SYMPOSIUM 2

2ND YEAR PRESENTATIONS, Assessment, river project, UNIT 2, Videos

I originally made this video for the Symposium 2 for when we were supposed to present the videos to the rest of our classmates, but as I was just finishing working on it (and despite saving the file every five minutes or so) the Mac I was working on crashed and I lost about 4 hours worth of work. This all happened at 4am, 6 hours before we were due to present to the class, and so I ended up giving a verbal presentation with some of the images I used in the video to demonstrate what I was talking about. This was a very stressful and anxiety inducing situation, but I am very pleased that I did it, and that Jonathan and Ed were understanding and allowed me to present the way I did.

This video is a little bit longer than it was supposed to be, and even that was a struggle, as I found I had so much I wanted to show and say. I am fairly pleased with the outcome though, and I feel that it captures my process and research quite well.

Presentation- ISMs in the Art Gallery 07/03/19

2ND YEAR PRESENTATIONS, Assessment, river project, UNIT 2

20190307_123453ISMs In The Art Gallery

I have linked my presentation, above, and the photo shows all of my casts so far laid out on the table during my presentation.

During my presentation I wanted to focus on how my river project is about engaging the audience and being more interactive than your average piece of art, and how this links to my research paper topic of classism in the gallery space. I feel that work that is purely visual leaves out a lot of people, specifically those with visual impairments, and can also put off children and those who prefer tactile work, so I wanted to combat this by making work that is meant to be touched and handled by the audience. Engaging the audience in this way can be effective at breaking down the barriers many people, particularly those of different classes, age and abilities, face when visiting art galleries and museums, and I feel this is vital if we want the art world to be a more inclusive and diverse space. I was keen for my classmates to pick up and interact with my work and get their opinions on it, which is why I laid out all the pieces I have made so far out on the table for my presentation.


3D Printing iPad Scan

river project, UNIT 2, Videos, Work in Progress

The scans using the iPad didn’t pick up much detail, but captured the shape of the bone quite well- I then used Meshmixer to try and get rid of the pen I used to prop up the bone, which was harder than I expected- cutting it off was the easy part, but I struggled to figure out how to seal up the hole left in the mesh. I haven’t shown this part in the video, as I forgot to record it, but you can see on the 3D print where I dragged the mesh across in an attempt to seal up the hole, so I definitely need more practice with this! Overall though I am very happy with how the print came out, for a first attempt I think I did a good job, and going forwards I know I need to practice messing around on MeshMixer to make my other 3D scans and prints look better!

I am planning on scanning the rest with the iPad as well, to see what they come out like, and to act as a back up in case I can’t get them to work with photogrammetry in time.

3D Scanning using iPad 14/01/19

river project, UNIT 2, Videos, Weekly Summaries, Work in Progress

This video is of the Digital Media Technician Adamina demonstrating how to use the 3D scanning software and piece of kit for an iPad. This is one of the more basic 3D scanning techniques available, and as you can see the scan hasn’t picked up the details of the bone, only the rough shapes.

The next step for me is to install a free programme called MeshMixer and cut off the pen, as it came up in the scan, and seal up the piece. Then it will be ready to be 3D printed on Monday next week.

This slideshow requires JavaScript.

These photos show the set up in the studio, including white backdrop, plinth, and lighting set up. We suspended the bone from nylon wire so that we could scan the whole object, and used a pen and blueback underneath it for stability- we needed it to be still for the scanning to work.

Next Steps:

  • download MeshMixer and clean up the scan for printing
  • meet with Adamina next Monday (I have booked an appointment with her) and send the scan to print
  • hopefully next week we will also experiment with photogrammetry, which she mentions in the video. This process is a bit more lengthy and complicated- I will have to borrow a camera and lens from uni, and photograph the object multiple times from multiple angles, and then upload these photos to a specialist programme that stitches everything together to create a 3D model. This will take a fair bit of time, and I might still need to work into the objects on the software to clean them up before we can send them to the 3D printer

Silicone casting 15/01/19

river project, UNIT 2, Videos, Work in Progress

This slideshow requires JavaScript.

I decided to make silicone casts of the bones, to explore a different material and its potential for my project- and luckily someone else in the foundry also wanted to work with silicone too, so Lindsay mixed up the last bit of silicone she had for us both to use. Unfortunately there wasn’t enough to cast the brick or jaw pieces, so I may revisit this material once she has more in stock. The photos above show the process- weighing and mixing the two parts of the silicone, then pouring it into my moulds, the same as when I used the wax and plaster, as well as photos of the silicone bones de-moulded.

The above video shows clips of all the bones, and demonstrates the qualities of the silicone- as you can see it is a very tactile material that I have had a lot of fun playing with! There is something very surreal about squashing a pink bone in your hands, and being able to fold it then watch it spring back when you let go, and I am very happy with the results of this experiment.

When I get the chance to present these to the class the main feedback I want is whether or not to cut off the excess silicone- the bronze and aluminium casts don’t have the “feet”, but the plaster and glass wax pieces do, so this is something I need to consider when deciding what to present and how in the final exhibition.

Weekly To Do List 14/01/19

river project, UNIT 2, Weekly To Do Lists

Monday:

  • Morning – help prep sandpit and mould for the pour in the afternoon
  • 12pm- meet Adamina and experiment with 3D scanning and printing

Tuesday:

  • Morning- Glass wax cast the jaw pieces and redo the brick
  • Afternoon- start making silicone casts of bones

Wednesday:

  • I have work in the evening so I will probably rest during the day

Thursday:

  • 10am – 12pm Group tutorial
  • Continue casting in glass wax/silicone/polymer plaster (brick)
  • Work on aluminium bone casts?

Friday:

  • Photograph pieces so far
  • Continue working on presentation for 7th March

Glass Wax Tests 11/01/19

Photographs, river project, UNIT 2, Videos, Weekly Summaries, Work in Progress

This slideshow requires JavaScript.


Some photos taken of the process of casting with glass wax- the melting glass wax, the casts full of glass wax, and photos of the failed jaw bone casts and brick cast. Casting the brick hollow with glass wax is proving troublesome- the wax is very brittle and the sides of the cast keep breaking as I try to de-mould it. I will try one more time to cast it hollow but a bit thicker and if that doesn’t work I might have to cast it solid instead. The jaw bone pieces kept failing as the glass wax is too thick and not hot enough to flow all the way through the moulds- I will try to get it hotter next time, but I have to be careful in case the wax gets too hot and the colour changes.

Video demonstrating the properties of glass wax and the casting process.
I wanted to explore the properties and materiality of glass wax, and these are the results so far.
Clip 1: the chunk of unmelted glass wax, demonstrating what it looks like before it is melted and cast- you can see how the light refracts and passes through it.
Clip 2 and 3: the glass wax as it melts, showing the viscosity and how it stretches and flows much like real glass when in molten form. It is very different to other waxes I have used in the past.
Clips 4 and 5: the first attempts at casting the jaw bones in glass wax- as you can see the wax didn’t flow completely through the moulds as it was not hot enough and cooled too fast. I will try again but with the wax much hotter so hopefully it will flow through the moulds properly.
The rest of the clips: the other bone casts in glass wax.

This slideshow requires JavaScript.

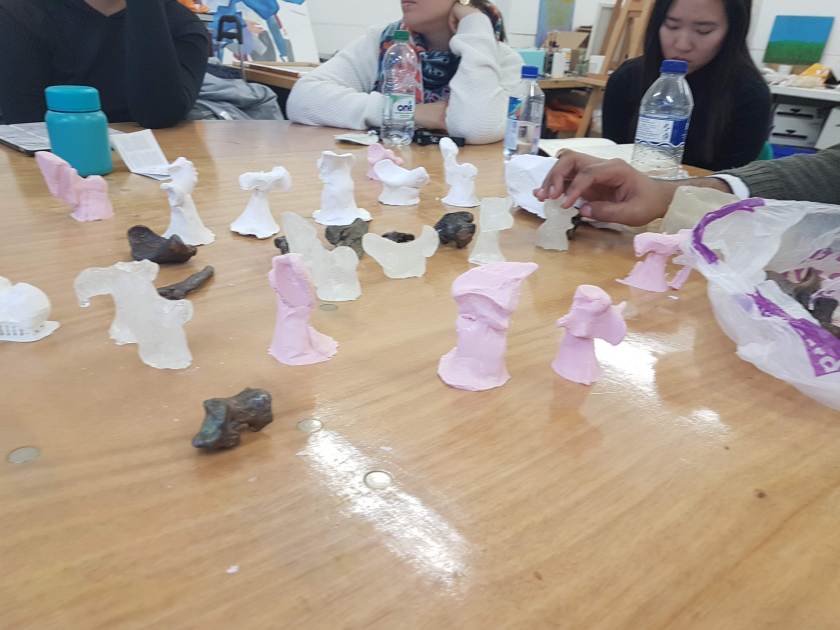
These photos show the second attempt at casting the jaw bones in glass wax (still not hot enough), the glass wax casts all together, the broken hollow brick cast (the details were captured beautifully, it’s just a shame that the sides broke), and one of the glass wax casts lit by Jonathan’s phone torch- as an experiment to see how light travels through them. I think going forwards I would like to photograph the glass wax pieces with a light source beneath them like this, but using a more professional set up.

Notes on glass wax:

  • Properties- melts differently to waxes I have used in the past (i.e. the green and orange waxes used in uni, soy wax, paraffin wax, beeswax)
  • As it melts it goes quite stringy and is still very thick and viscous, can be stretched into glass-like threads that look like nylon thread
  • It sets VERY quickly and needs to be quite hot to pour well, but you have to be super careful not to overheat it as it can make the wax change colour
  • You can add oil paint as a pigment to glass wax, but I’m more interested in how it looks originally- like a translucent glass
  • I might do one or two in colour just to see what it looks like, but we’ll see
  • It is quite brittle- I tried to make a hollow brick cast and the sides shattered (like glass) as I tried to remove the cast- if I retry this I will need to make it thicker
  • It picks up detail really beautifully and I’m definitely impressed
  • I need to redo the jaw bones in glass wax as the wax wasn’t hot enough and as a result didn’t flow through the moulds properly


Plaster Room 26/11/18

Photographs, river project, Videos, Work in Progress

This slideshow requires JavaScript.

Notes

  • Made up a batch of herculite for my hot rubber moulds- to demonstrate the process I am going to leave them exactly as they came out of the moulds
  • I made sure to wiggle the moulds as I poured to make sure the plaster got into every crevice
  • The bones came out beautifully but the brick broke as I tried to de-mould it, clearly the sides weren’t thick enough
  • I could make the brick solid instead of hollow but herculite is super heavy, and if I am trying to show the process it should be hollow to match how I made the wax cast
  • I will make a thicker hollow cast of the brick later on this week
  • I wanted to get into the metal workshop today but I felt really sick and foggy so Lindsey and I decided it was best for me not to use the power tools today. I didn’t want to waste a day, so that’s why I made the herculite casts, as a way to still be productive

This slideshow requires JavaScript.

I also ended up going on a walk to the flower shop in Camberwell with Ellen, a BA Sculpture 2nd year student, and we are going to be doing some bronze casting together. We are both interested in nature, and capturing fleeting moments (and both want to make Christmas gifts for loved ones) so we bought flowers from the shop, and also collected foliage on the way back. We then dipped those in wax, and the next stage is to use a hair dryer to set the wax, and then we can build the moulds- the plants will burn out directly in the kiln so there is no need to make hot rubber moulds and waxes. The wax will help to stabilise the plants and make them a bit thicker, so that they will be more likely to come out in the pour. I know it isn’t directly related to one of my projects but this is something I’ve wanted to do for a while and I feel like I might as well give it a go whilst I have the opportunity.

Practical Work To Do List

river project, Weekly Summaries, Work in Progress
  • Buy saucepan for glass wax
  • Use existing moulds to make glass wax casts
  • Use existing moulds to make jesmonite casts (plaster casts didn’t work)
  • Finish bronzes and aluminium casts
  • Go back to riverbank and find plastic bottle (and other things?)
  • Cast bottle in foundry (?)
  • Use existing moulds to use eco resin? – Speak to Jonathan in 3D
  • Find 3D scanning/printing place and look into costs

I would like to get as much of this done by January as pos, so I can start casting my objects in Ceramics in the 2nd term

Using an Engraving Tool on the Bronze Brick

river project, Videos, Work in Progress

Process Video: Using an Engraving Tool from Kat Outten on Vimeo.

This short clip shows how I have been using an electric engraving tool to work details back into the surface of the brick wherever it was lost due to the casting process. The shiny parts are where I have used an angle grinder or Dremel tool previously to get rid of runners, risers, and other imperfections on the surface of the bronze. I have to take frequent breaks when using these tools, and swap hands often, as the vibration from the tool makes my wrists ache, but otherwise it is fairly simple to use. As always I follow safety protocol, wearing a visor, ear protection, dust mask, and gloves to protect myself, as well as having the extractor fan on and handling all tools safely and responsibly.