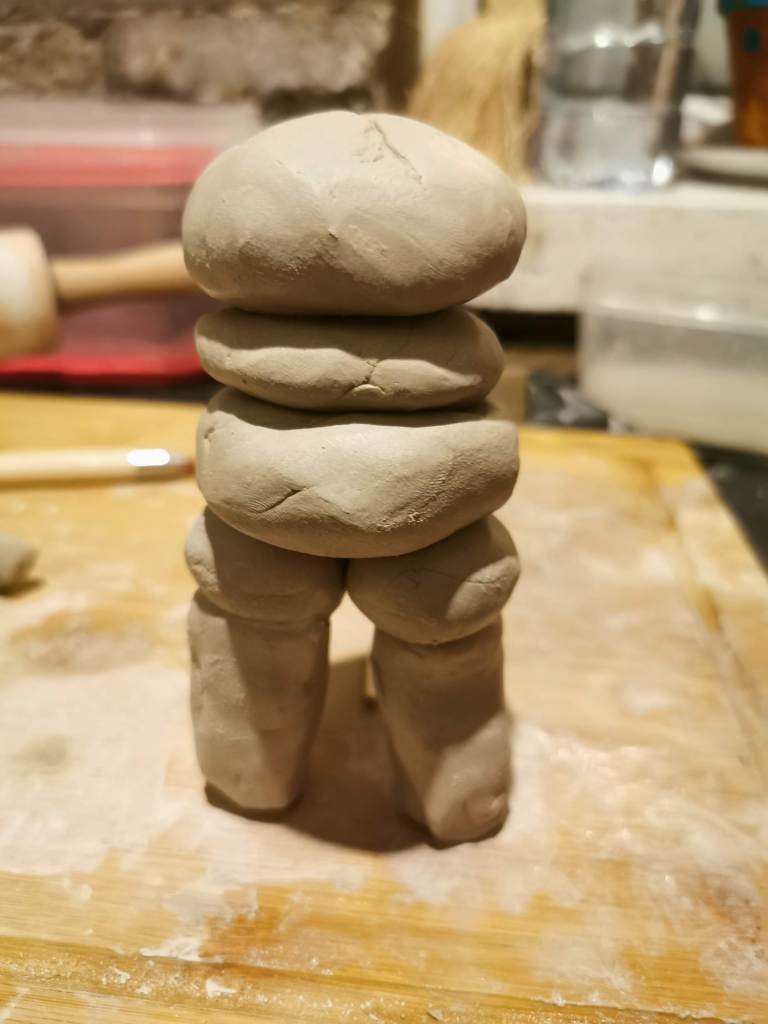
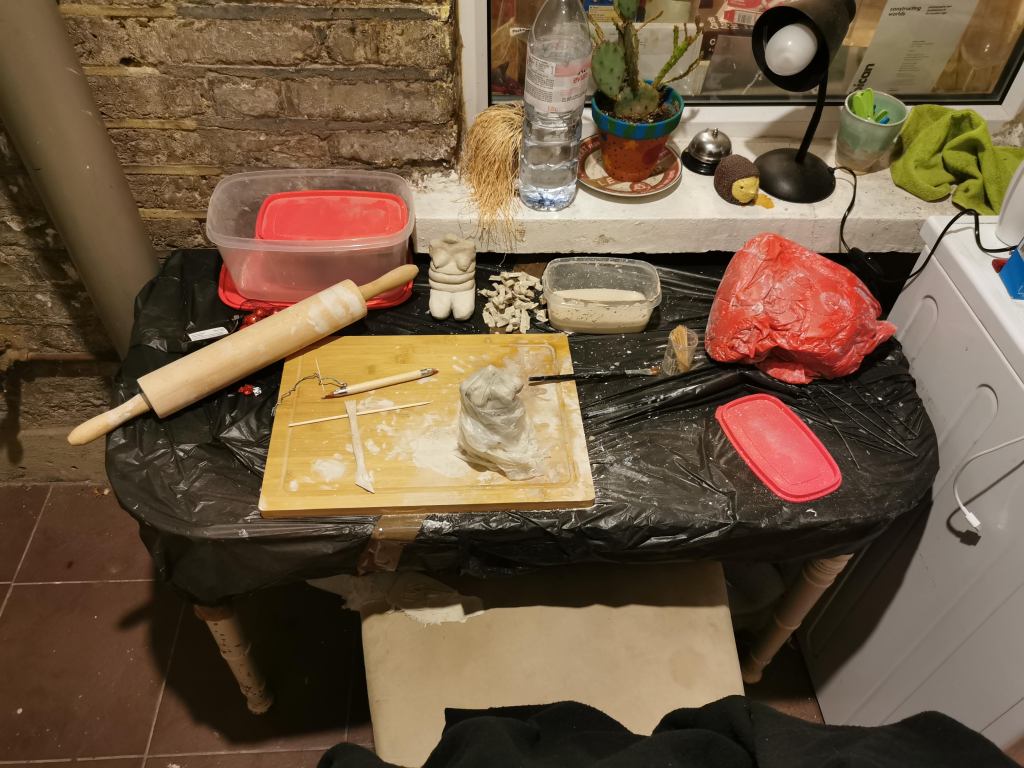
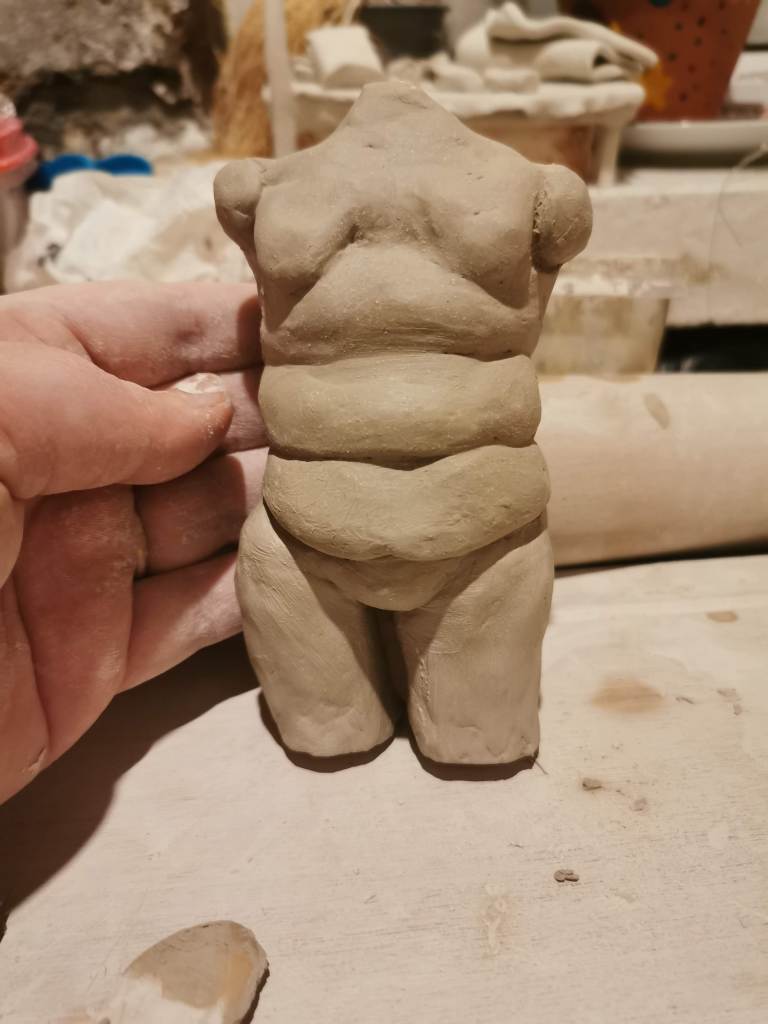
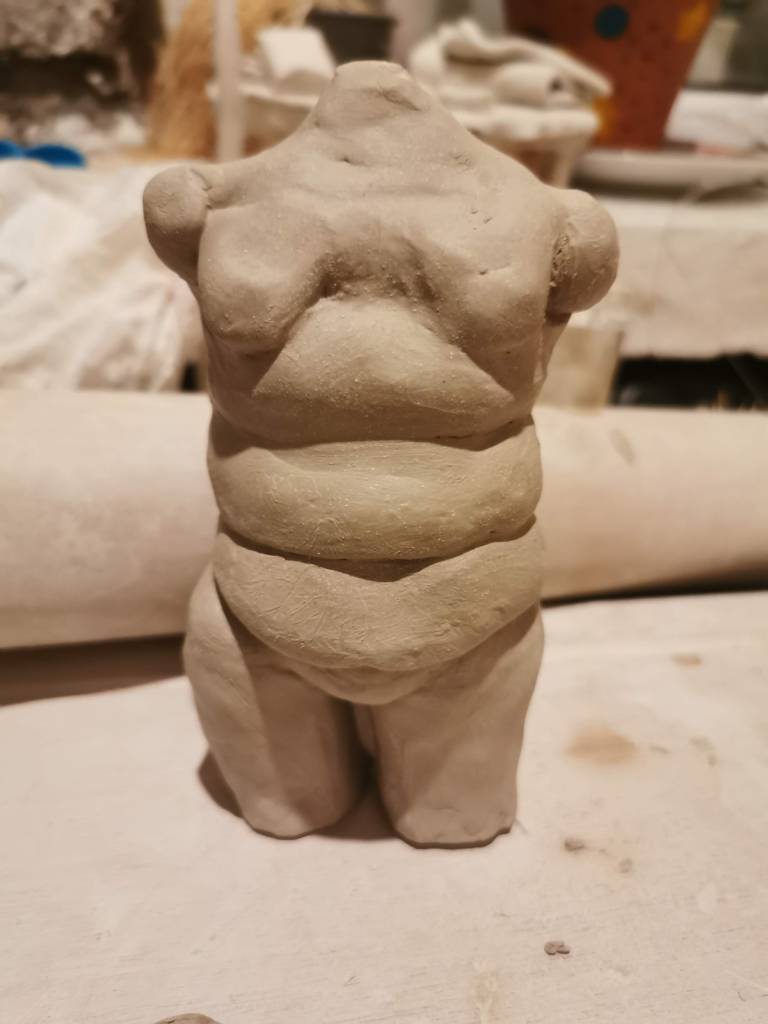
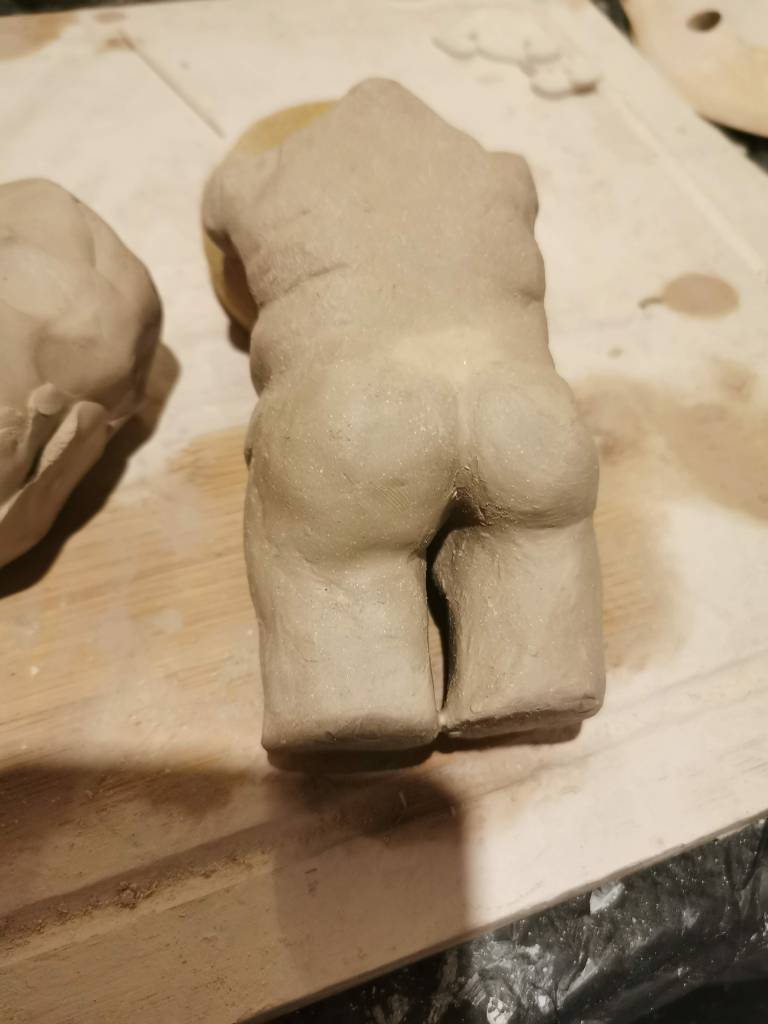
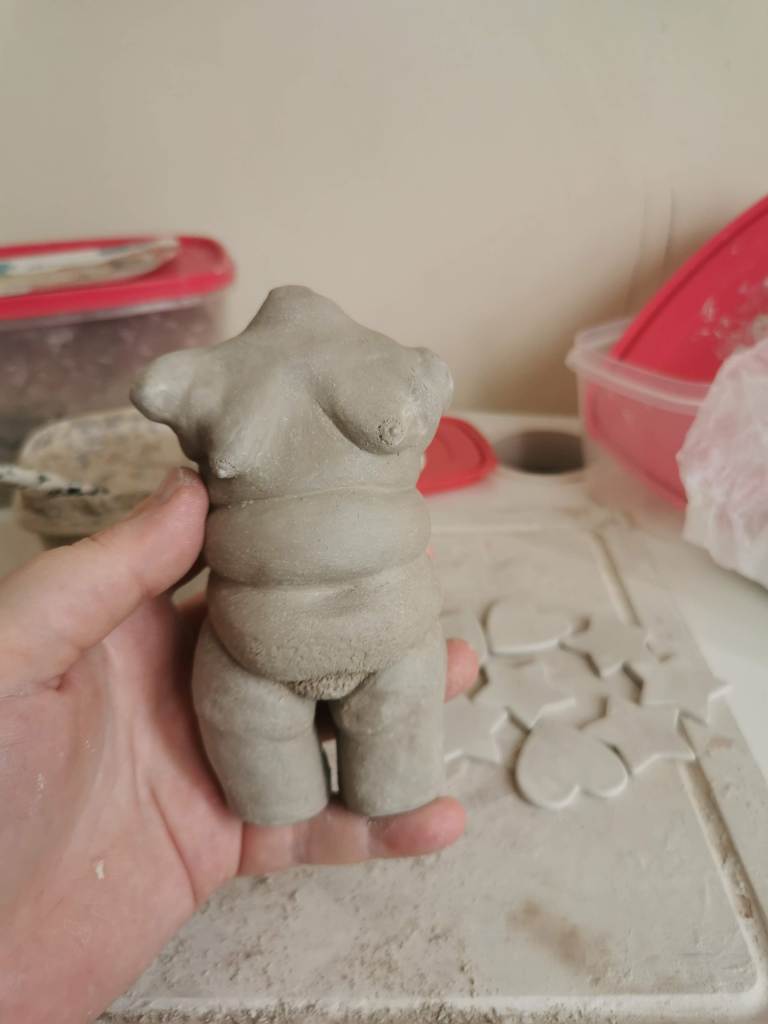
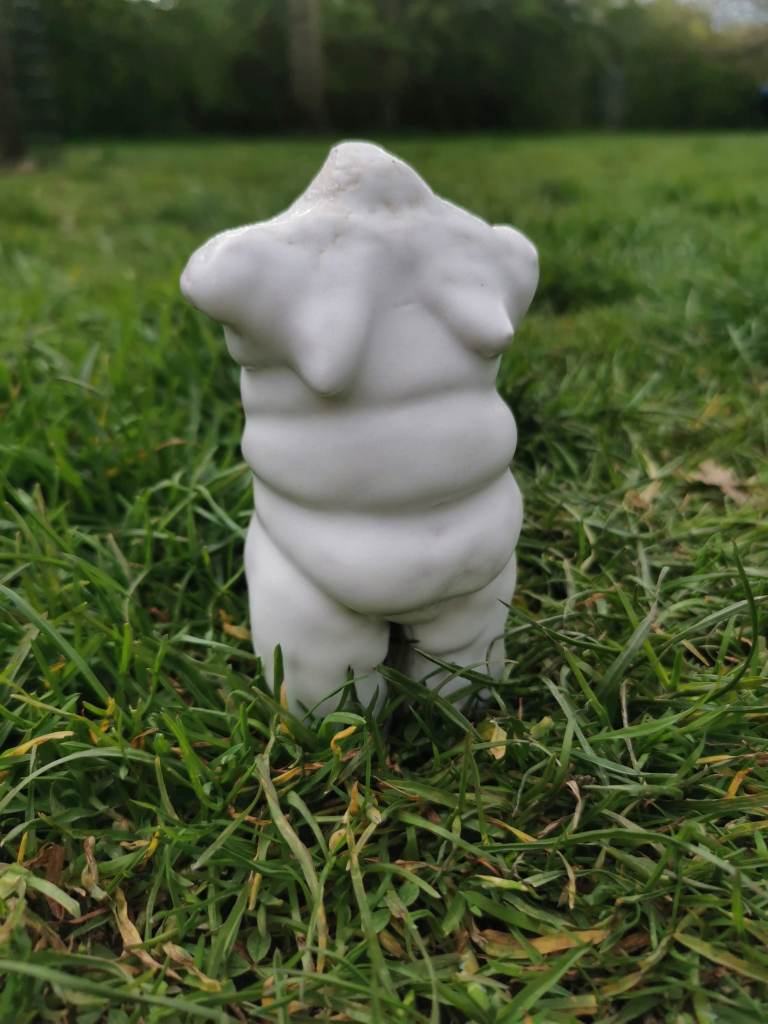
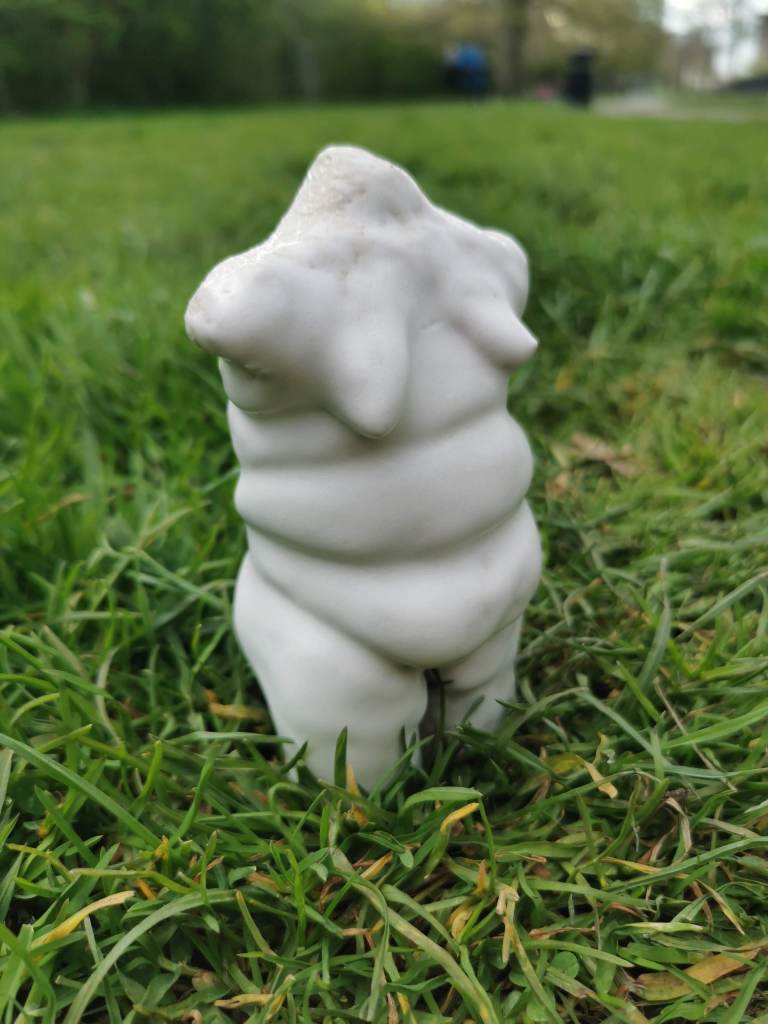
The sculpture right at the start, built up out of shapesmy desk set up at homeA photo of the self portrait 2 sculpture in the early stages- you can see how the body has been built up of shapes stuck togetheranother early stage photo- you can see how parts have started to be smoothed outthe back of the sculpture in the early stages- you can see that the back and bum area are still quite flat and need more workthe finished greenware sculpture- you can see details like pubic hair, nipples and stretchmarks have been sculpted inthe sculpture after bisque firing- it is now completely white and ready to be glazeda photo of the bisque sculpture being sprayed with glaze in a booth set upthe glazed sculpture before firingthe finished sculpture after the glaze firing, photographed in the grass at a local parkanother photo of the sculpture in the grass, from a different angle
This was my second self portrait sculpture made over a few months in 2021- this one of my torso and upper thighs standing up, but still missing the arms and legs. I definitely became more confident with sculpting during this process, as you can tell by the detailed pubic hair, stretch marks, and nipples visible in the photos before glazing. The shapes are definitely more refined and less rough than the first self portrait sculpture I made, and I was really happy with the overall shape and sculpt. Unfortunately because I went for a thicker, opaque glaze that is made for dipping a lot of this detail was lost in the glaze firing, as the glaze obscured and covered up a lot of those details. I hoped that spraying the glaze (rather than dipping) would prevent this, but as you can see that didn’t work. The glaze also came out patchy on the shoulder area and inner thigh area, although you can’t really tell from the photos here.
I think if I wanted to attempt something so detailed in the future some solutions could be using a thinner, transparent brush on glaze, or just sculpting it on a much larger scale, which is something I would like to try once I get a bit more confident. Despite all the hiccups I can see how much I’ve improved already since my first self portrait, and I’m excited to keep practicing and trying new things!
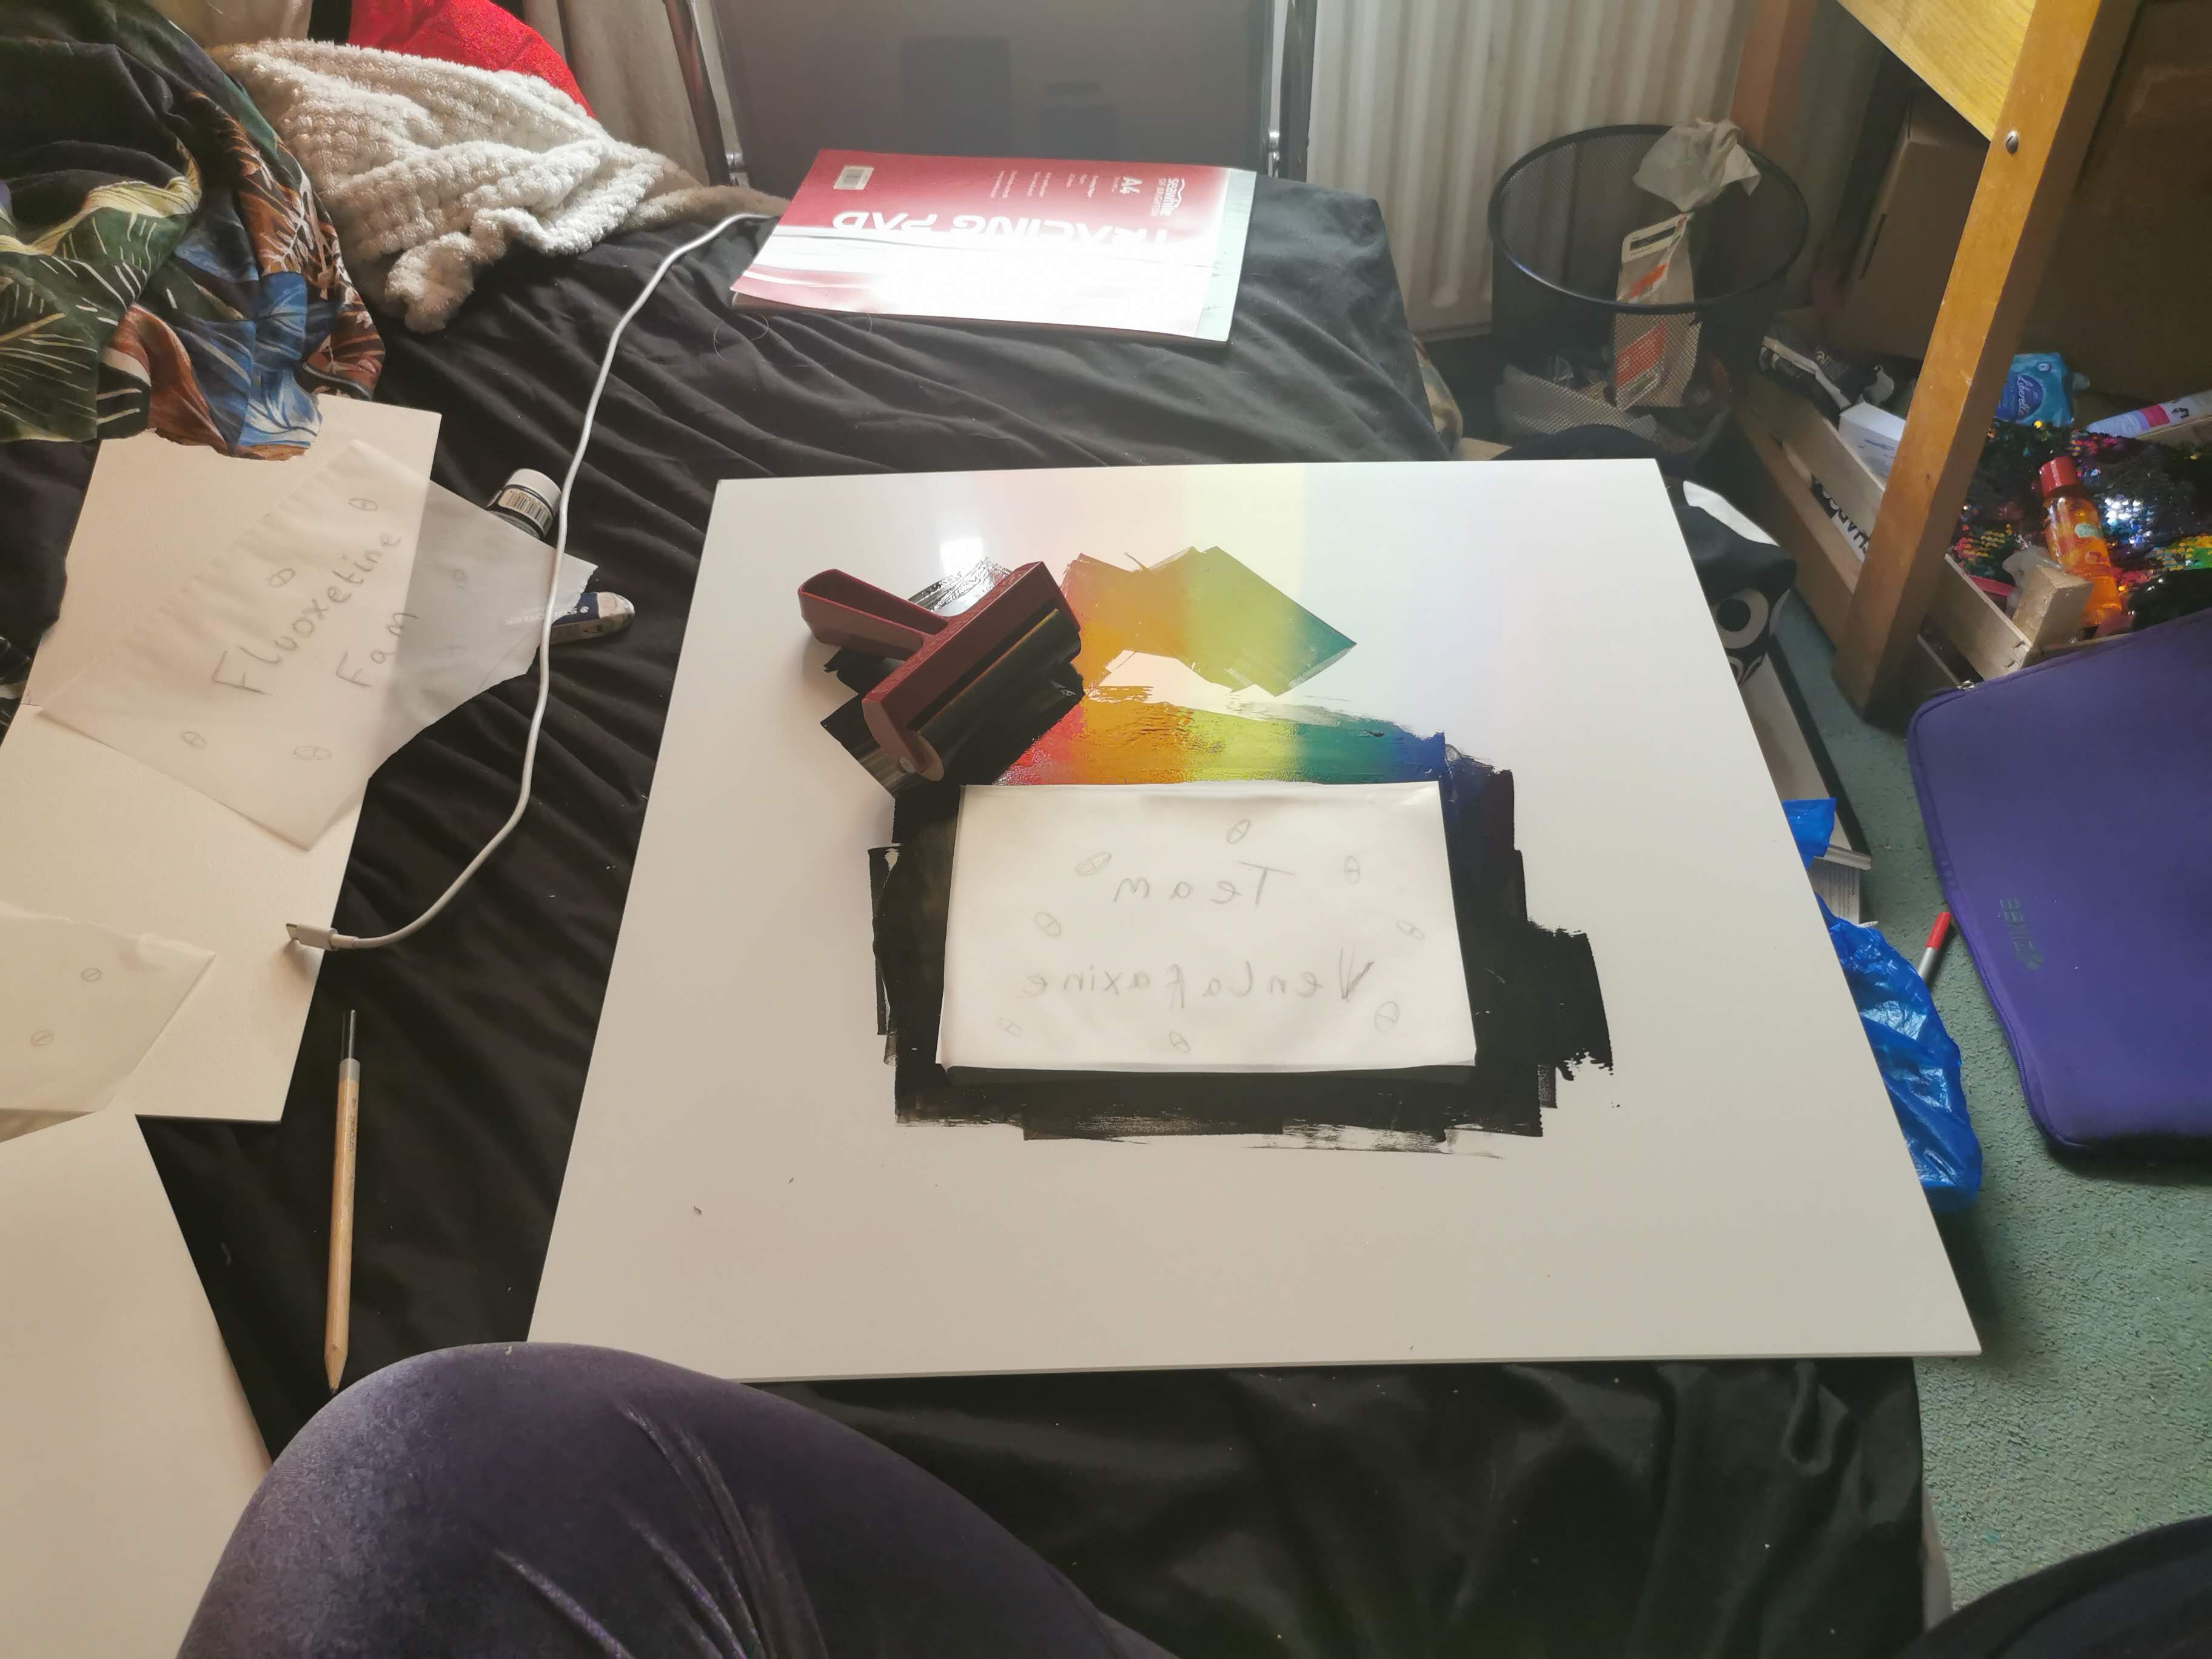
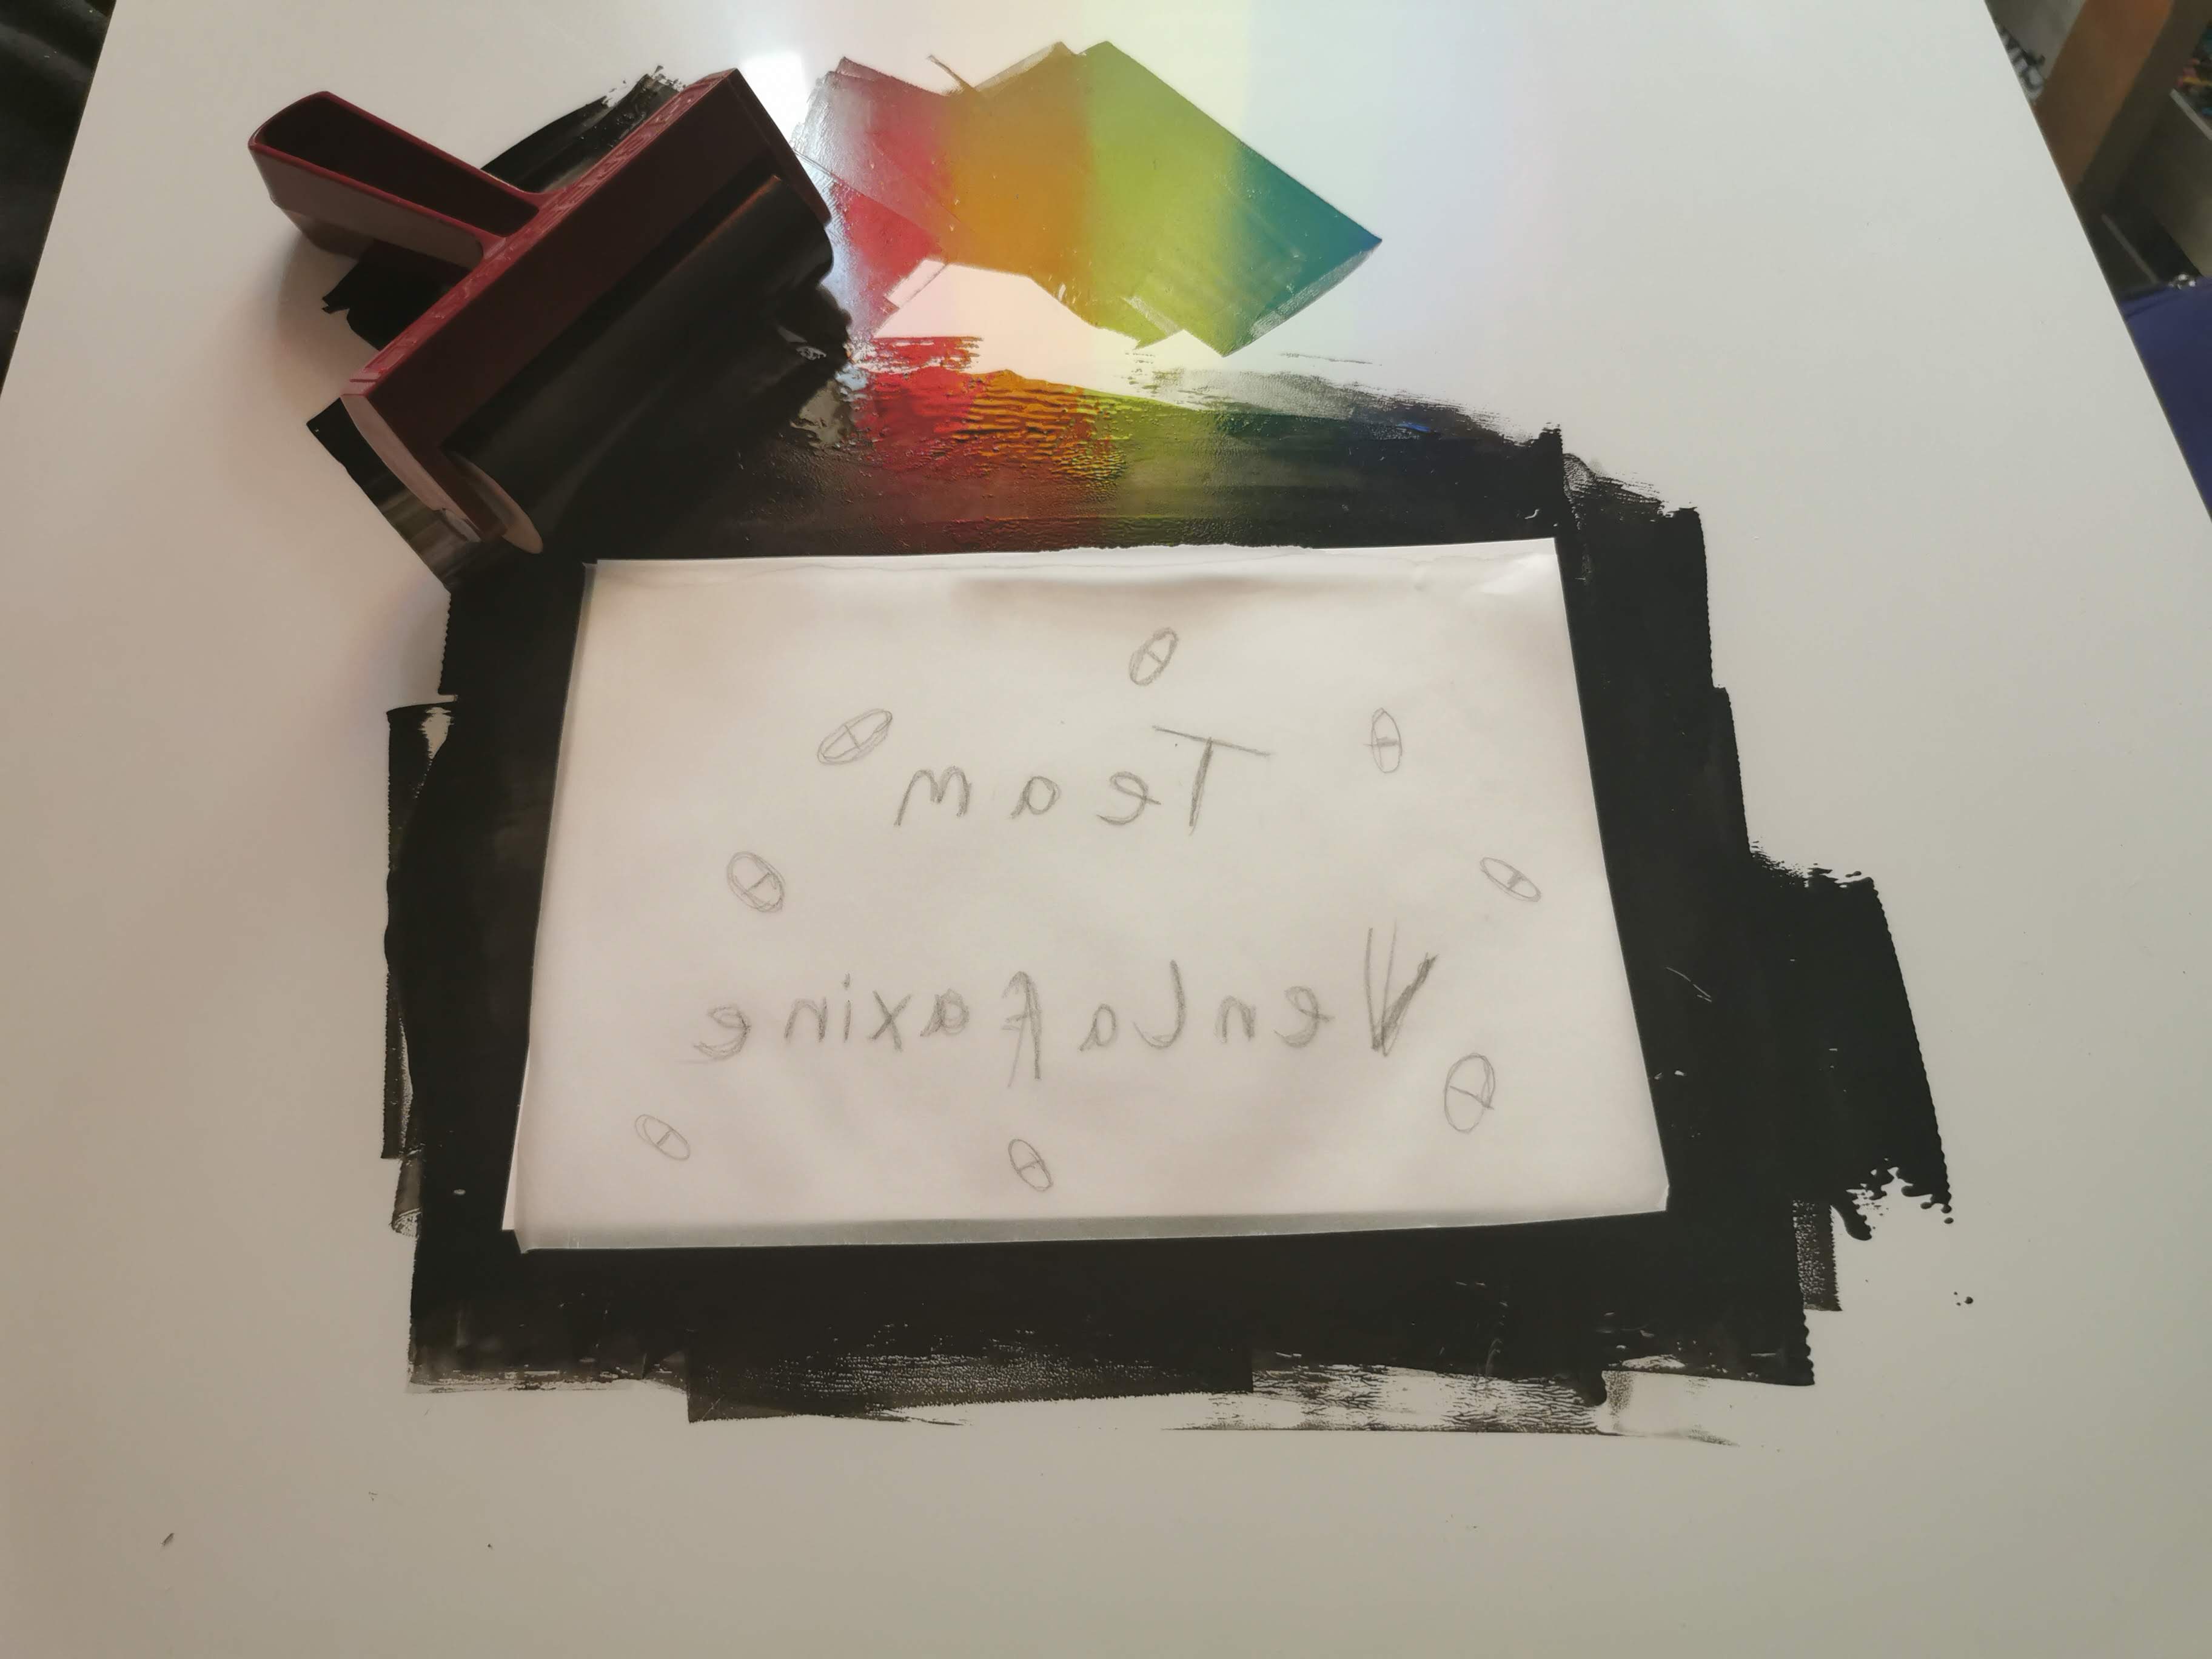
I’ve made myself a little DIY monoprint set up for my room consisting of a sheet of perspex and a roller and ink from a home linocut kit. The above photos show the set up and the process for the series I made about 2 months ago (I was going to wait until I had scans to upload but I decided to just upload the photos from my phone as I want to document what I’m doing regardless). I knew I wanted to write, but with monoprinting your prints come out reversed and I am rubbish at writing backwards, so I wrote out each thing on tracing paper first which I then flipped and placed on top of the sheet of paper I was printing onto, so that I could trace the backwards writing- meaning the prints were the right way.
This slideshow requires JavaScript.
The series consists of 13 prints- 3 are the names of the 3 antidepressants I have taken (one of which I am currently taking), and then 10 of the side effects I have experienced from these medications.
I made this as I have just recently switched antidepressants and am now on the third kind I have tried since I first started taking them aged 17, and I wanted to bring attention to some of the side effects that particularly effect me. Some of these side effects I didn’t even realise I was experiencing because of my medication- for instance the increased sensitivity to sunlight one- I used to tan really well and it took a lot of exposure to the sun for me to burn, but over the years this has changed and I now burn very easily and become easily fatigued if I spend too long in the sun. I also get dehydrated faster when it’s hot and it was only last summer that I read somewhere that it is a common side effect of long term antidepressant use. I think it’s really important to discuss relying on medication to be able to function; there is a lot of stigma still particularly towards those who take medication for mental health issues, a lot of misinformation, and a lot of jargon.
I was stuck on what to do next with this series of prints, so I put them aside for over a month to figure out where I wanted to go with it, and then saw a few days ago that Babeworld3000 are doing bi monthly zoom call crits and a reading group, so I figured joining the crit would be a good way to get feedback on this work. They gave me some really good stuff to work with and I enjoyed being able to feedback to others- it was something I really missed from uni!
I’m going to add the notes that the peeps who run Babeworld3000 made during the call once they email them out, but here are the things I jotted down just after my turn:
Make it into a zine- educational (one of the people who runs Babeworld3000 also took part in the exhibition I was in with WANK Collective last year and really liked the zines I displayed- she suggested making these into a zine and others agreed)
liked that it’s in my own language, more accessible, feels more real, honest
Printing onto the side effects leaflets?
Side effects bingo- everyone who has also taken these kinds of meds really connected with it and we joked about creating a “side effects bingo” which could be something fun on it’s own or as part of a zine
liked the medium
side effects bunting
To Do:
add notes from Babeworld3000 once they are emailed out
consider how to turn the prints into a zine- do I want to monoprint the whole zine, is this feasible? Or do I want to scan them in and create the zine digitally?
decide what else could go in the zine/what I want on the front and back covers, what size, is it going to be stapled, hand stitched, or just folded?
Take better photos or scan the prints in for portfolio
EDIT: CRIT NOTES FROM BABEWORLD3000:
Kat
Monoprint series for feedback
How to show? Maybe zines
Your past zines could be shared with a zine made from these new prints in sort of a library.
All these perspectives on your own experience shows how multifaceted you are
The prints are extremely relatable with the whole group raising hands or saying “same”
The bingo sheet at the back of the zine is an extension of this – like Instagram bingos where we can share parts of ourselves in a humorous and relatable way
The zine format is accessible and flips the whole doctors pamphlet thing on its head
print on the list of side effects but using an accessible code of language – colloquial and loaded language.
Making a gif banner seems a bit hit and miss- the lowest down one is the best one I’ve managed to make so far, but I’m still not 100% happy with it so I’m going to keep experimenting until I get it right. Also it turns out RedBubble only accept PNG or JPEG for their site banners so I’ll have to do something else for it. I do want to get to grips with this process though and I would like a new gif banner for this blog, so I will keep tinkering!
https://www.livingpaintings.org/
– These are books made for blind and visually impaired people, with the illustrations raised so that they can be touched and felt
Things I could try/consider for future print based works
could try printing and applying different textures to my work- flocking, foiling, or using puff binder? This would mean my prints are more tactile
print on off white paper and be mindful of colours used
print in Braille?
choose fonts that are easier to read
making larger scale prints than I normally would, to aid legibility
This is just some research to lay the ground work for the project, but I think it’s a good start and there is already a lot to think about and potentially experiment with!
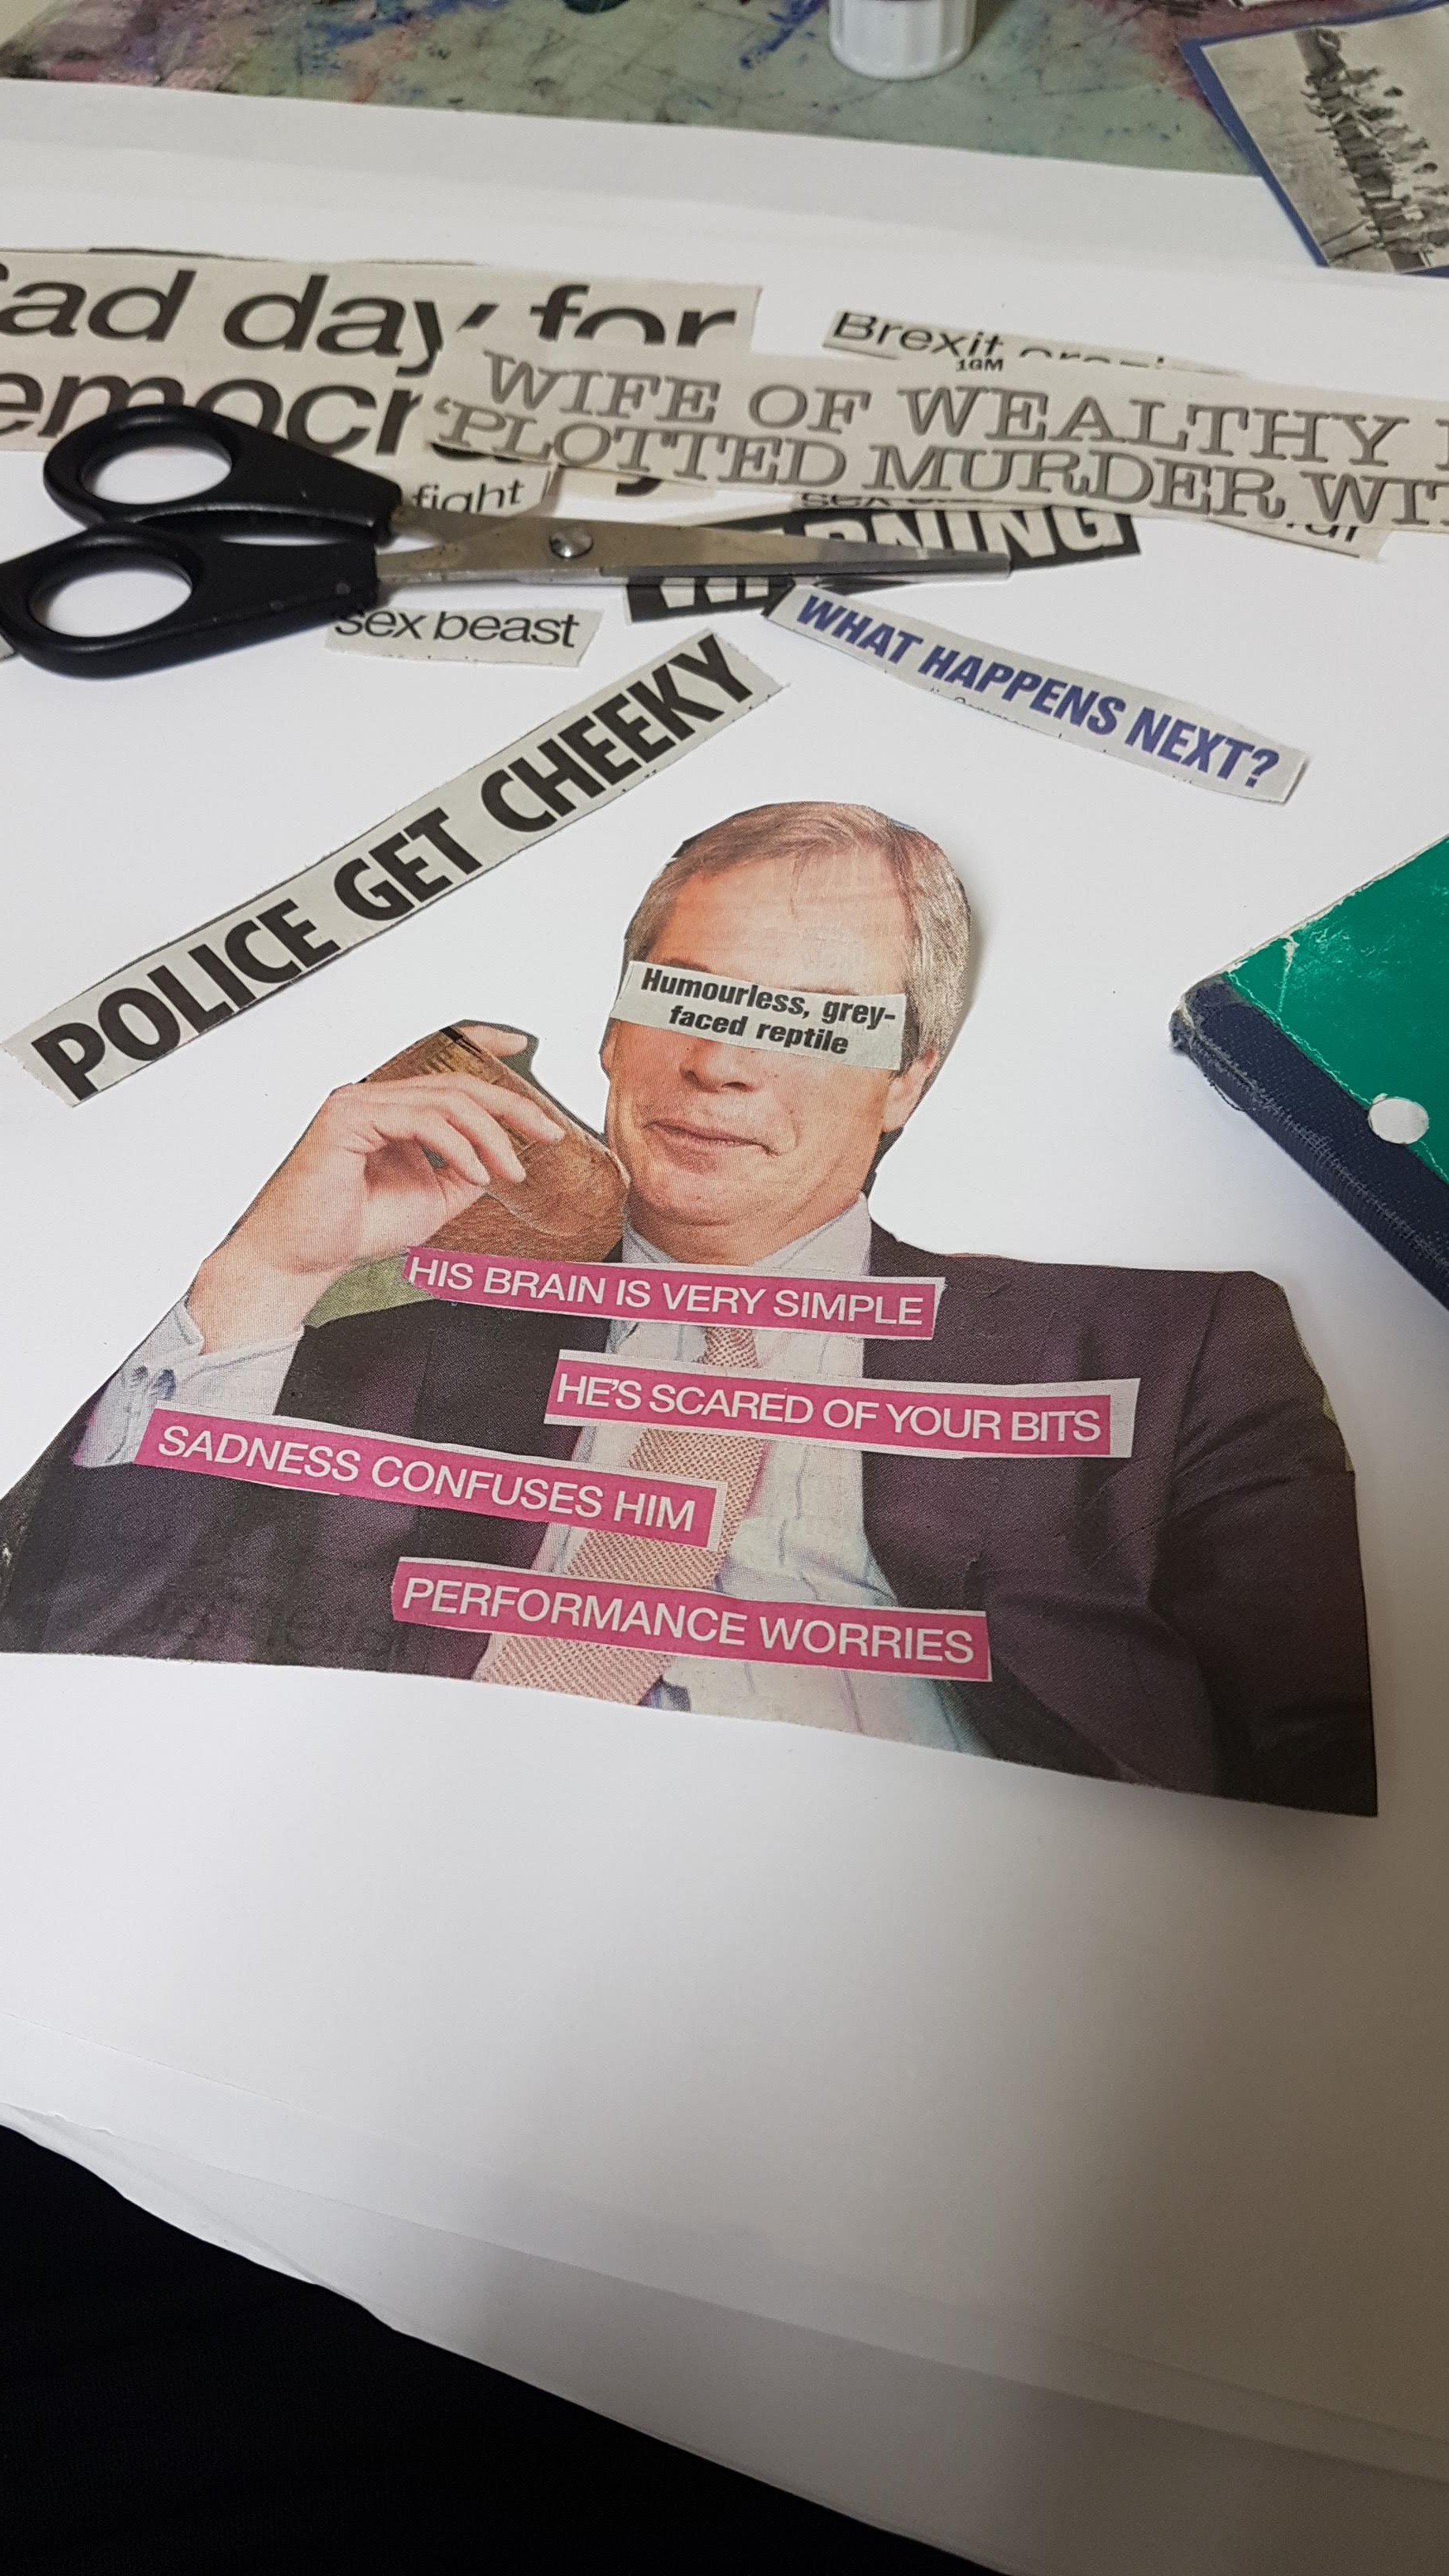
I’m running a drop in zine making workshop for young people as part of my artist residency at The Playground next week, so I bought some newspapers last week to make an example zine to show at the workshop. This is the result so far! These collages will be made into the zine (hopefully).
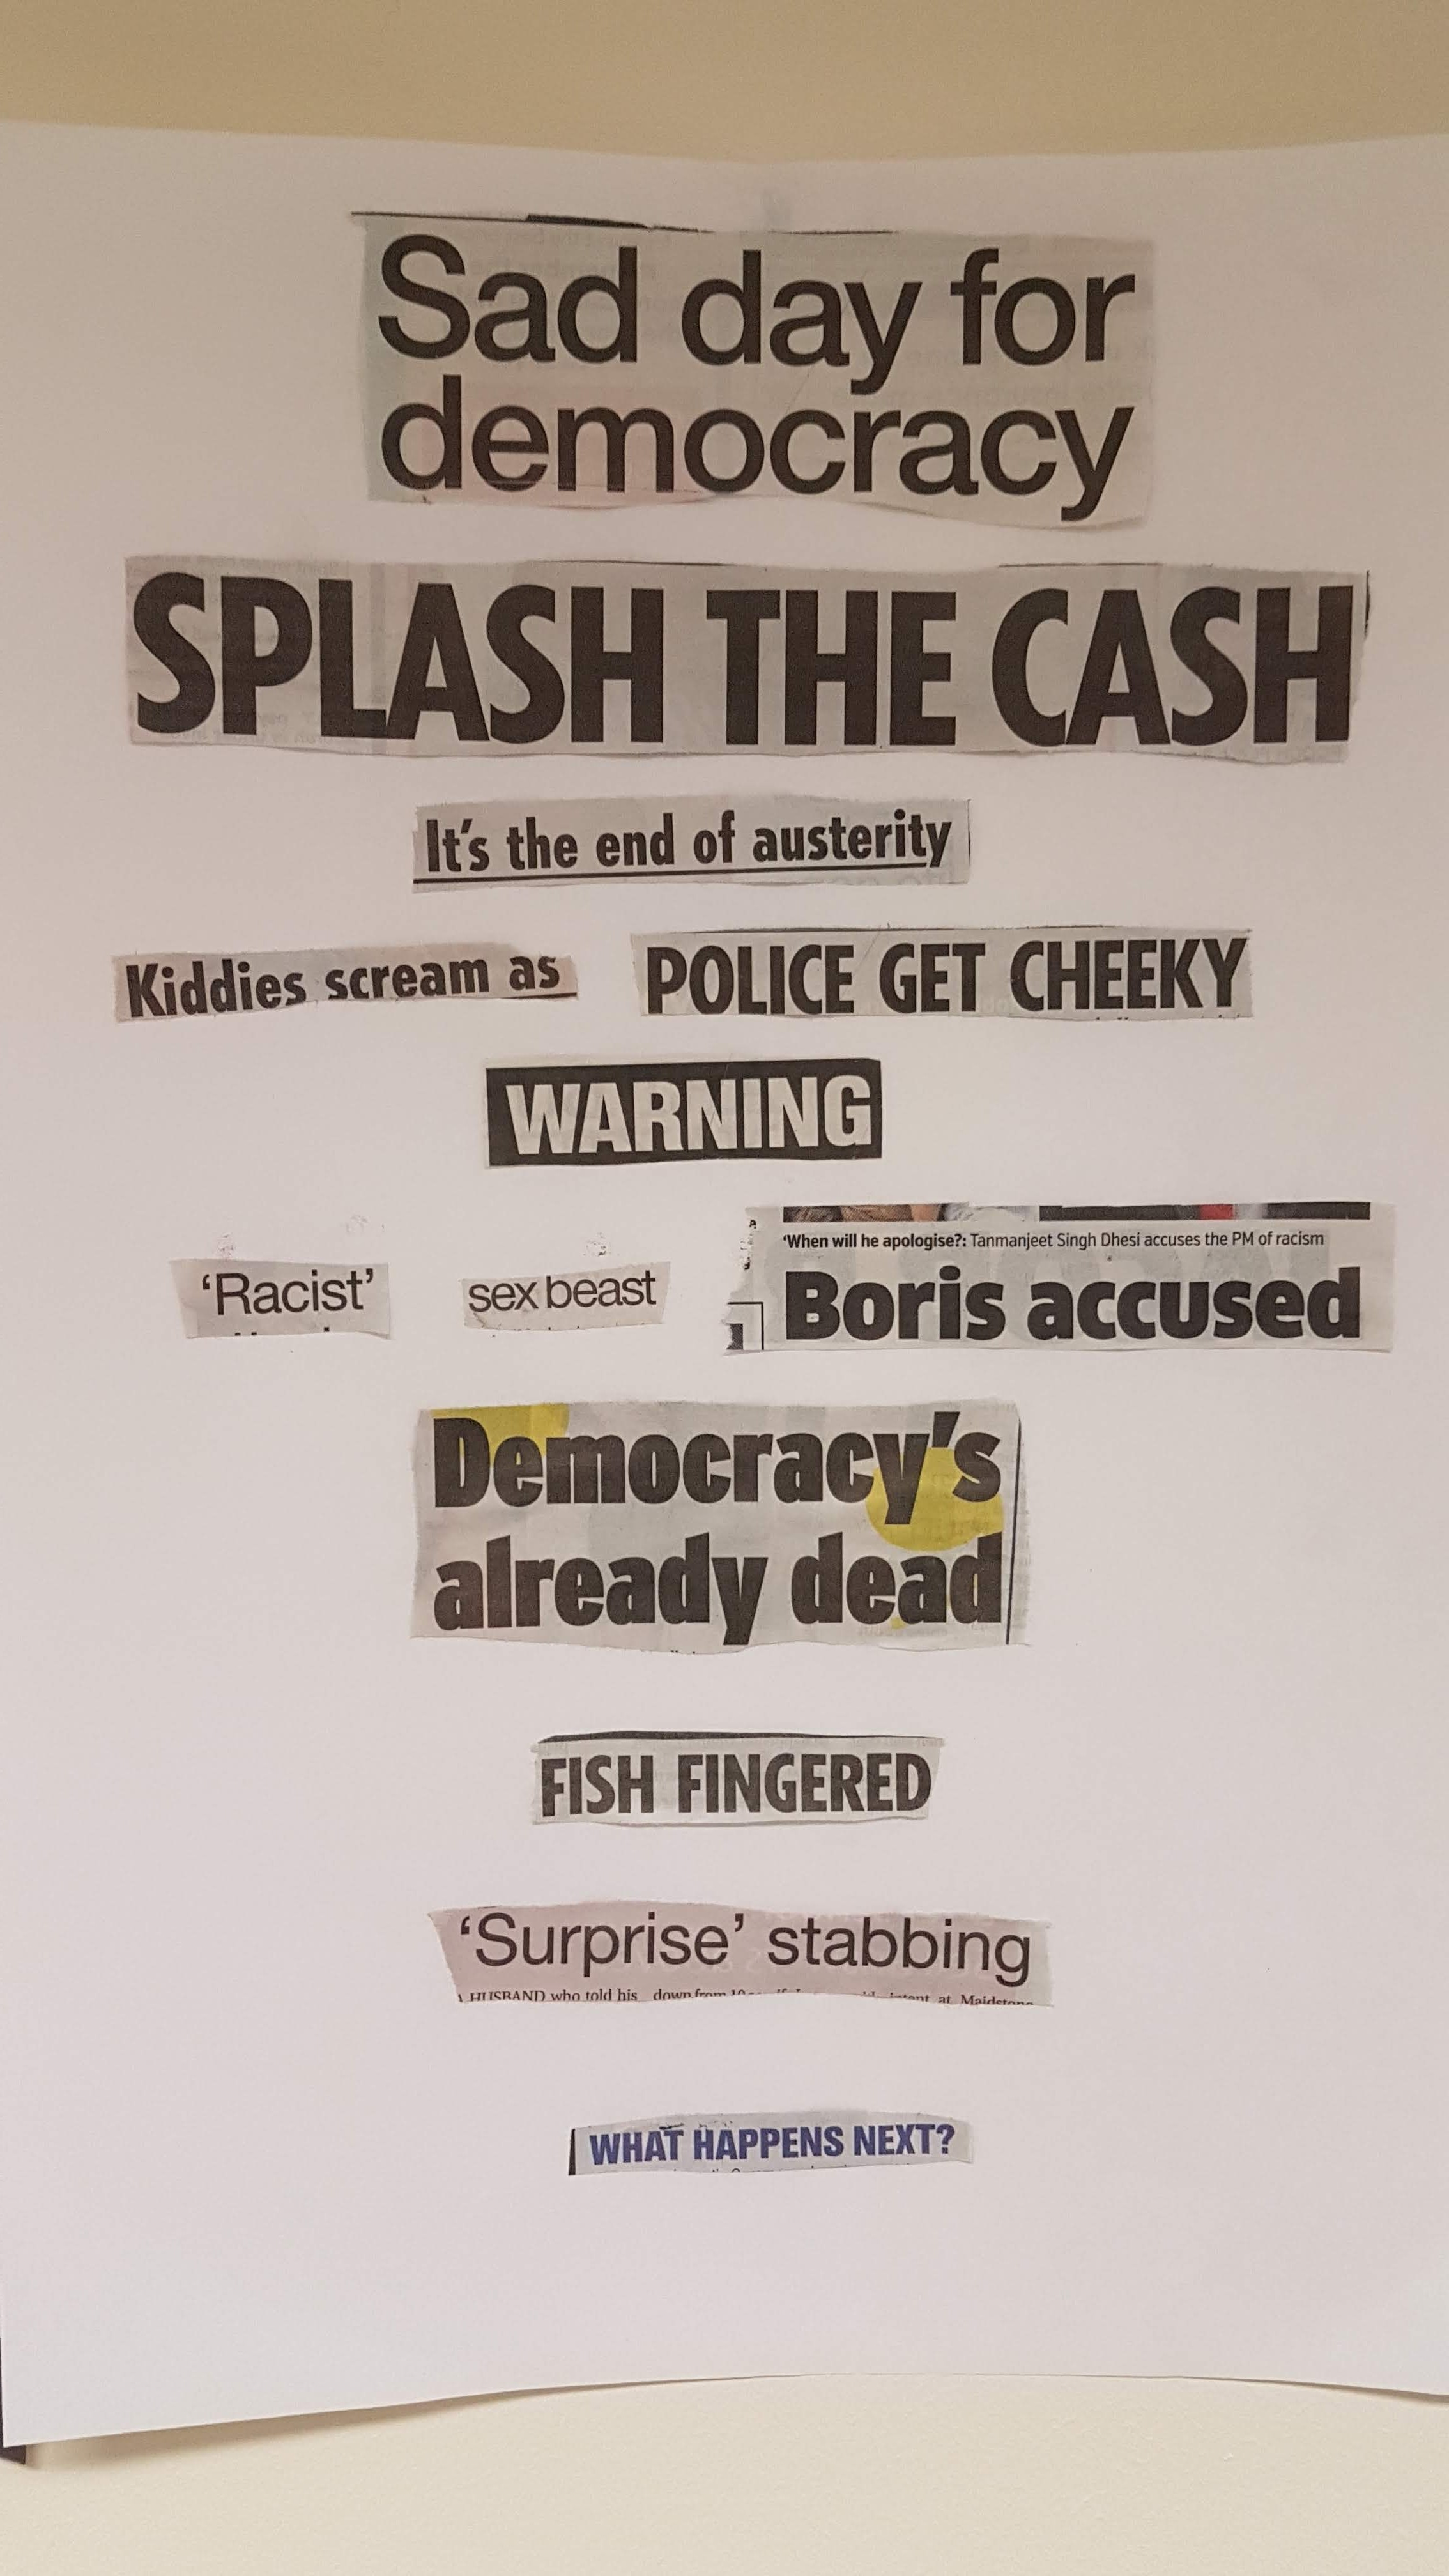
The above collage is a poem called “What Happens Next?”
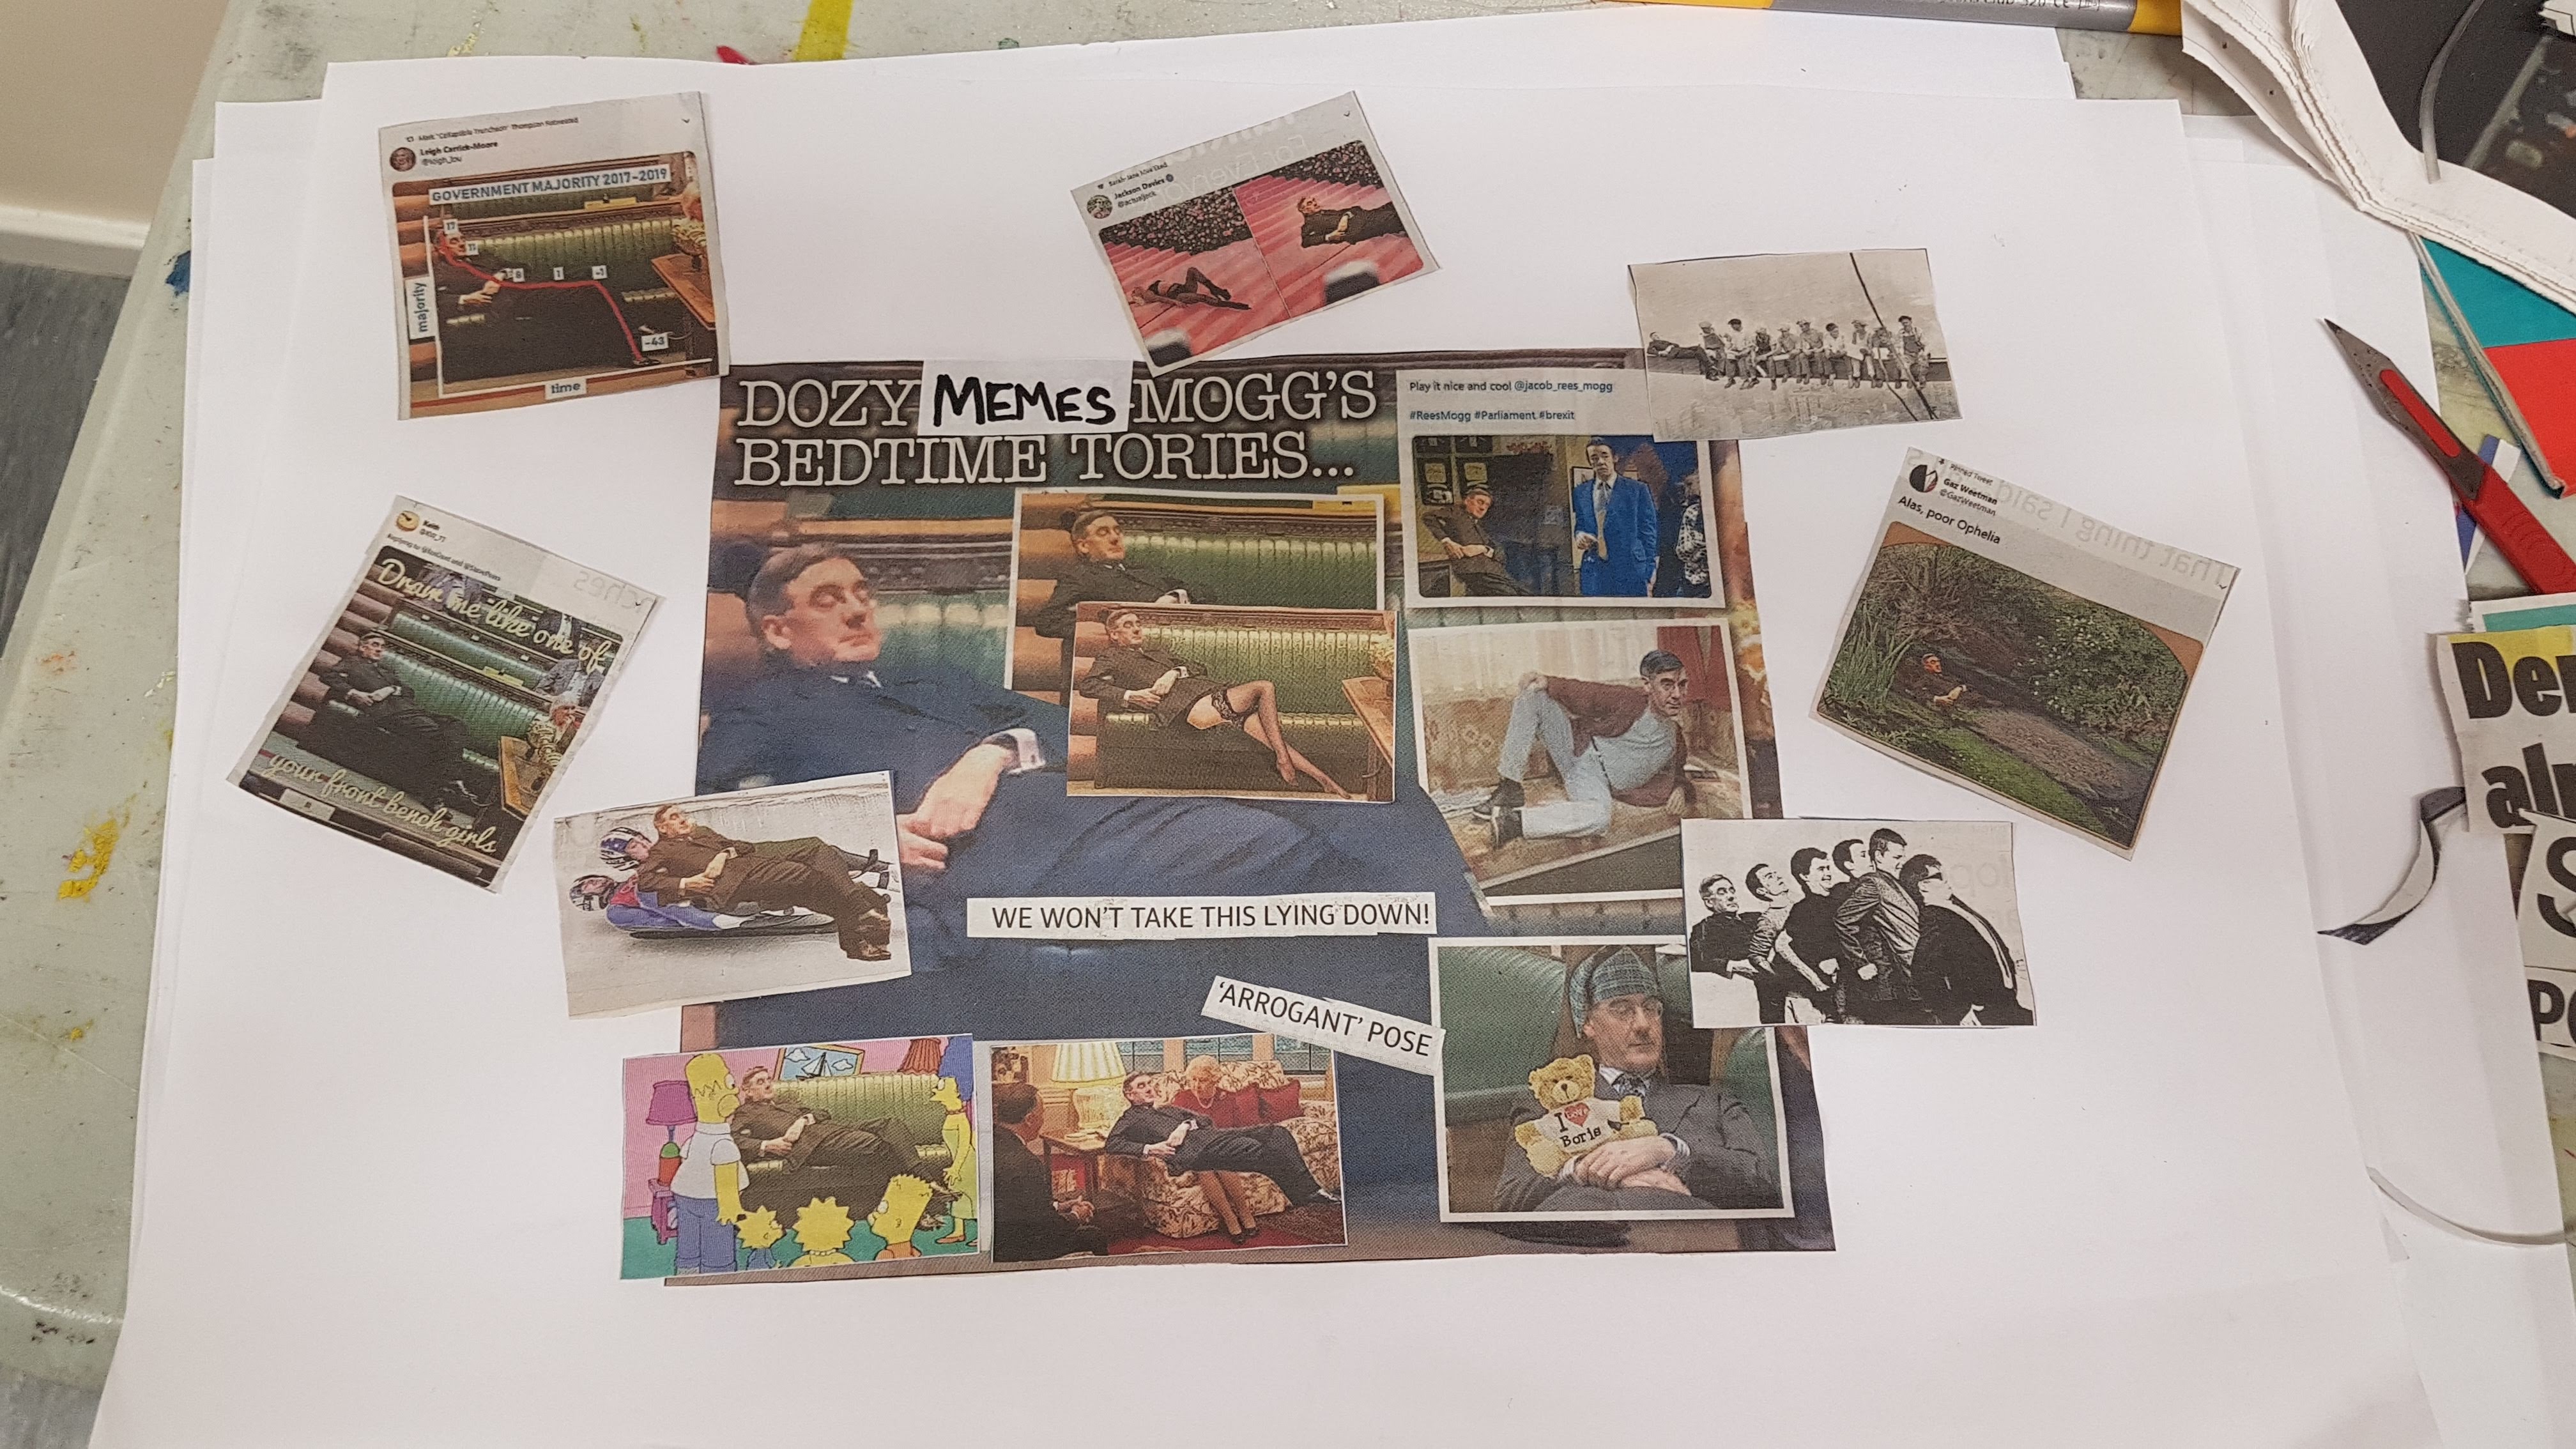
This collage is called “Jacob Memes Mogg, or We Won’t Take This Lying Down”
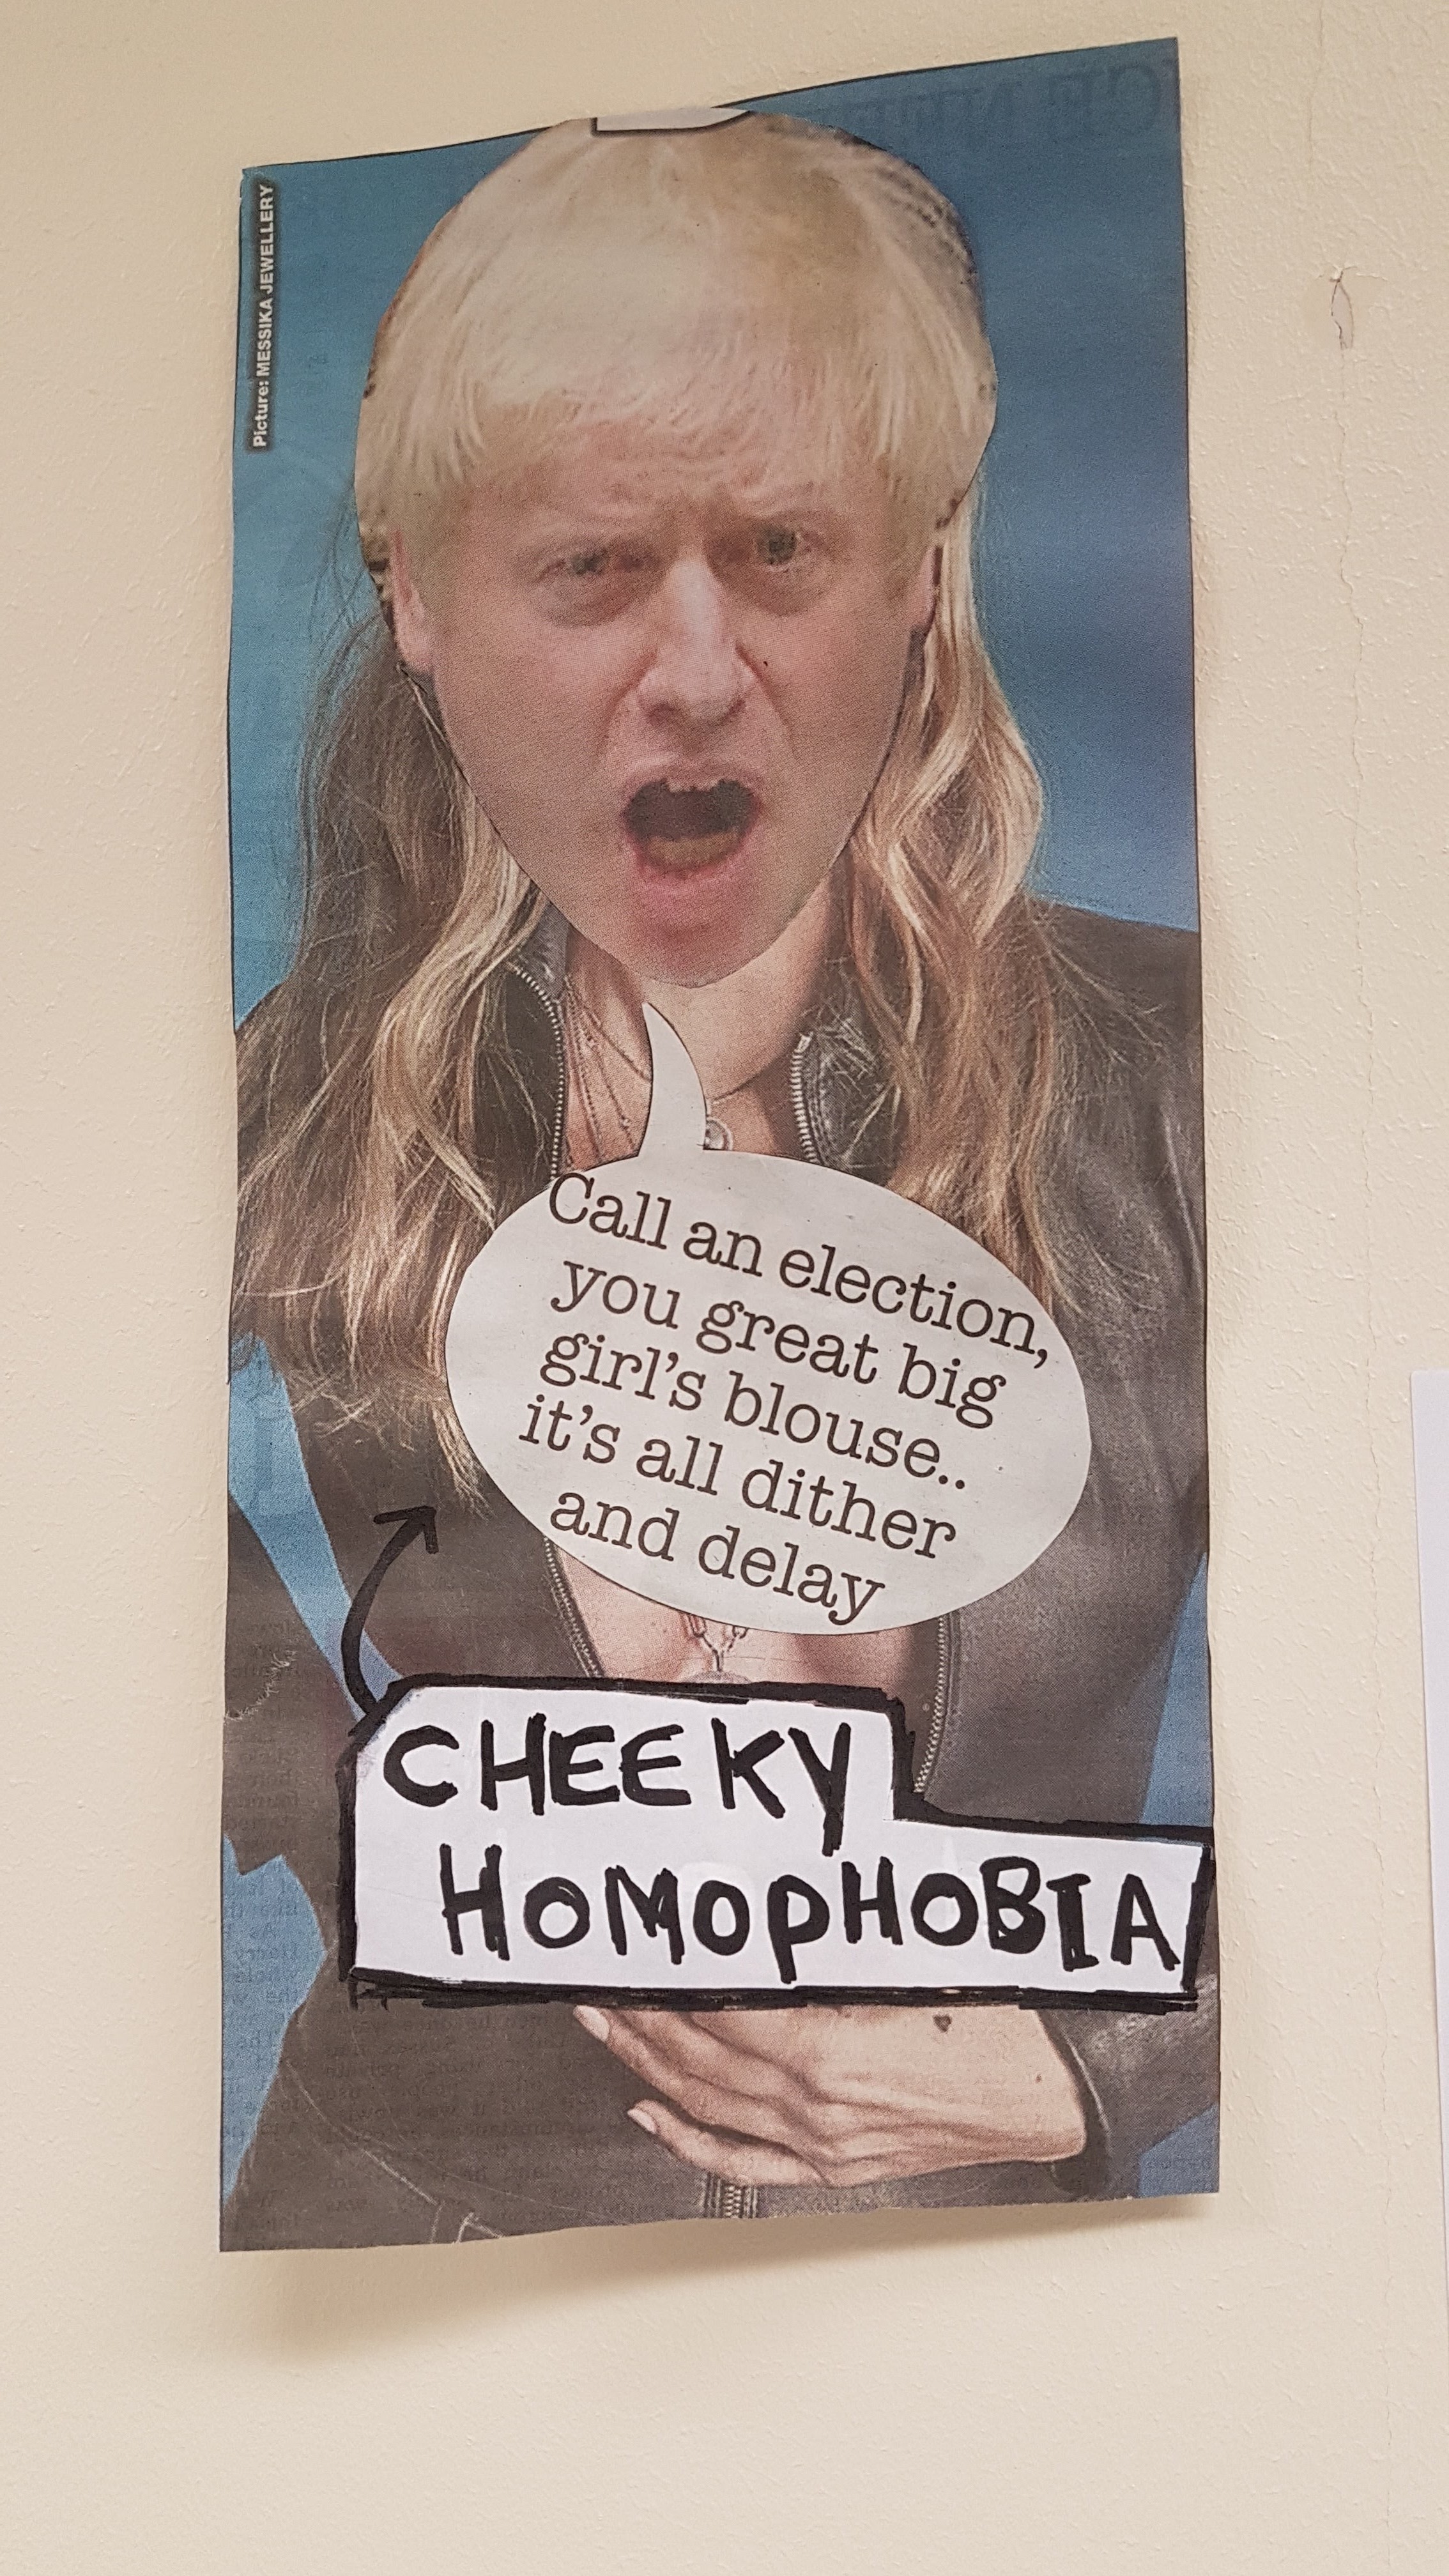
This one is called “Cheeky Homophobia”
And finally the “Nigel Farage Poem” (not the most creative title but it does what it says on the tin!)
I think given the current political climate this is an apt piece of work, and the zine will possibly called “Dangerous Men” or something along those lines, because although these men are often the subject of memes and jokes they are in fact very dangerous men. I’m actually really pleased with these so far, it was my first chance to be properly creative in a few weeks and I knocked these out in a couple of hours! Life is stressful after uni, but it’s moments of creativity like this that make it worth it.
I also picked up one of the big 3D printed bones, shown in the video below
The ceramic bones have been fired with the glaze on and I am really happy with how they turned out! The textures are really highlighted by the glaze, and they have that new ceramic sheen which is really satisfying to look at and to handle
This slideshow requires JavaScript.
Worked on the aluminium pieces- the dremels are all busted, so I tried using a different tool, but the aluminium was so soft that it clogged up the bit
Ended up using a saw, files, and sandpaper to work on them by hand instead- 3 of them just need to be worked into with the engraving tool, and the other 2 still need some work with the hand tools
This slideshow requires JavaScript.
Tuesday 25/06/19
Spent most of today painting and sorting out my space for the show- I just need to sweep and mop the floor and get the table and stools in and it is basically ready to go
got my table top cut in the wood workshop, and painted it with the first coat of white
grabbed the black trestle legs left behind by the BA students for my table
This slideshow requires JavaScript.
Picked up another of my large 3D prints- this one looks a lot smoother that the first one, but the technicians were not sure if it was due to using a different 3D printer, or the file type
Sent two more giant bones to print
Also discussed my Selected Showcase idea with Jonathan, and tested out projecting the video onto the 2 big 3D prints- I really like how it looks but it comes with a set of challenges I will discuss on a separate post
This slideshow requires JavaScript.
Friday 28/06/19
Spent the last two days very ill, but got back in today, and did some more work on my 3D prints, as the foundry and metal workshop were both shut
spent most the day working the BA degree show private view, so I didn’t have much time to do work
I did pick up my 3D printed bones, and worked on them a little though
This slideshow requires JavaScript.
Tuesday 18/06/19
Two of the 3D prints I collected yesterday need to be sent to print again, as the supports are where a lot of the detail was supposed to be, and as I remove the support I am also removing the detail, so I will send these to print again this week, and choose somewhere different for the supports to go- as shown in the photos below
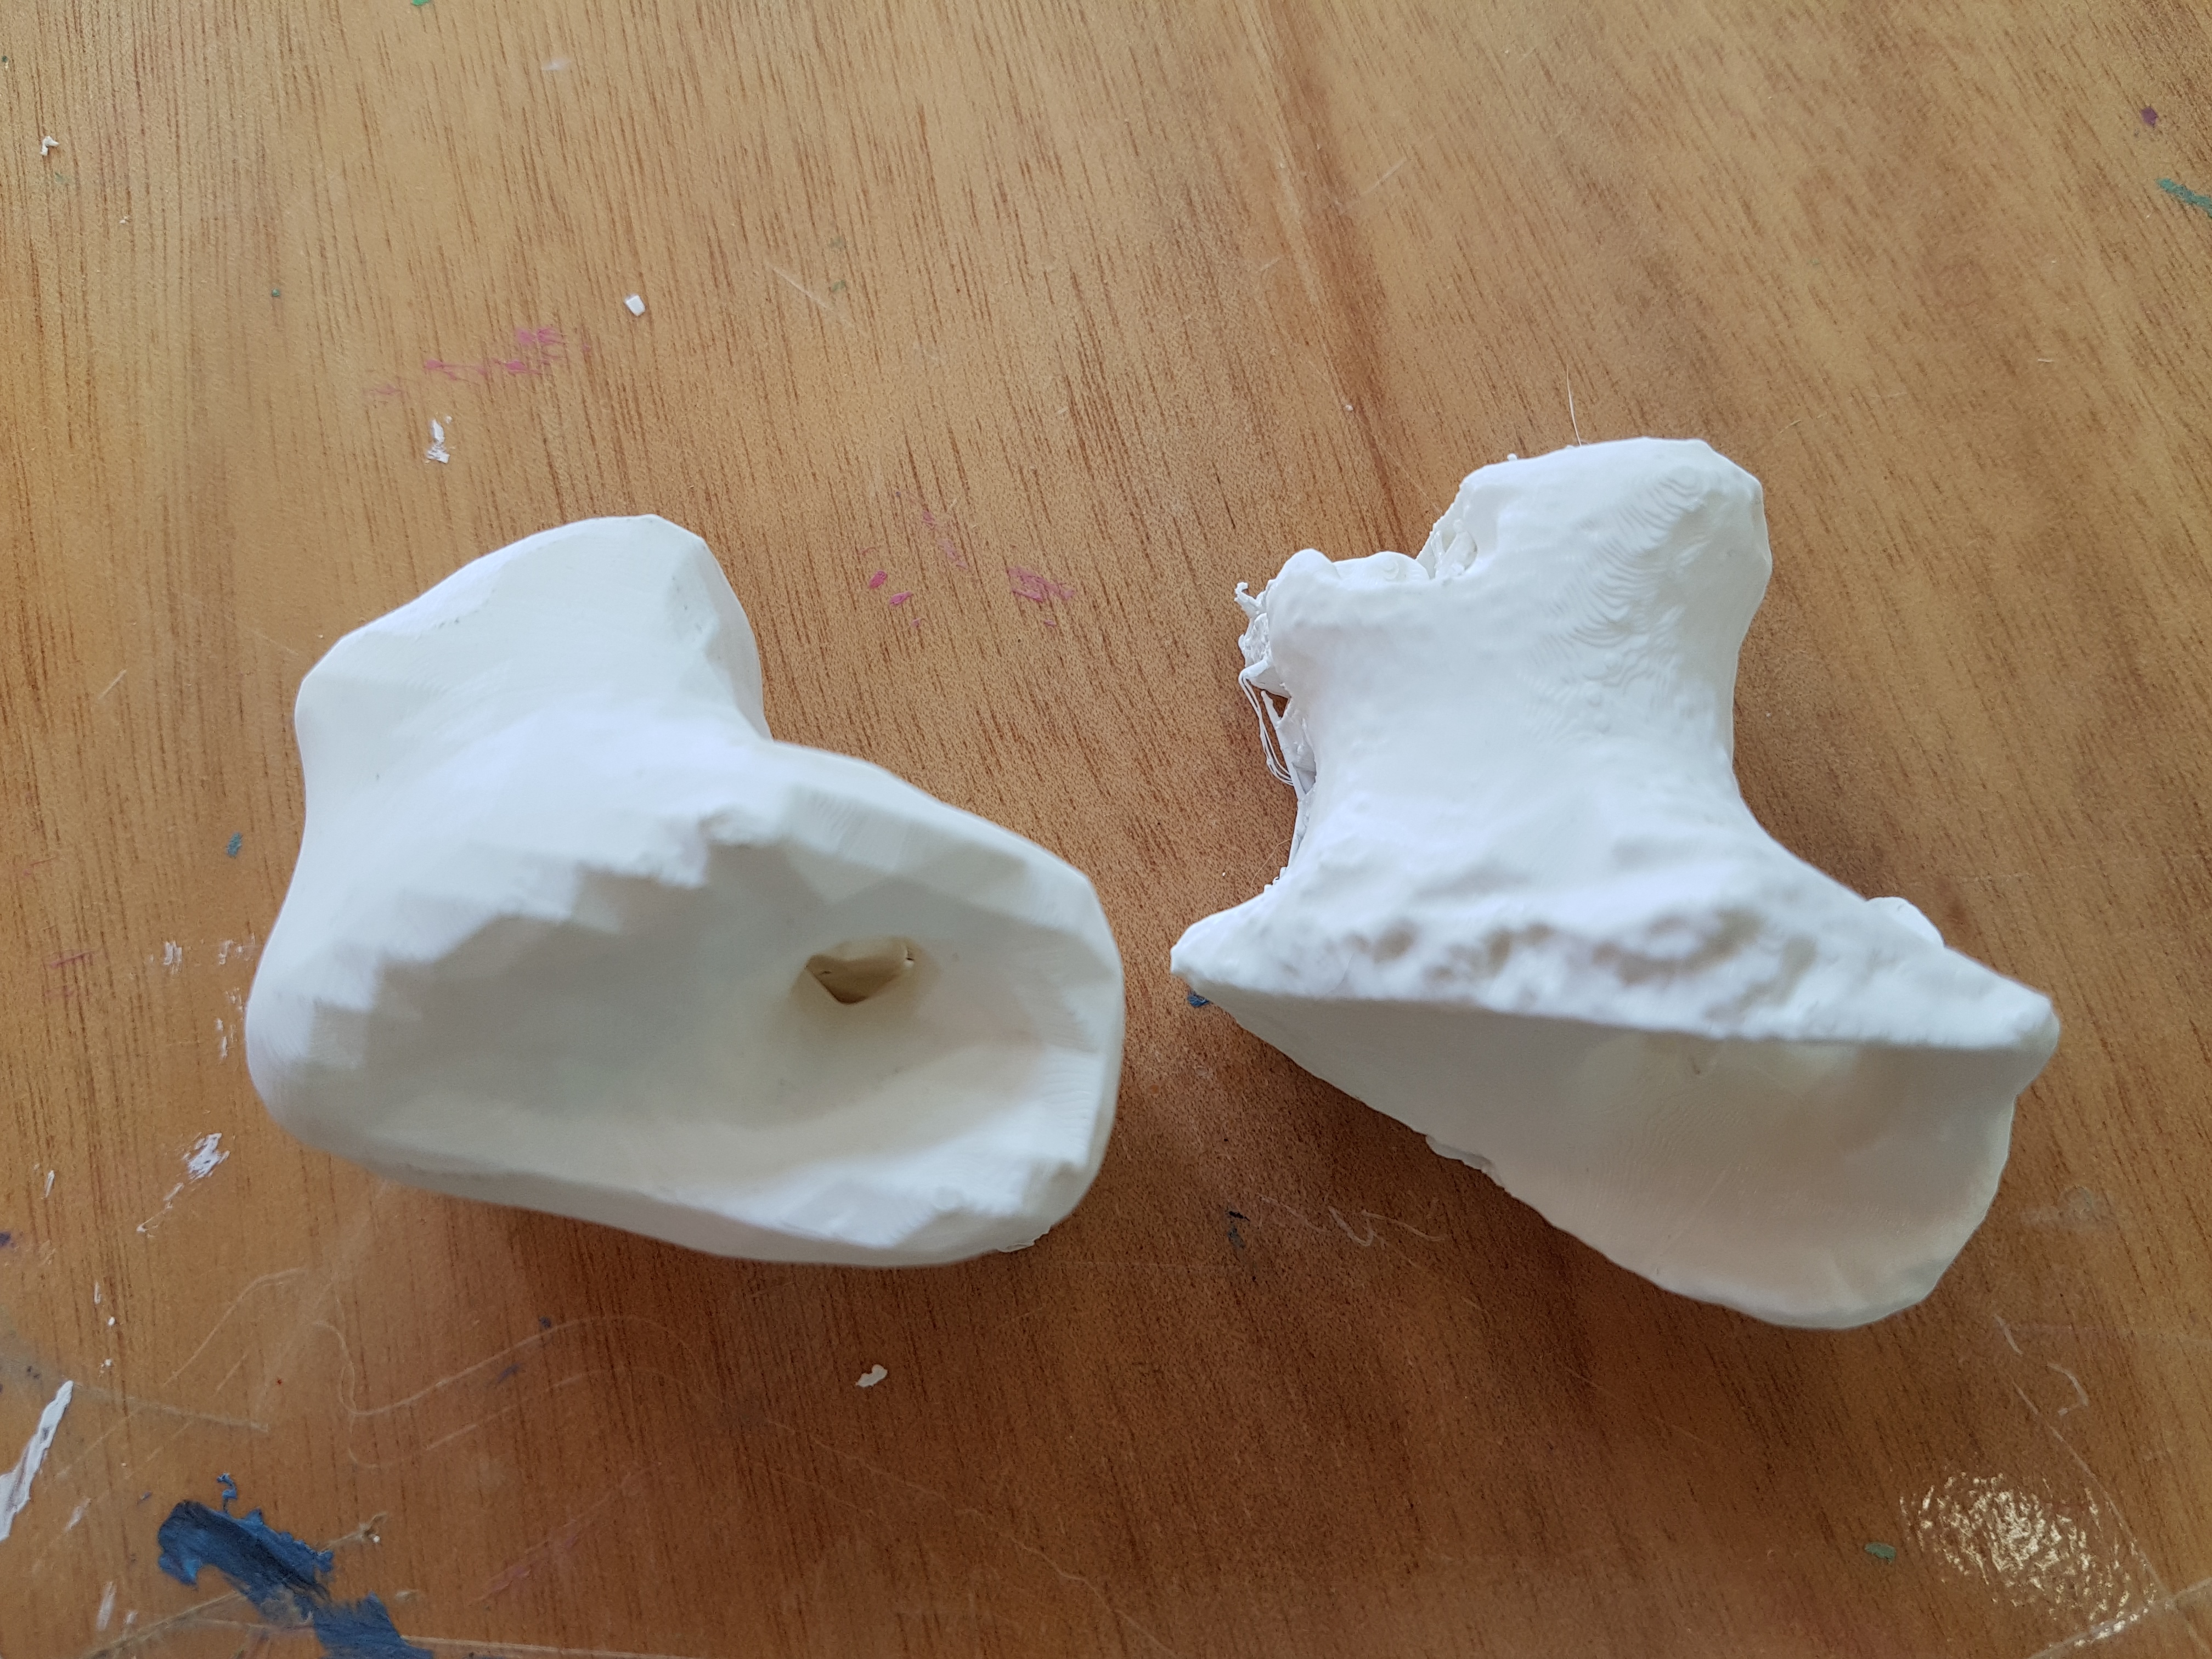
to make the 3D printed bones look “finished” I have been using pliers, sandpaper, and files to get rid of the supports, and the marks left behind on the bones, although I haven’t been able to completely remove these traces, so I suppose it is just part of the nature of the material
the 3D prints are very light, much like the real bones, but feel pretty solid
This slideshow requires JavaScript.
the photo below shows the iPad 3D scan and print next to the Einscan 3D scan and print- the quality is vastly different, as you can see- the Einscan actually has the textural surface of the bone, and is much less pixelated looking than the much rougher iPad scan
side by side of the iPad scan and Einscan
Thursday 20/06/19
I decided to try and work on the aluminum pieces today, but as I clamped one of them in the vice it cracked, and Lindsey had to help me seal the crack with aluminum filler and epoxy resin
This will need to be sanded down once the resin filler has dried
This slideshow requires JavaScript.
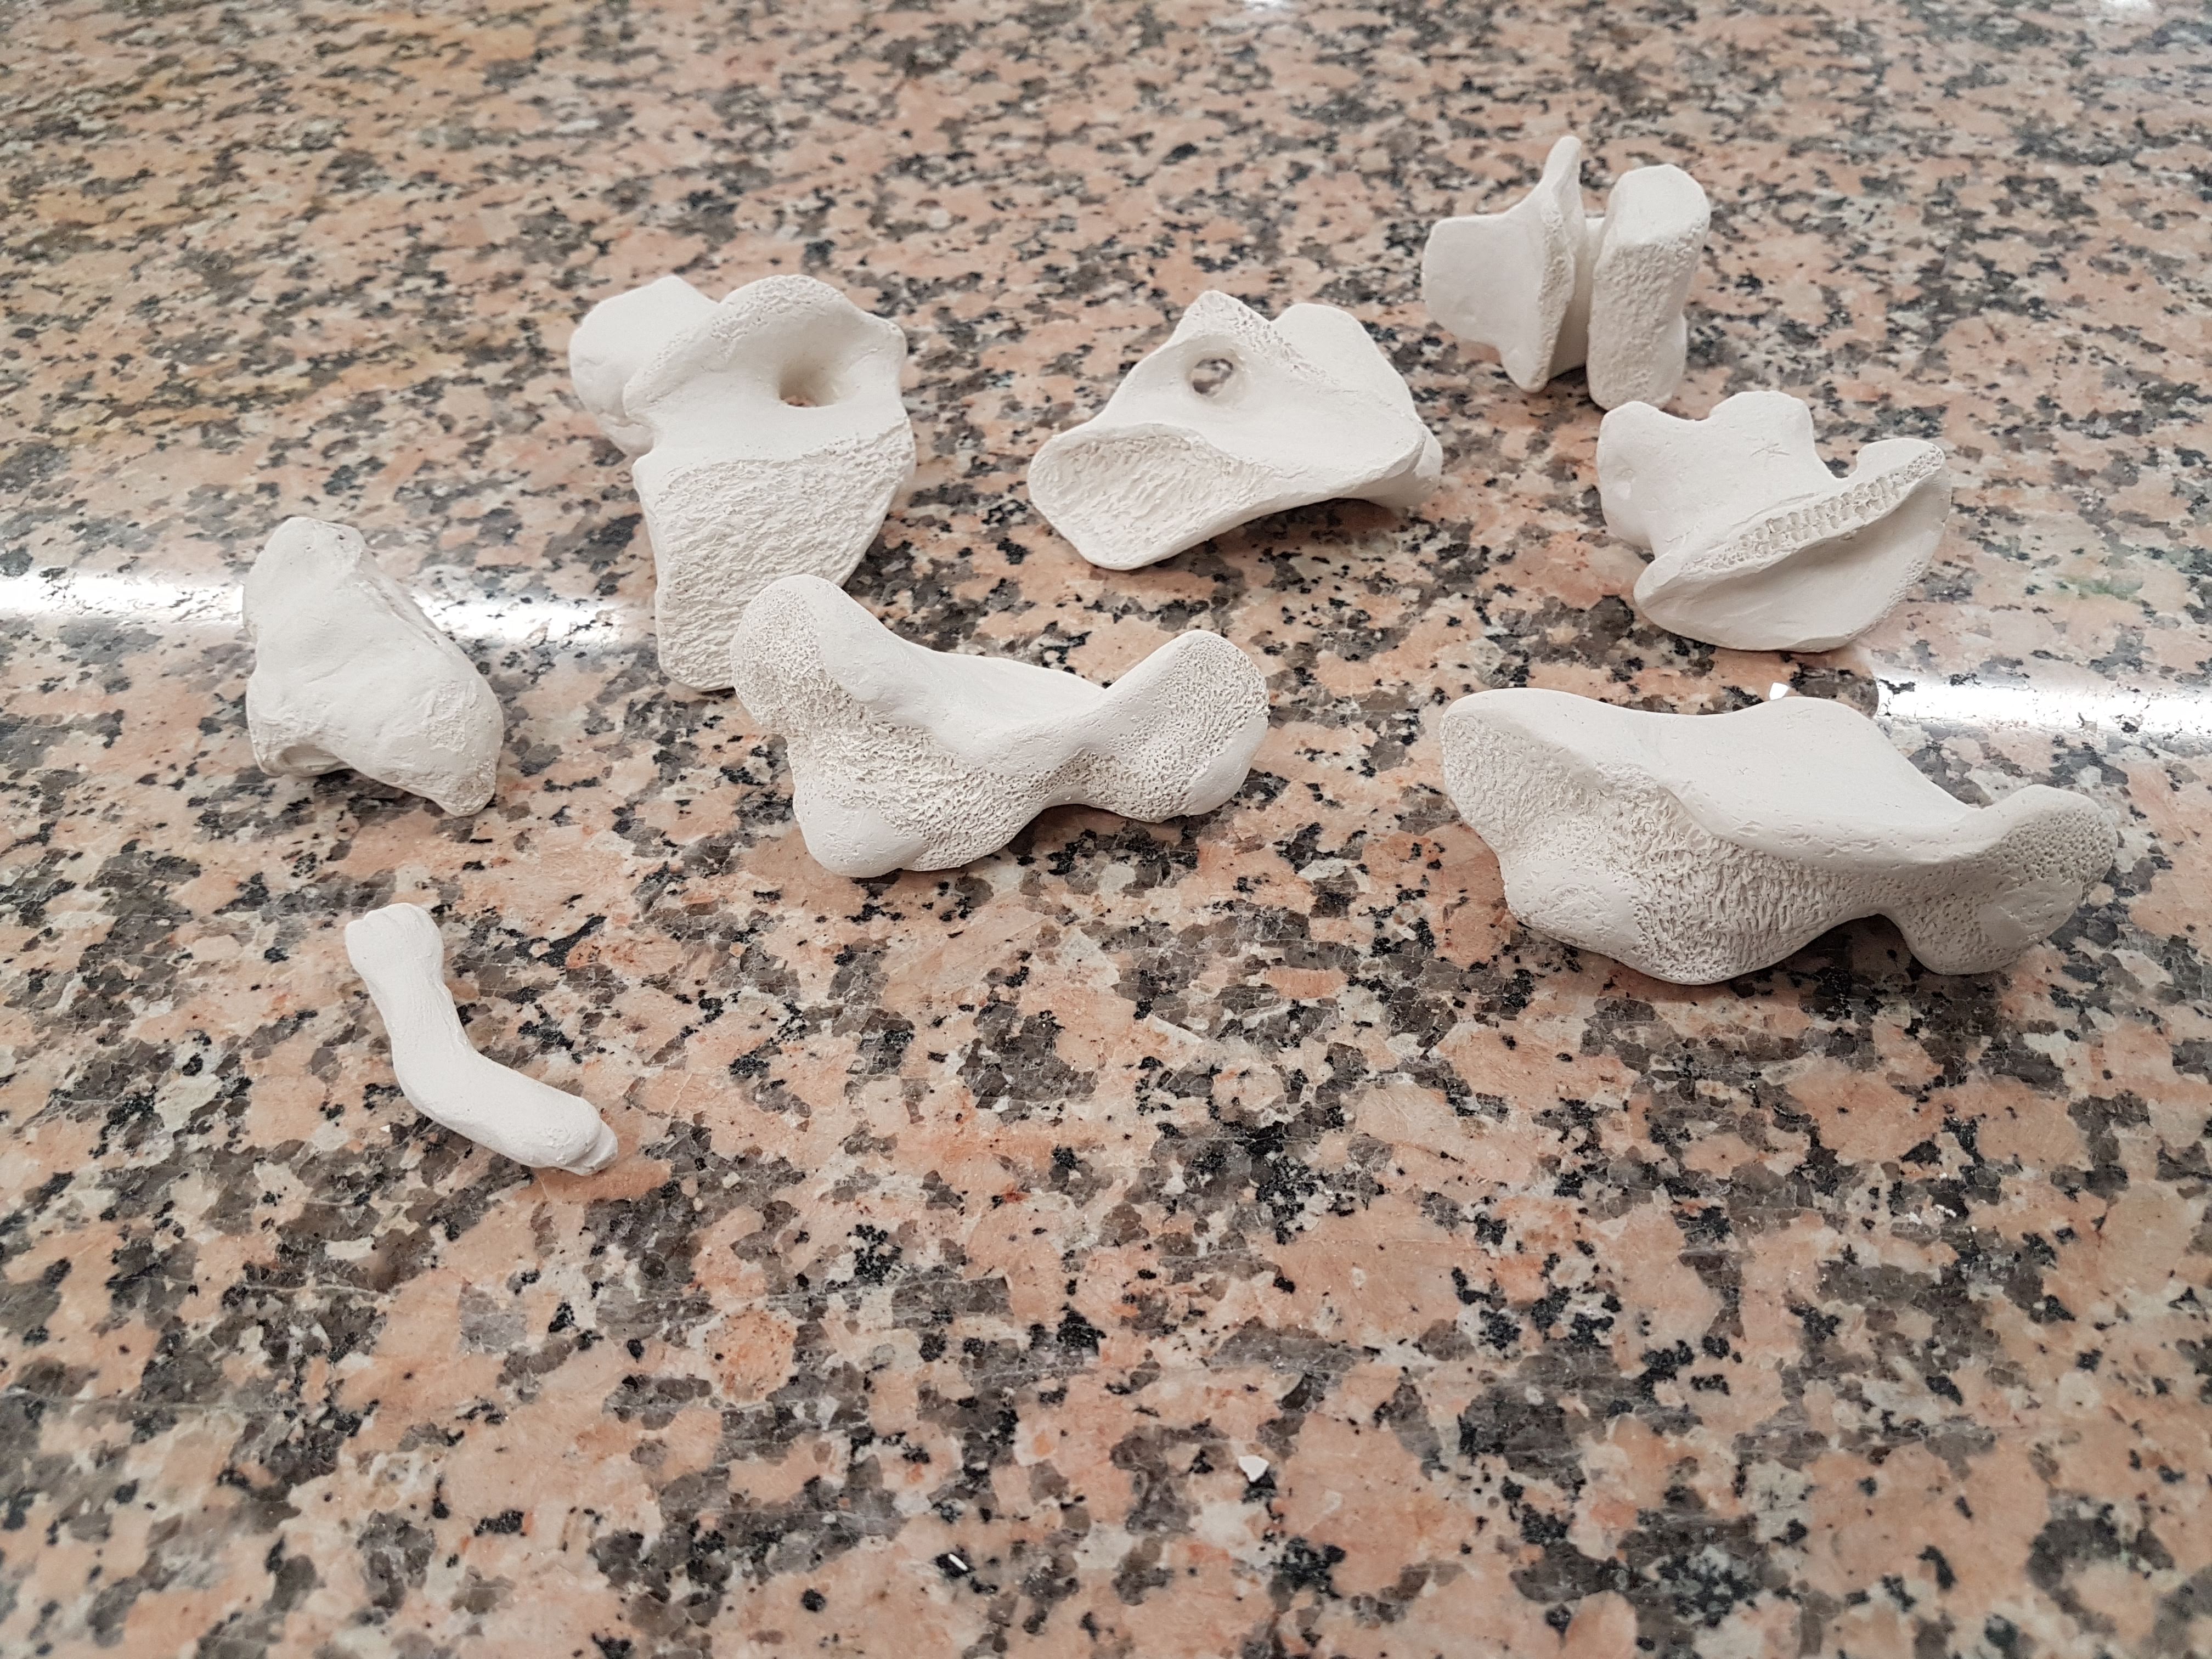
my ceramic bones have been biscuit fired, below is what they looked like once they had been fired, before I glazed them
Friday 21/06/19
glazed my bones today- the photos below show the glazing process, and the bones once the glaze had dried and was ready to be fired again
This slideshow requires JavaScript.
to glaze the ceramic bones I had to first mix the glaze very thoroughly, then using the metal tool shown in the photo I had to clamp each bone and dip it into the glaze, shaking it gently to make sure the coating was even, then working the glaze into the textures of the bones with my finger and a brush
I then had to remove the glaze with a damp sponge anywhere that the surface of each bone touched the worktop- if you don’t do this, when the ceramic pieces are fired the glaze melts and sticks to the bottom of the kiln, which means the pieces will probably be destroyed when you try to remove them
I have circled the places I removed the glaze in red in the photos below to demonstrate
I mentioned this new 3D scanning available in the 3D workshop briefly in my weekly summary post, but I thought I should probably do a separate post for it, as it is a really exciting piece of kit that I have learnt to use.
This slideshow requires JavaScript.
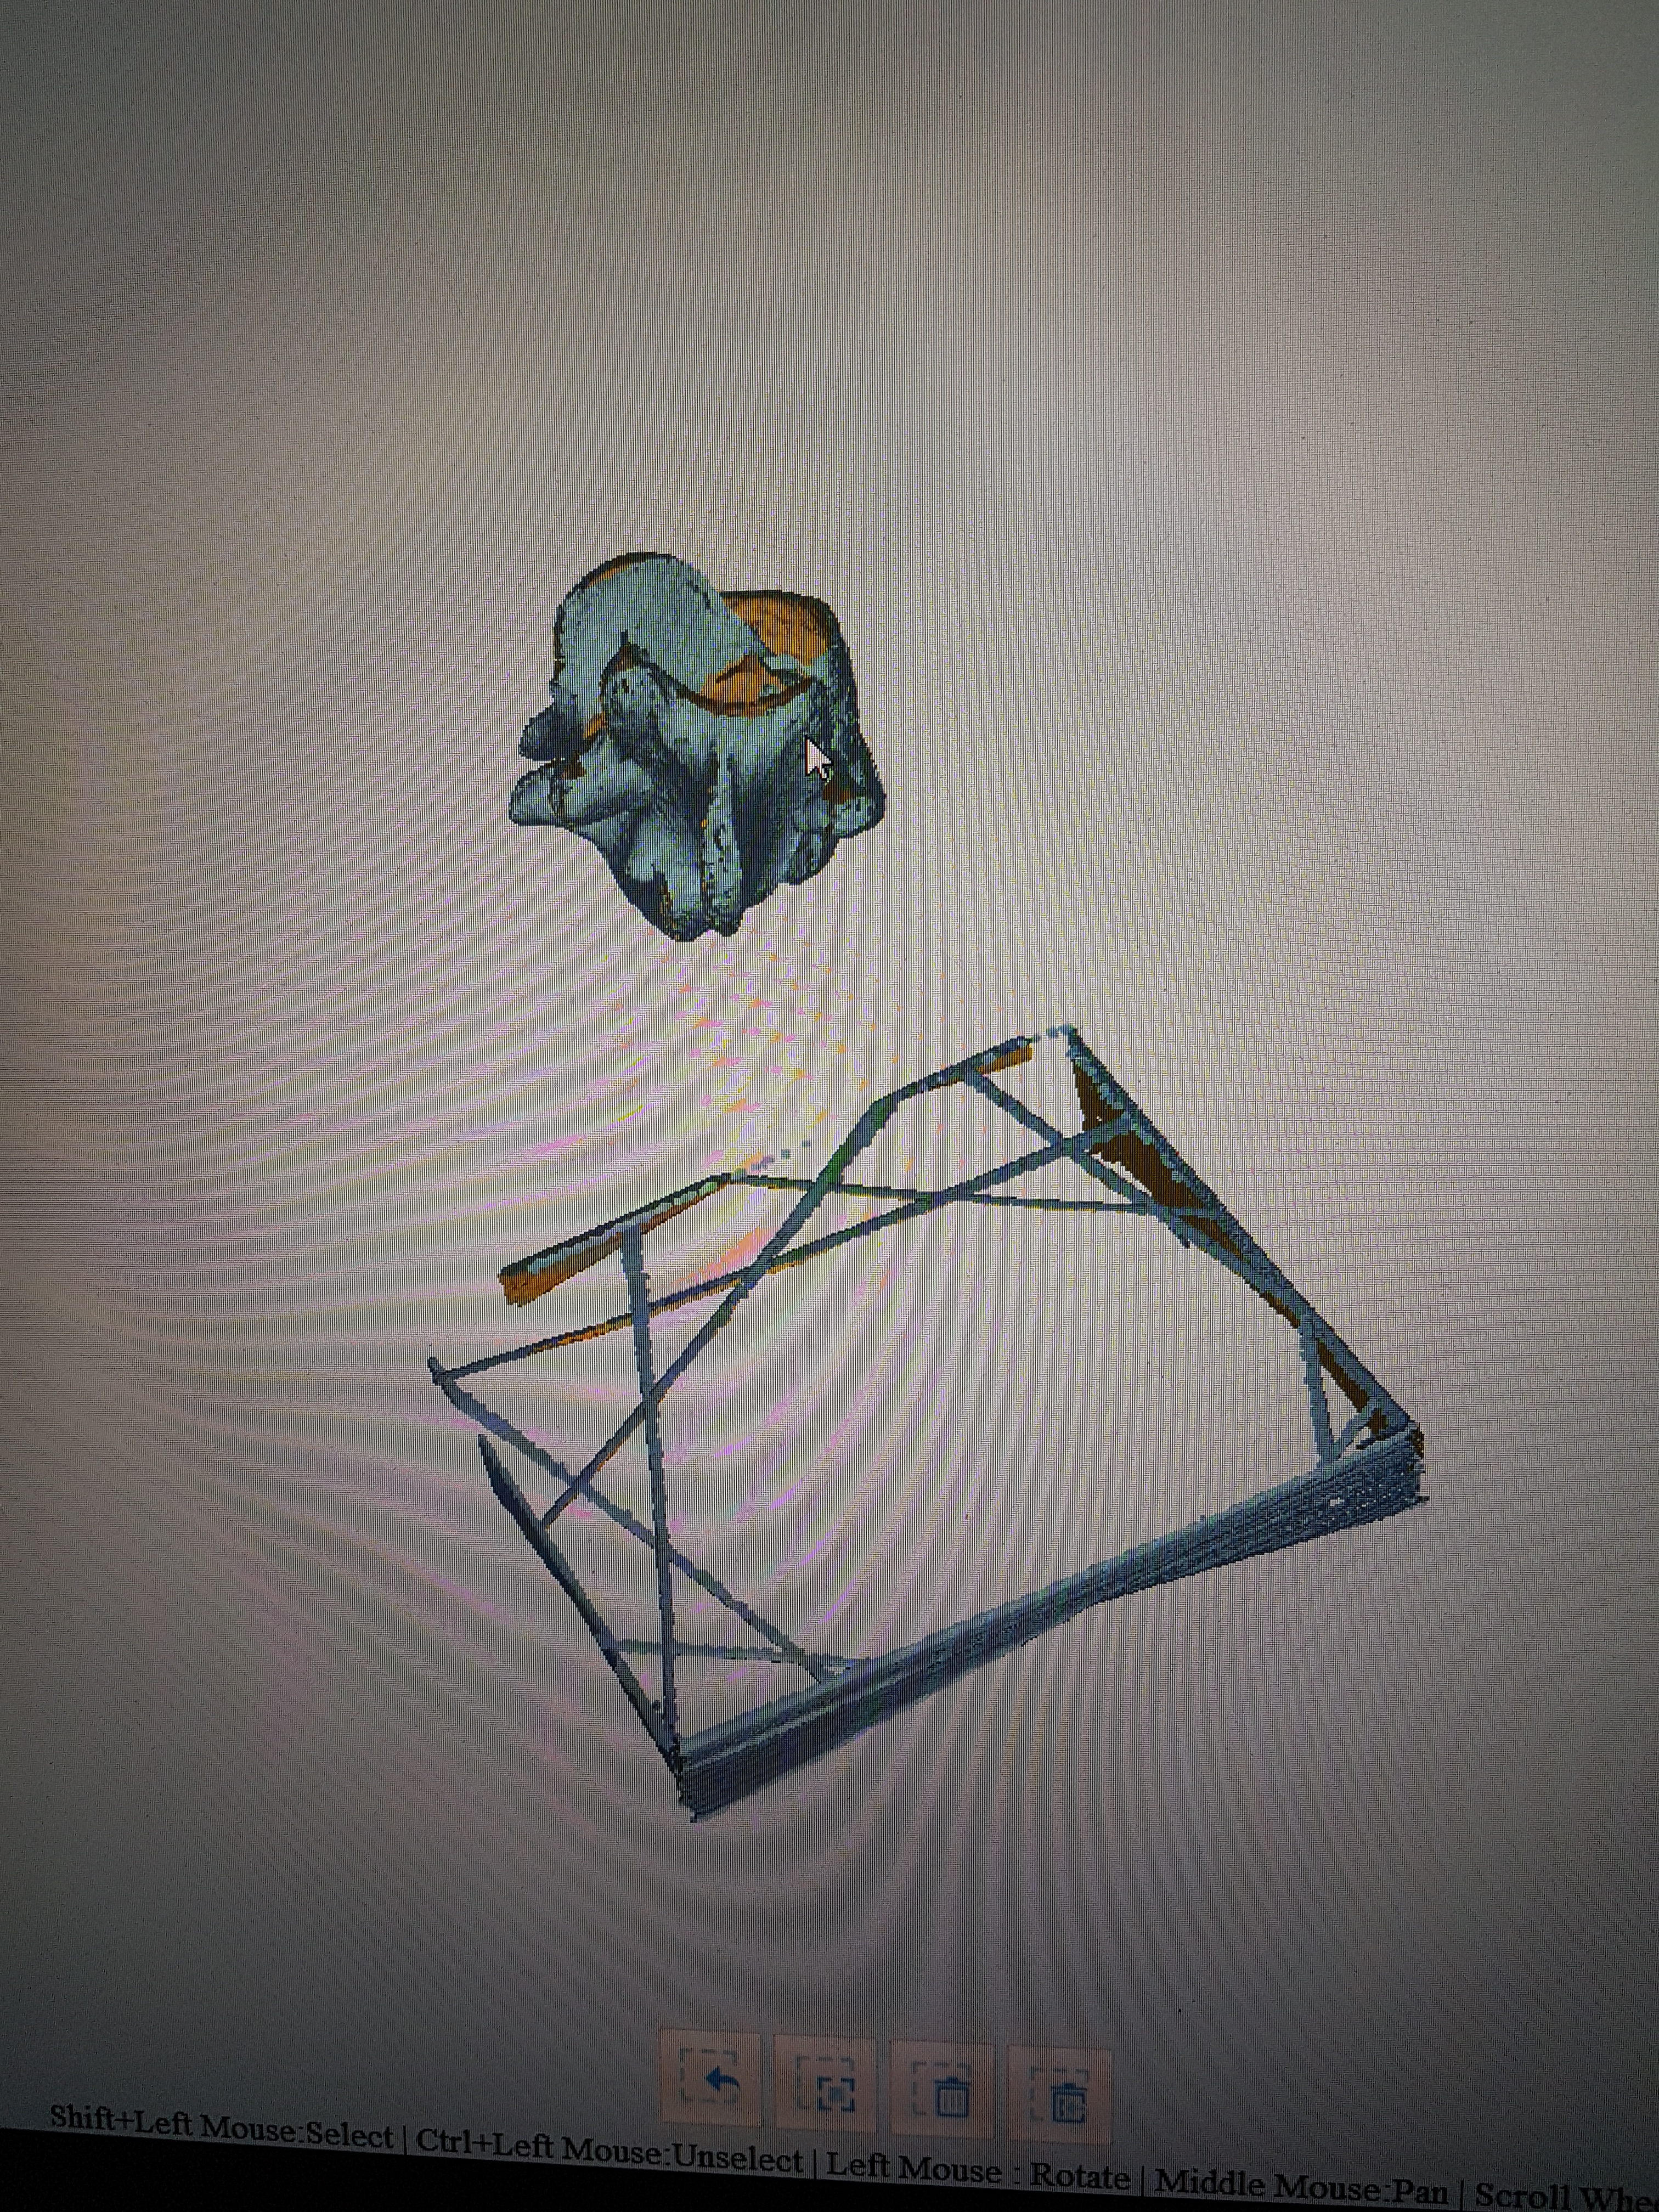
The Einscan is a piece of kit and accompanying software for 3D scanning, which Jonathan (tutor) mentioned was now available for use in the 3D workshop during our one to one tutorial. You start by setting up the software and kit, by calibrating it- you put the calibration stand onto the turntable, and follow the instructions on the software- rotating the removable board as shown on screen so that the dots align. You rotate the board three times, and in-between each one the turntable rotates it 360 degrees to calibrate the camera. Jonathan (technician) explained that the scanner builds the 3D model by sending out beams of light across the object- the way the light bends around the object is then captured and is used to build the model. Once it was calibrated we used a glue gun to attach the bone to a clear plastic rod embedded in a small piece of wood, much like when I 3D scanned with the iPad and with the photogrammetry- the rod acting as a support. Most of the bones had to be scanned twice, with the bone moved into a different position and glued before being scanned the second time. Jonathan then showed me how to match the two scans up on the software to produce the finished model. (he showed me this on Thursday last week, which is why I ended up with the mutant bone scan, as I didn’t know how to match the two scans up).
I still have one more bone to scan, and possibly one to redo, but I have made really quick progress with this and I’m really happy with how the scans are coming out! As you can see from the video, the details and texture are being picked up much better than they were with the iPad, although not quite as well as the photogrammetry- however this has a much higher success rate and is much faster, so I think the prints I get from these scans will probably be the final ones I put in the show, which is very exciting! I really want to play with these scans on blender- maybe animating them in some way, and I would also like to play around with scale if I have time- printing them as small as possible, and as large as possible. If I have time for these experiments, and if they go well, I am considering applying for the Selected Showcase at our end of year show- I envision displaying a short animation of the digital 3D models, or perhaps a few still images, alongside some huge and tiny 3D prints of the bones.
To Do:
– Scan the last bone
– clean the scans up on Meshmixer
– send the scans to print
After my first attempt editing an iPad scan of my bone didn’t go so well (you could see where I dragged the mesh, and this was visible on the 3D print) I was a bit hesitant to try again. This video was originally a 5 and half min screen cap of some playing around with another bone scan, to get a feel for the tools and how the programme works, which I sped up to 2 mins. You can see me trying different tools and playing with softening the shape, which I didn’t end up keeping.
This screenshot shows the bone before any editing was done- the raw scan.
I feel a little more confident to use Meshmixer now, and I plan on cleaning the rest of the iPad bone scans up, just to see how the shapes have turned out.
Took moulds from foundry down to Ceramics studio and started testing them out
The clay is much softer than anticipated- I am used to more solid materials such as the wax, so de-moulding has proven more difficult- the clay loses shape as soon as you try to pull it out of the moulds
I found leaving the clay in the moulds to dry a little helped, but not much
I only managed to get one clay bone finished; I had to do a lot more work to it than I was used to doing with the wax to get it to look right, using the real bone for reference
This slideshow requires JavaScript.
I also popped into the 3D workshop to chat about the new scanner with the technician, Jonathan, and ended up doing a scan of one of my bones then and there
This slideshow requires JavaScript.
Tuesday 04/06/19
I booked out the photography studio last week for this morning, to photograph all my sculptures so far, with the help of Richard, the technician
Ended up coming back after lunch and staying there til 3.30ish, as some pieces proved trickier to photograph
This slideshow requires JavaScript.
I took 360 pics of all the pieces except for the two brick casts and the bronze casts, and I plan to animate them into little gifs for my website
I learnt a lot about how to light different shapes and materials, which I hope I can try to mimic at home with a flexible desk lamp, fabric, and a white table or sheet- Richard definitely taught me that you don’t always need the fancy equipment available at uni
Didn’t get time to go to ceramics again, as planned, so I went to the 3D workshop to do more 3D scans instead
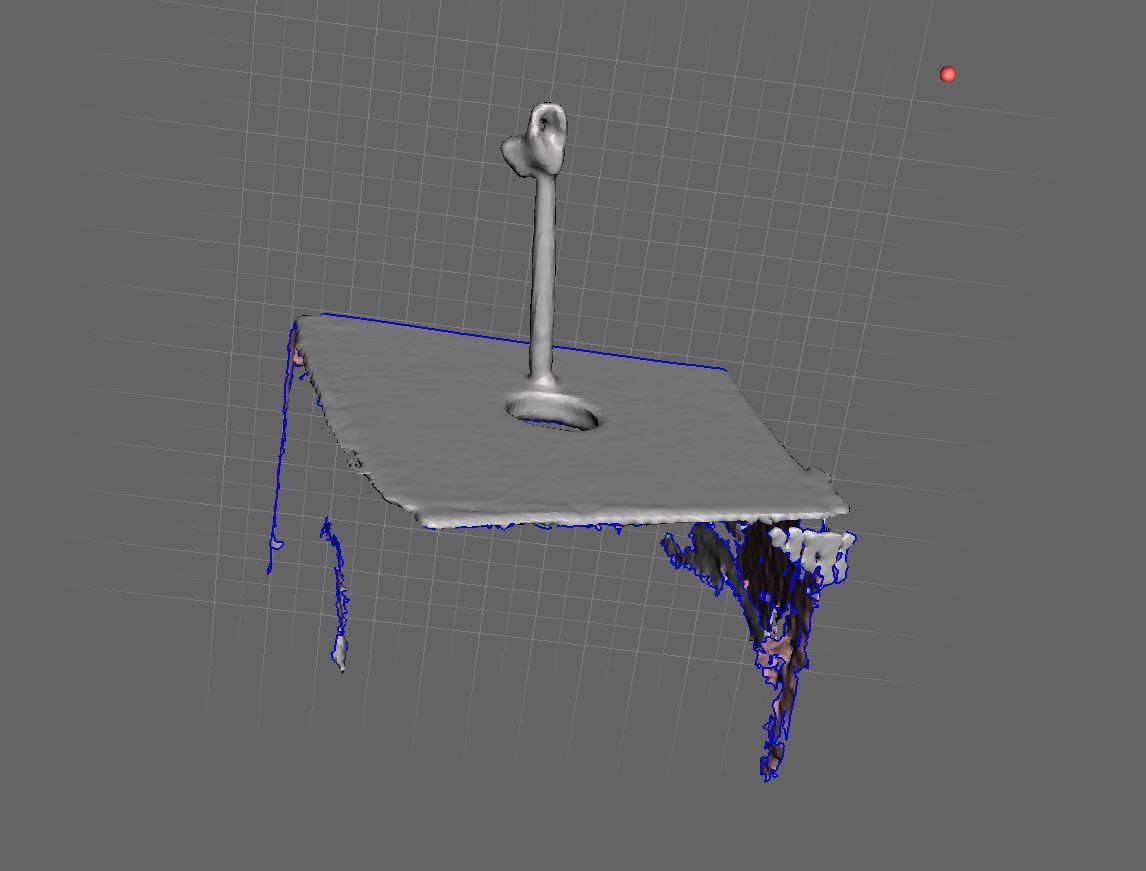
I ended up with a few fixable scans, and one mutant scan- I scanned it twice at two different angles, but the software stitched it together wrong, giving me a mutant bone
Wednesday 05/06/19
Made progress on remaking my Symposium video (I lost the entire thing because the programme I was using crashed)
Had to go to work in the evening
Thursday 06/06/19
Morning group tutorial- we discussed show details and I am happy with the space I have been allocated
Edited one of the iPad bone scans and sent it to print
Made some more progress on remaking the symposium video
Friday 07/06/19
Visited Jonathan in 3D and scanned the bones that went wrong on Tuesday- he showed me how to do multiple scans and match them up to get a better 3D model
I have one bone left to scan- I just need to do that and clean up the scans on MeshMixer and they will be ready to 3D print