
Monday 17/06/19
- spent most the day working the BA degree show private view, so I didn’t have much time to do work
- I did pick up my 3D printed bones, and worked on them a little though
Tuesday 18/06/19
- Two of the 3D prints I collected yesterday need to be sent to print again, as the supports are where a lot of the detail was supposed to be, and as I remove the support I am also removing the detail, so I will send these to print again this week, and choose somewhere different for the supports to go- as shown in the photos below
- to make the 3D printed bones look “finished” I have been using pliers, sandpaper, and files to get rid of the supports, and the marks left behind on the bones, although I haven’t been able to completely remove these traces, so I suppose it is just part of the nature of the material
- the 3D prints are very light, much like the real bones, but feel pretty solid
- the photo below shows the iPad 3D scan and print next to the Einscan 3D scan and print- the quality is vastly different, as you can see- the Einscan actually has the textural surface of the bone, and is much less pixelated looking than the much rougher iPad scan

side by side of the iPad scan and Einscan
Thursday 20/06/19
- I decided to try and work on the aluminum pieces today, but as I clamped one of them in the vice it cracked, and Lindsey had to help me seal the crack with aluminum filler and epoxy resin
- This will need to be sanded down once the resin filler has dried
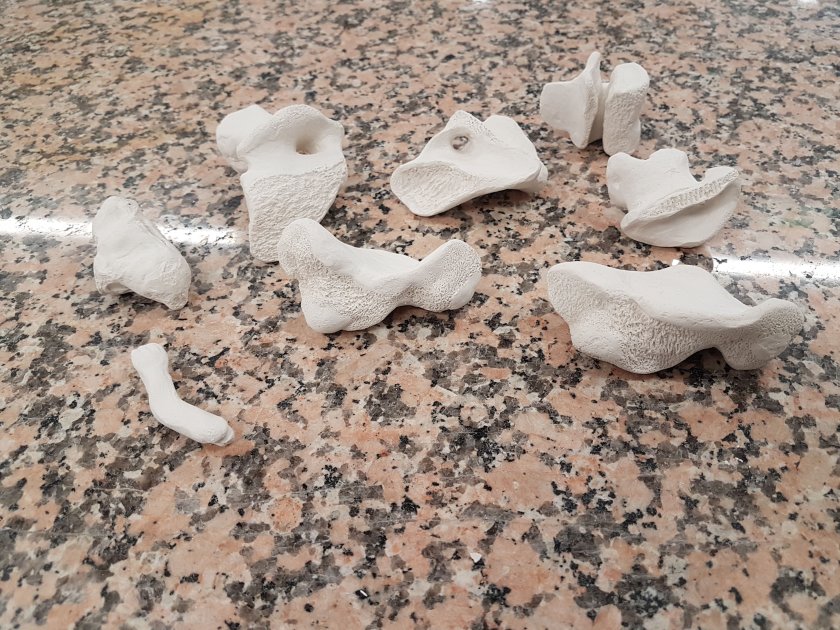
- my ceramic bones have been biscuit fired, below is what they looked like once they had been fired, before I glazed them
Friday 21/06/19
- glazed my bones today- the photos below show the glazing process, and the bones once the glaze had dried and was ready to be fired again
- to glaze the ceramic bones I had to first mix the glaze very thoroughly, then using the metal tool shown in the photo I had to clamp each bone and dip it into the glaze, shaking it gently to make sure the coating was even, then working the glaze into the textures of the bones with my finger and a brush
- I then had to remove the glaze with a damp sponge anywhere that the surface of each bone touched the worktop- if you don’t do this, when the ceramic pieces are fired the glaze melts and sticks to the bottom of the kiln, which means the pieces will probably be destroyed when you try to remove them
- I have circled the places I removed the glaze in red in the photos below to demonstrate
