Weekly blog 24/06/19 – 28/06/19

river project, UNIT 2, Weekly Summaries, Weekly To Do Lists, Work in Progress

Monday 24/06/19

  • I also picked up one of the big 3D printed bones, shown in the video below
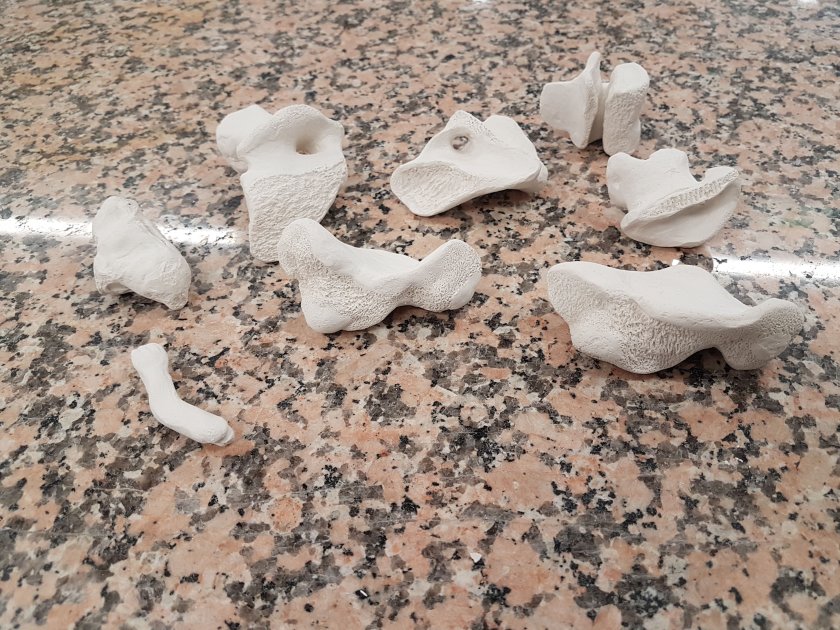
  • The ceramic bones have been fired with the glaze on and I am really happy with how they turned out! The textures are really highlighted by the glaze, and they have that new ceramic sheen which is really satisfying to look at and to handle

This slideshow requires JavaScript.

  • Worked on the aluminium pieces- the dremels are all busted, so I tried using a different tool, but the aluminium was so soft that it clogged up the bit
  • Ended up using a saw, files, and sandpaper to work on them by hand instead- 3 of them just need to be worked into with the engraving tool, and the other 2 still need some work with the hand tools

This slideshow requires JavaScript.

Tuesday 25/06/19

  • Spent most of today painting and sorting out my space for the show- I just need to sweep and mop the floor and get the table and stools in and it is basically ready to go
  • got my table top cut in the wood workshop, and painted it with the first coat of white
  • grabbed the black trestle legs left behind by the BA students for my table

This slideshow requires JavaScript.

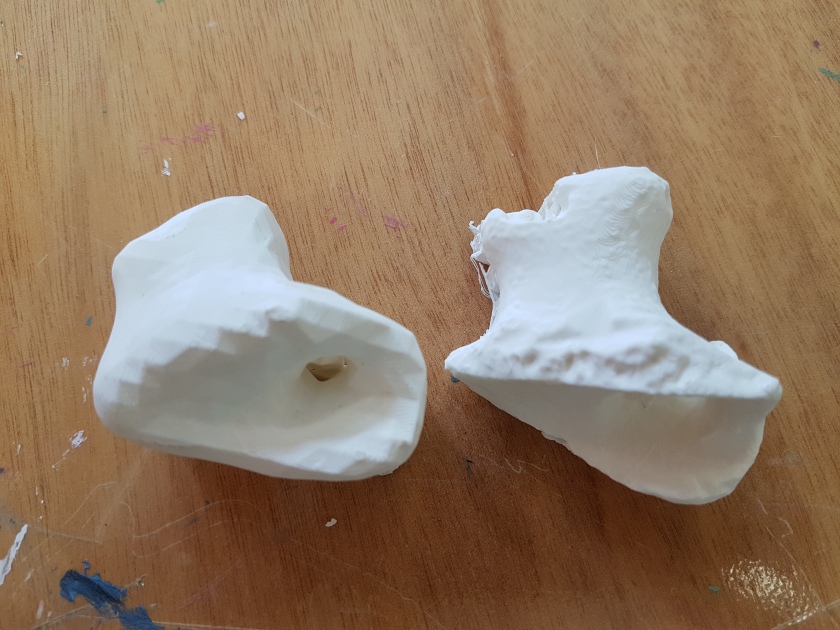
  • Picked up another of my large 3D prints- this one looks a lot smoother that the first one, but the technicians were not sure if it was due to using a different 3D printer, or the file type
  • Sent two more giant bones to print
  • Also discussed my Selected Showcase idea with Jonathan, and tested out projecting the video onto the 2 big 3D prints- I really like how it looks but it comes with a set of challenges I will discuss on a separate post

This slideshow requires JavaScript.

Friday 28/06/19

  • Spent the last two days very ill, but got back in today, and did some more work on my 3D prints, as the foundry and metal workshop were both shut

This slideshow requires JavaScript.

Weekly Blog 17/06/19 – 21/06/19

river project, UNIT 2, Weekly Summaries, Work in Progress

Monday 17/06/19

  • spent most the day working the BA degree show private view, so I didn’t have much time to do work
  • I did pick up my 3D printed bones, and worked on them a little though

This slideshow requires JavaScript.

Tuesday 18/06/19

  • Two of the 3D prints I collected yesterday need to be sent to print again, as the supports are where a lot of the detail was supposed to be, and as I remove the support I am also removing the detail, so I will send these to print again this week, and choose somewhere different for the supports to go- as shown in the photos below
  • to make the 3D printed bones look “finished” I have been using pliers, sandpaper, and files to get rid of the supports, and the marks left behind on the bones, although I haven’t been able to completely remove these traces, so I suppose it is just part of the nature of the material
  • the 3D prints are very light, much like the real bones, but feel pretty solid

This slideshow requires JavaScript.

  • the photo below shows the iPad 3D scan and print next to the Einscan 3D scan and print- the quality is vastly different, as you can see- the Einscan actually has the textural surface of the bone, and is much less pixelated looking than the much rougher iPad scan
20190620_140330.jpg

side by side of the iPad scan and Einscan

Thursday 20/06/19

  • I decided to try and work on the aluminum pieces today, but as I clamped one of them in the vice it cracked, and Lindsey had to help me seal the crack with aluminum filler and epoxy resin
  • This will need to be sanded down once the resin filler has dried

This slideshow requires JavaScript.

  • my ceramic bones have been biscuit fired, below is what they looked like once they had been fired, before I glazed them

20190620_113056


Friday 21/06/19

  • glazed my bones today- the photos below show the glazing process, and the bones once the glaze had dried and was ready to be fired again

This slideshow requires JavaScript.

  • to glaze the ceramic bones I had to first mix the glaze very thoroughly, then using the metal tool shown in the photo I had to clamp each bone and dip it into the glaze, shaking it gently to make sure the coating was even, then working the glaze into the textures of the bones with my finger and a brush
  • I then had to remove the glaze with a damp sponge anywhere that the surface of each bone touched the worktop- if you don’t do this, when the ceramic pieces are fired the glaze melts and sticks to the bottom of the kiln, which means the pieces will probably be destroyed when you try to remove them
  • I have circled the places I removed the glaze in red in the photos below to demonstrate

This slideshow requires JavaScript.


Putting the Waxes into Moulds

river project, Work in Progress

This slideshow requires JavaScript.

These photos show the process of prepping my wax bones for the kiln.
Process:

  • I started by pressing the waxes into clay, separated by a layer of cling film to make it easier to remove the clay at a later stage. I built up the clay a little to help hold the waxes in place
  • I then joined the waxes to create runners (where the metal would flow through) and risers (where the metal rises out of) using wax tubes, straws, and sausages of soft wax, depending on the thickness of each bone. I added additional runners made of soft wax to any points on the bone that were smaller, thinner, or looked like they would benefit from it and joined them onto thicker parts of the bones or onto the main runners
  • Once I was happy with how the runners and risers and I had degreased them with meths (to help the grog stick) I then began to layer up the first coat grog mix (2:1 grog and herculite) starting off with a paintbrush to work it into the details of the bones. As the mixture thickened I then pressed it on and built it up around the waxes, making sure not to cover the main runners and risers (the pieces you can see sticking out)
  • When the grog had been built up enough and left to dry I then flipped them over, removing the clay and cling film, so that I could repeat the process of layering up the first coat grog
  • I then needed to extend the runners and risers further, bringing the risers at the bottom up to the top, layering with more grog as I went along, for support
  • As I did this Becky built up a base with grog, which we then used to stand up the separate parts of the mould, building the grog round the sides until it was stable
  • Next we had to get the cup onto the runners, using hot knives to join them and soft wax for additional support
  • Because of the heat we had to degrease and add more grog around the runners for support as we went, as we left one over night only to find that the wax had curved over in the heat
  • I then extended the runners using hot knives to join the pieces of wax tube, and bring them up to the top of the cup, again degreasing and layering grog as I went for support
  • The next stage was to fit a sheet of plastic around the whole thing, which we secured with duct tape, before mixing a batch of normal fine casting plaster. We then dipped some scrim into the plaster and used this to secure the plastic to the base- working extra plaster in to waterproof the join. We also tied some plaster dipped scrim around the middle of each mould to help stabilise it ready for the 2nd coat grog to go in
  • This isn’t shown in the photos but we then filled the mould gradually with 2nd coat grog (1:1:1 grog, ludo and plaster then 2:1 ludo and plaster) until it was to the top of the cup and left it to set

We made 3 moulds this way with the wax bones inside, but I will be uploading a more in-depth video showing the process of the two wax brick moulds once I have finished editing it!