Residency at The Playground week 1

Accessibility Project, Internship at 3rd Rail, Residency at The Playground, Weekly Summaries

“The Playground is offering a 2-month summer residency for ten 2019 graduates from Camberwell, Chelsea and Wimbledon. This is a socially engaged residency and we invite creatives to be resident one to two days a week. The residency involves an exchange of four hours towards working with local communities in a public programme. This could include working towards a showcase of local peoples’ art, assisting at a public event, or contributing curation skills. The residency and the public programme will be coordinated by The Playground staff. As part of the summer residency graduates will get: • The opportunity to curate and exchange skills and creative practices with the local community through activities and events.
• Access to studio space at The Playground Monday-Friday 10am-6pm.
• Practice development through Careers and Employability and training on working with community groups.
• Kitchen access (free tea and coffee).
• The opportunity to be part of a pool of workshop leaders and assistants for further paid work.

About the Playground: The Playground is a space for us all to meet, hosted by Camberwell College of Arts, to share our interests and find ways to achieve new things together. In the coming months we aim to make things happen in this space for all ages through multi-arts events, showcasing opportunities, workshops and open access to lo-tech making and digital technologies.”

– info taken from The Playground Summer Residency application form

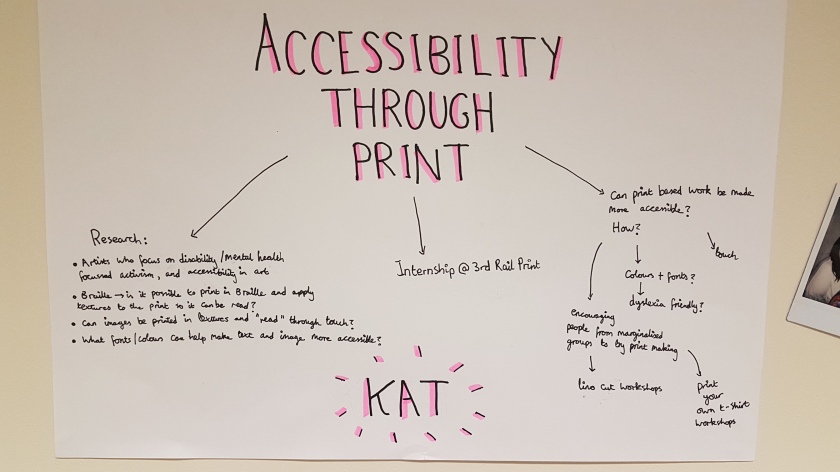
I applied for this residency and got it! As part of this I have given myself a project further exploring accessibility in the arts and the gallery space, leading on from my river project that I worked on during the MA. As I also have the internship at 3rd Rail Print Space I have decided to focus on accessibility in print. Print based work can be quite inaccessible for those with visual impairments, and reading and comprehension difficulties, such as dyslexia- so I want to challenge this and explore how we can make print based works more inclusive.

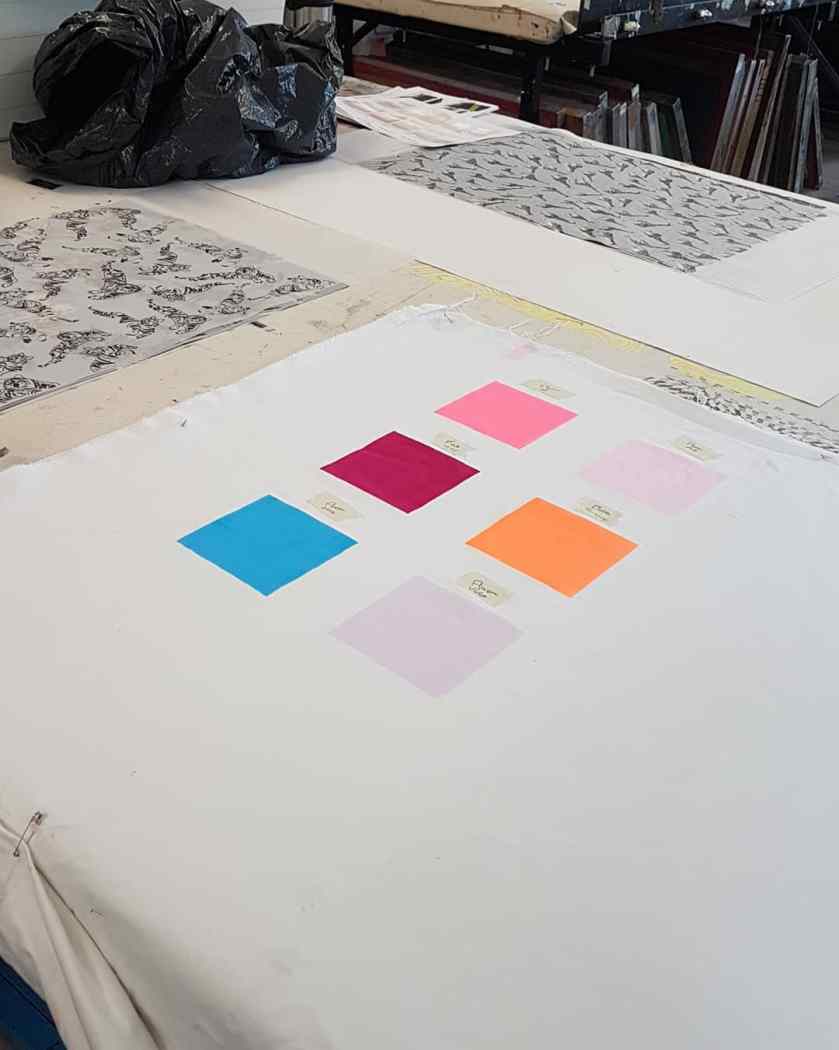
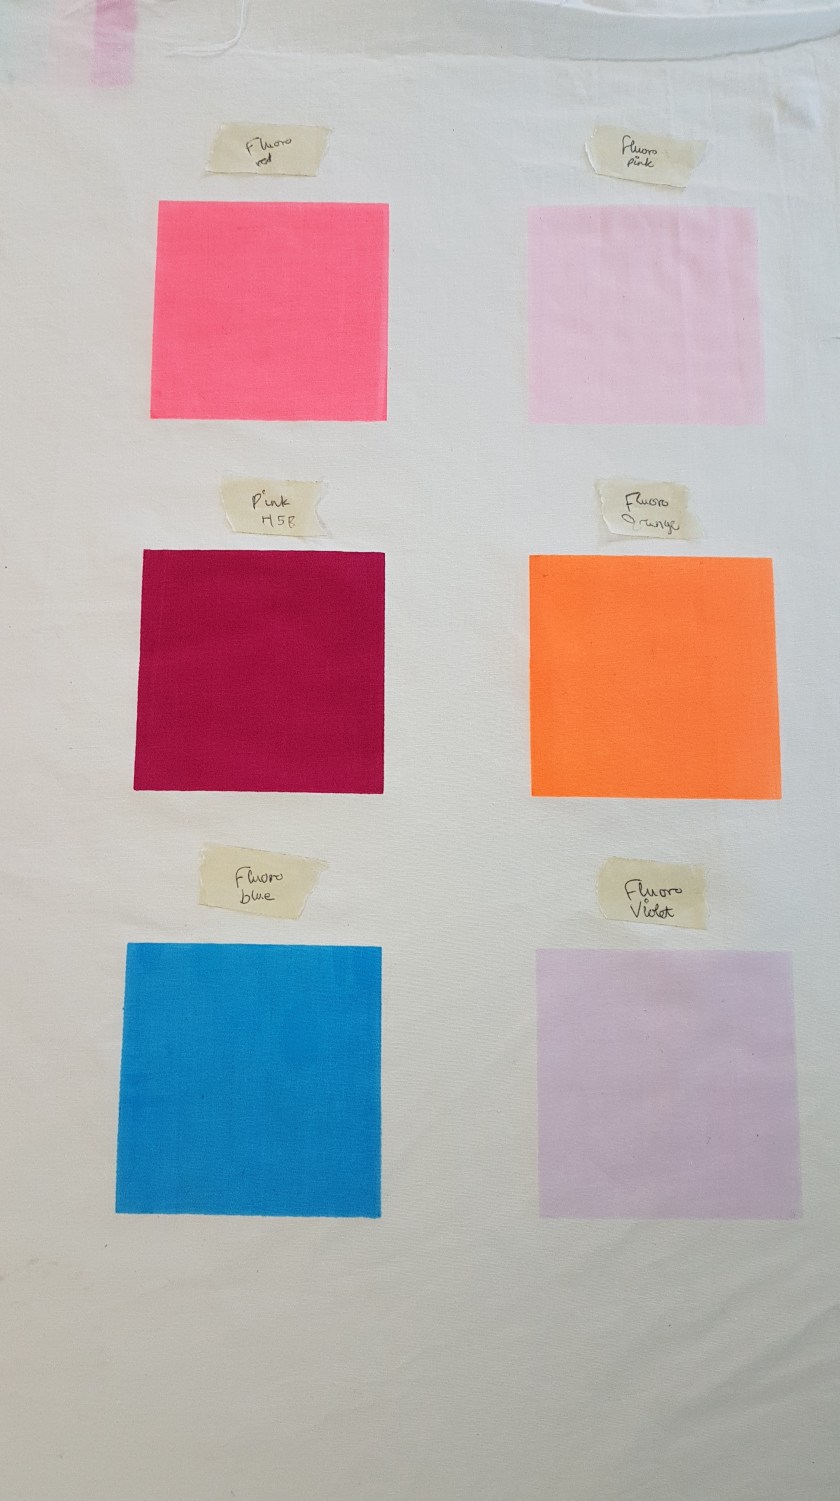
Here is a photo of my wall space behind my desk at The Playground, and a photo of what I’ve written up so far about this project:

IMG_20190812_183714_723.jpg20190812_175352.jpg

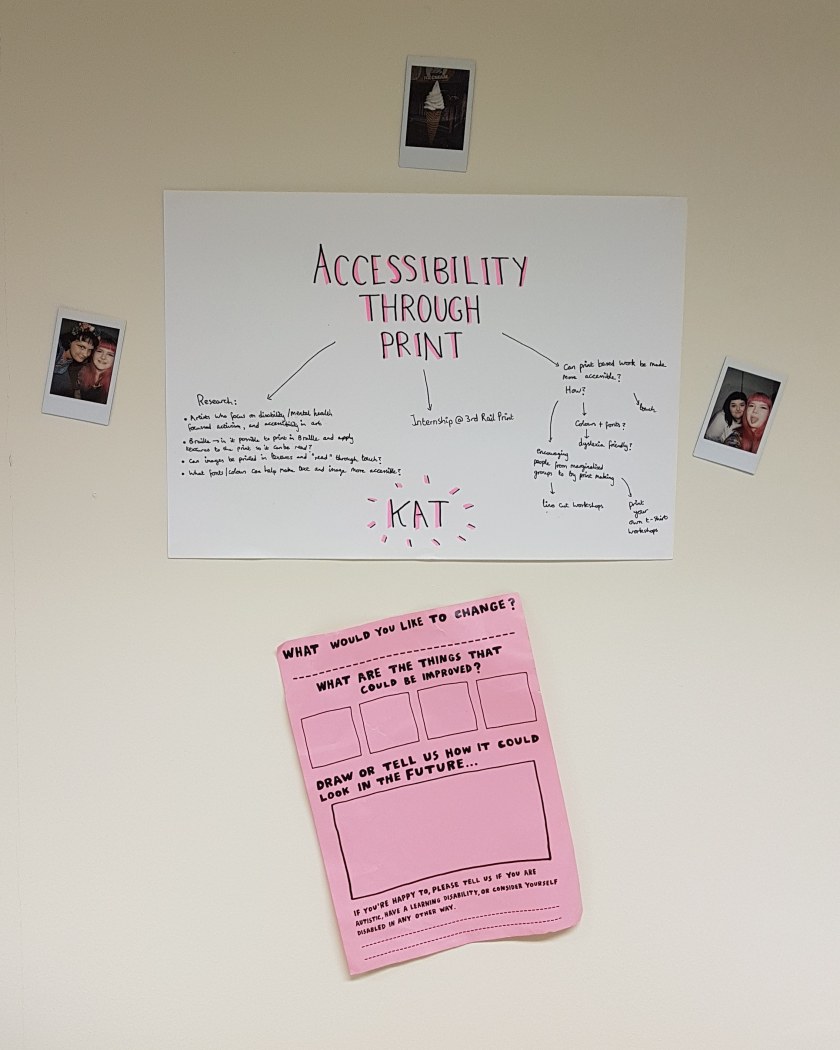
The pink sheet was taken from a current exhibition at the Wellcome Collection that I visited two weeks ago, and I think it helps to set the focus for this project.

Pigment Samples Project

Internship at 3rd Rail, Weekly Summaries

Second week of my internship at 3rd Rail Print Space and I have been given a project to work on, which is super exciting!

I’ve been tasked with creating a set of pigment sample swatches on fabric to make into a book of swatches for clients, and also to scan and digitize these for the website.

What I’ve done so far:

  • Made a file of 10cm × 10cm squares, each with a 3cm border of blank space around them on Photoshop, which I then printed onto film
  • Coated and exposed a 48 silkscreen for fabric with the 6 square design
  • Mixed half of the pigments up with transparent fabric binder, ready to be printed with and made note of which ones I had and hadn’t mixed yet
  • Ratio of 6g of pigment to 100g of binder
  • Printed 6 of these colours onto the fabric (pinned and ironed out first)
  • Ran those 6 through the baker machine

I think one of them (fluoro orange) will need to be done again as it has a mark, but I am happy with the other five. I am concerned that the other fluoro colours aren’t as bright as I think they should be, but I followed the ratios correctly, and they match the booklet from the company, so I’ll check with my manager when I’m back in on Thursday. This is an ongoing project that I’ll be working on whenever it’s quiet during the 9-5 of my internship, until I have all 19 colours printed, scanned, edited and uploaded online as well as physically to do be made into a swatch book. This is a really good way for me to learn all the stages of the process, so I’m really pleased to have been given this to do!

Weekly blog 24/06/19 – 28/06/19

river project, UNIT 2, Weekly Summaries, Weekly To Do Lists, Work in Progress

Monday 24/06/19

  • I also picked up one of the big 3D printed bones, shown in the video below
  • The ceramic bones have been fired with the glaze on and I am really happy with how they turned out! The textures are really highlighted by the glaze, and they have that new ceramic sheen which is really satisfying to look at and to handle

This slideshow requires JavaScript.

  • Worked on the aluminium pieces- the dremels are all busted, so I tried using a different tool, but the aluminium was so soft that it clogged up the bit
  • Ended up using a saw, files, and sandpaper to work on them by hand instead- 3 of them just need to be worked into with the engraving tool, and the other 2 still need some work with the hand tools

This slideshow requires JavaScript.

Tuesday 25/06/19

  • Spent most of today painting and sorting out my space for the show- I just need to sweep and mop the floor and get the table and stools in and it is basically ready to go
  • got my table top cut in the wood workshop, and painted it with the first coat of white
  • grabbed the black trestle legs left behind by the BA students for my table

This slideshow requires JavaScript.

  • Picked up another of my large 3D prints- this one looks a lot smoother that the first one, but the technicians were not sure if it was due to using a different 3D printer, or the file type
  • Sent two more giant bones to print
  • Also discussed my Selected Showcase idea with Jonathan, and tested out projecting the video onto the 2 big 3D prints- I really like how it looks but it comes with a set of challenges I will discuss on a separate post

This slideshow requires JavaScript.

Friday 28/06/19

  • Spent the last two days very ill, but got back in today, and did some more work on my 3D prints, as the foundry and metal workshop were both shut

This slideshow requires JavaScript.

Weekly Blog 17/06/19 – 21/06/19

river project, UNIT 2, Weekly Summaries, Work in Progress

Monday 17/06/19

  • spent most the day working the BA degree show private view, so I didn’t have much time to do work
  • I did pick up my 3D printed bones, and worked on them a little though

This slideshow requires JavaScript.

Tuesday 18/06/19

  • Two of the 3D prints I collected yesterday need to be sent to print again, as the supports are where a lot of the detail was supposed to be, and as I remove the support I am also removing the detail, so I will send these to print again this week, and choose somewhere different for the supports to go- as shown in the photos below
  • to make the 3D printed bones look “finished” I have been using pliers, sandpaper, and files to get rid of the supports, and the marks left behind on the bones, although I haven’t been able to completely remove these traces, so I suppose it is just part of the nature of the material
  • the 3D prints are very light, much like the real bones, but feel pretty solid

This slideshow requires JavaScript.

  • the photo below shows the iPad 3D scan and print next to the Einscan 3D scan and print- the quality is vastly different, as you can see- the Einscan actually has the textural surface of the bone, and is much less pixelated looking than the much rougher iPad scan
20190620_140330.jpg

side by side of the iPad scan and Einscan

Thursday 20/06/19

  • I decided to try and work on the aluminum pieces today, but as I clamped one of them in the vice it cracked, and Lindsey had to help me seal the crack with aluminum filler and epoxy resin
  • This will need to be sanded down once the resin filler has dried

This slideshow requires JavaScript.

  • my ceramic bones have been biscuit fired, below is what they looked like once they had been fired, before I glazed them

20190620_113056


Friday 21/06/19

  • glazed my bones today- the photos below show the glazing process, and the bones once the glaze had dried and was ready to be fired again

This slideshow requires JavaScript.

  • to glaze the ceramic bones I had to first mix the glaze very thoroughly, then using the metal tool shown in the photo I had to clamp each bone and dip it into the glaze, shaking it gently to make sure the coating was even, then working the glaze into the textures of the bones with my finger and a brush
  • I then had to remove the glaze with a damp sponge anywhere that the surface of each bone touched the worktop- if you don’t do this, when the ceramic pieces are fired the glaze melts and sticks to the bottom of the kiln, which means the pieces will probably be destroyed when you try to remove them
  • I have circled the places I removed the glaze in red in the photos below to demonstrate

This slideshow requires JavaScript.


Weekly blog- 10/06/19 – 14/06/19

Assessment, river project, UNIT 2, Weekly Summaries, Weekly To Do Lists, Work in Progress

TO DO:

  • Upload last weeks weekly blog
  • create short videos of the 3D scanning process and upload with notes
  • work on Symposium video
  • continue working in Ceramics on the clay bones
  • finish 3D scans with Einscan, edit them on Meshmixer, and send as many as pos to print this week

Monday 10/06/19

  • came in for the afternoon and completed another clay bone in the Ceramics Studio, with another almost finished. I also pressed some clay into 3 of the gel flex moulds before I left, so they should be firm enough for me to pull out of the moulds a little easier in the morning
  • I found that working with the clay when it is harder is closer to working with the wax like I am used to so it was a little easier, although I am going to need to pick up the pace if I want to make them all in both the lighter colour clay, and the terracotta. I wanted to make doubles of each too which means more work. I’ve actually lost one of the original bones, and the pieces of jaw have been difficult to cast well, so that means I have 5 bones to display. This still means that I’ll need to make 20 ceramic bones though if I stick to my original plan of 2 of each in both types of clay, which is a daunting task. I think I might end up only making one of each, and if they break in the exhibition then they break, but I’ll have to see what progress I can make this week.
  • I also went to learning zone, to make some process videos, and work on finishing some of the draft posts saved on my blog, and so far I have finished and published 4, plus this post which I will publish at the end of the week

Tuesday 11/06/19

  • Finished 2 more ceramic bones, and have another 2 half done (one of them is frustrating me so I started another one and kept going back and forth between the two)
  • I now have some bones and a few small things made out of the Earthenware Scarva drying on the drying racks, which I intend to fire when Tas next lights the kilns. I may experiment with glazes on the other objects, to see if I want to glaze the ceramic bones or not.
  • Also sent three of the Einscan 3D bones to print, they should be ready for me to pick up tomorrow
  • Jonathan showed me some tricks on Meshmixer with one of my scans, so hopefully I’ll be able to finish it on my own
  • Picked up the iPad scan 3D print that I sent to print last week, and it looks good- low poly and only the shape, but good as a test

20190611_150836

  • Screenshots of the 3D printing software, Cura, below. You can set the size of the objects here (which I kept the same as the scans, meaning they will be the same size aprox as the real bones) and you can also tell the programme to automatically build supports for your objects which will print with it. We arranged them so that the supports will be touching, to save space and the filament.

This slideshow requires JavaScript.

This slideshow requires JavaScript.

Thursday 13/06/19

  • Was unable to attend the group session due to illness, so instead I added some more bits to a few drafted posts, including this one, and finished another post. I also had a play around on Meshmixer with the more difficult bone (the 3 I sent to print only needed minimal fixes). I have managed to sort it out a bit, but I think I will need Jonathan’s assistance to get it ready to print. (Screenshots below)
  • this same bone is also proving to be tricky to sculpt, due to how big the inner gap is- it is very easy to squash in the soft clay, and prone to falling apart

This slideshow requires JavaScript.

Friday 14/06/19

  • Finished the clay bones I was working on- I now have 1 of each of the main five, and a spare of one of them which are on the drying rack
  • Spent all day working on those, they should be ready to fire next week

3D scanning with Einscan

river project, UNIT 2, Videos, Weekly Summaries, Work in Progress

I mentioned this new 3D scanning available in the 3D workshop briefly in my weekly summary post, but I thought I should probably do a separate post for it, as it is a really exciting piece of kit that I have learnt to use.

This slideshow requires JavaScript.

The Einscan is a piece of kit and accompanying software for 3D scanning, which Jonathan (tutor) mentioned was now available for use in the 3D workshop during our one to one tutorial. You start by setting up the software and kit, by calibrating it- you put the calibration stand onto the turntable, and follow the instructions on the software- rotating the removable board as shown on screen so that the dots align. You rotate the board three times, and in-between each one the turntable rotates it 360 degrees to calibrate the camera. Jonathan (technician) explained that the scanner builds the 3D model by sending out beams of light across the object- the way the light bends around the object is then captured and is used to build the model. Once it was calibrated we used a glue gun to attach the bone to a clear plastic rod embedded in a small piece of wood, much like when I 3D scanned with the iPad and with the photogrammetry- the rod acting as a support. Most of the bones had to be scanned twice, with the bone moved into a different position and glued before being scanned the second time. Jonathan then showed me how to match the two scans up on the software to produce the finished model. (he showed me this on Thursday last week, which is why I ended up with the mutant bone scan, as I didn’t know how to match the two scans up).

I still have one more bone to scan, and possibly one to redo, but I have made really quick progress with this and I’m really happy with how the scans are coming out! As you can see from the video, the details and texture are being picked up much better than they were with the iPad, although not quite as well as the photogrammetry- however this has a much higher success rate and is much faster, so I think the prints I get from these scans will probably be the final ones I put in the show, which is very exciting! I really want to play with these scans on blender- maybe animating them in some way, and I would also like to play around with scale if I have time- printing them as small as possible, and as large as possible. If I have time for these experiments, and if they go well, I am considering applying for the Selected Showcase at our end of year show- I envision displaying a short animation of the digital 3D models, or perhaps a few still images, alongside some huge and tiny 3D prints of the bones.

To Do: 
– Scan the last bone
– clean the scans up on Meshmixer
– send the scans to print


Weekly blog 03/06/19 – 07/06/19

Photographs, river project, UNIT 2, Videos, Weekly Summaries, Work in Progress

Monday 03/06/19

  • Took moulds from foundry down to Ceramics studio and started testing them out
  • The clay is much softer than anticipated- I am used to more solid materials such as the wax, so de-moulding has proven more difficult- the clay loses shape as soon as you try to pull it out of the moulds
  • I found leaving the clay in the moulds to dry a little helped, but not much
  • I only managed to get one clay bone finished; I had to do a lot more work to it than I was used to doing with the wax to get it to look right, using the real bone for reference

This slideshow requires JavaScript.

  • I also popped into the 3D workshop to chat about the new scanner with the technician, Jonathan, and ended up doing a scan of one of my bones then and there

This slideshow requires JavaScript.

Tuesday 04/06/19

  • I booked out the photography studio last week for this morning, to photograph all my sculptures so far, with the help of Richard, the technician
  • Ended up coming back after lunch and staying there til 3.30ish, as some pieces proved trickier to photograph

This slideshow requires JavaScript.

  • I took 360 pics of all the pieces except for the two brick casts and the bronze casts, and I plan to animate them into little gifs for my website
  • I learnt a lot about how to light different shapes and materials, which I hope I can try to mimic at home with a flexible desk lamp, fabric, and a white table or sheet- Richard definitely taught me that you don’t always need the fancy equipment available at uni
  • Didn’t get time to go to ceramics again, as planned, so I went to the 3D workshop to do more 3D scans instead
  • I ended up with a few fixable scans, and one mutant scan- I scanned it twice at two different angles, but the software stitched it together wrong, giving me a mutant bone

20190604_164439(0).jpg

Wednesday 05/06/19

  • Made progress on remaking my Symposium video (I lost the entire thing because the programme I was using crashed)
  • Had to go to work in the evening

Thursday 06/06/19

  • Morning group tutorial- we discussed show details and I am happy with the space I have been allocated
  • Edited one of the iPad bone scans and sent it to print
  • Made some more progress on remaking the symposium video

Friday 07/06/19

  • Visited Jonathan in 3D and scanned the bones that went wrong on Tuesday- he showed me how to do multiple scans and match them up to get a better 3D model
  • I have one bone left to scan- I just need to do that and clean up the scans on MeshMixer and they will be ready to 3D print

3D scanning photogrammetry

UNIT 2, Videos, Weekly Summaries, Work in Progress


The set up for photogrammetry is the same as for scanning with an iPad, as you can see from the set up photos above. Much like the iPad you need to capture a full 360 of the object you are scanning, however the process takes longer, and is harder to get right. You have to take around 50 images of the object, moving very slowly around it as you photograph, making sure to keep the camera the same distance from the object and the same angle as you do it. These photos then get uploaded into a programme called Autodesk Recap Photo, which stitches your photos into a 3D model.

The images included above are of one of the first attempts to scan one of the bones using this technique- unfortunately the back of the bone didn’t come out.

the video above shows what I mean better- although the detail has been captured beautifully, only half of the bone has come out as a 3D model. I tried a few times with no more success than that, and the software takes a long time to make the model only to find out that it hasn’t worked. I might need to find another method of 3D scanning, as the iPad scans lack the detail that I want, but photogrammetry is proving to be really difficult!


3D Scanning using iPad 14/01/19

river project, UNIT 2, Videos, Weekly Summaries, Work in Progress

This video is of the Digital Media Technician Adamina demonstrating how to use the 3D scanning software and piece of kit for an iPad. This is one of the more basic 3D scanning techniques available, and as you can see the scan hasn’t picked up the details of the bone, only the rough shapes.

The next step for me is to install a free programme called MeshMixer and cut off the pen, as it came up in the scan, and seal up the piece. Then it will be ready to be 3D printed on Monday next week.

This slideshow requires JavaScript.

These photos show the set up in the studio, including white backdrop, plinth, and lighting set up. We suspended the bone from nylon wire so that we could scan the whole object, and used a pen and blueback underneath it for stability- we needed it to be still for the scanning to work.

Next Steps:

  • download MeshMixer and clean up the scan for printing
  • meet with Adamina next Monday (I have booked an appointment with her) and send the scan to print
  • hopefully next week we will also experiment with photogrammetry, which she mentions in the video. This process is a bit more lengthy and complicated- I will have to borrow a camera and lens from uni, and photograph the object multiple times from multiple angles, and then upload these photos to a specialist programme that stitches everything together to create a 3D model. This will take a fair bit of time, and I might still need to work into the objects on the software to clean them up before we can send them to the 3D printer

Glass Wax Tests 11/01/19

Photographs, river project, UNIT 2, Videos, Weekly Summaries, Work in Progress

This slideshow requires JavaScript.


Some photos taken of the process of casting with glass wax- the melting glass wax, the casts full of glass wax, and photos of the failed jaw bone casts and brick cast. Casting the brick hollow with glass wax is proving troublesome- the wax is very brittle and the sides of the cast keep breaking as I try to de-mould it. I will try one more time to cast it hollow but a bit thicker and if that doesn’t work I might have to cast it solid instead. The jaw bone pieces kept failing as the glass wax is too thick and not hot enough to flow all the way through the moulds- I will try to get it hotter next time, but I have to be careful in case the wax gets too hot and the colour changes.

Video demonstrating the properties of glass wax and the casting process.
I wanted to explore the properties and materiality of glass wax, and these are the results so far.
Clip 1: the chunk of unmelted glass wax, demonstrating what it looks like before it is melted and cast- you can see how the light refracts and passes through it.
Clip 2 and 3: the glass wax as it melts, showing the viscosity and how it stretches and flows much like real glass when in molten form. It is very different to other waxes I have used in the past.
Clips 4 and 5: the first attempts at casting the jaw bones in glass wax- as you can see the wax didn’t flow completely through the moulds as it was not hot enough and cooled too fast. I will try again but with the wax much hotter so hopefully it will flow through the moulds properly.
The rest of the clips: the other bone casts in glass wax.

This slideshow requires JavaScript.

These photos show the second attempt at casting the jaw bones in glass wax (still not hot enough), the glass wax casts all together, the broken hollow brick cast (the details were captured beautifully, it’s just a shame that the sides broke), and one of the glass wax casts lit by Jonathan’s phone torch- as an experiment to see how light travels through them. I think going forwards I would like to photograph the glass wax pieces with a light source beneath them like this, but using a more professional set up.

Notes on glass wax:

  • Properties- melts differently to waxes I have used in the past (i.e. the green and orange waxes used in uni, soy wax, paraffin wax, beeswax)
  • As it melts it goes quite stringy and is still very thick and viscous, can be stretched into glass-like threads that look like nylon thread
  • It sets VERY quickly and needs to be quite hot to pour well, but you have to be super careful not to overheat it as it can make the wax change colour
  • You can add oil paint as a pigment to glass wax, but I’m more interested in how it looks originally- like a translucent glass
  • I might do one or two in colour just to see what it looks like, but we’ll see
  • It is quite brittle- I tried to make a hollow brick cast and the sides shattered (like glass) as I tried to remove the cast- if I retry this I will need to make it thicker
  • It picks up detail really beautifully and I’m definitely impressed
  • I need to redo the jaw bones in glass wax as the wax wasn’t hot enough and as a result didn’t flow through the moulds properly