Work in the Final Show

Assessment, Exhibitions, Photographs, river project, UNIT 2, Videos

20190703_15483720190703_154846

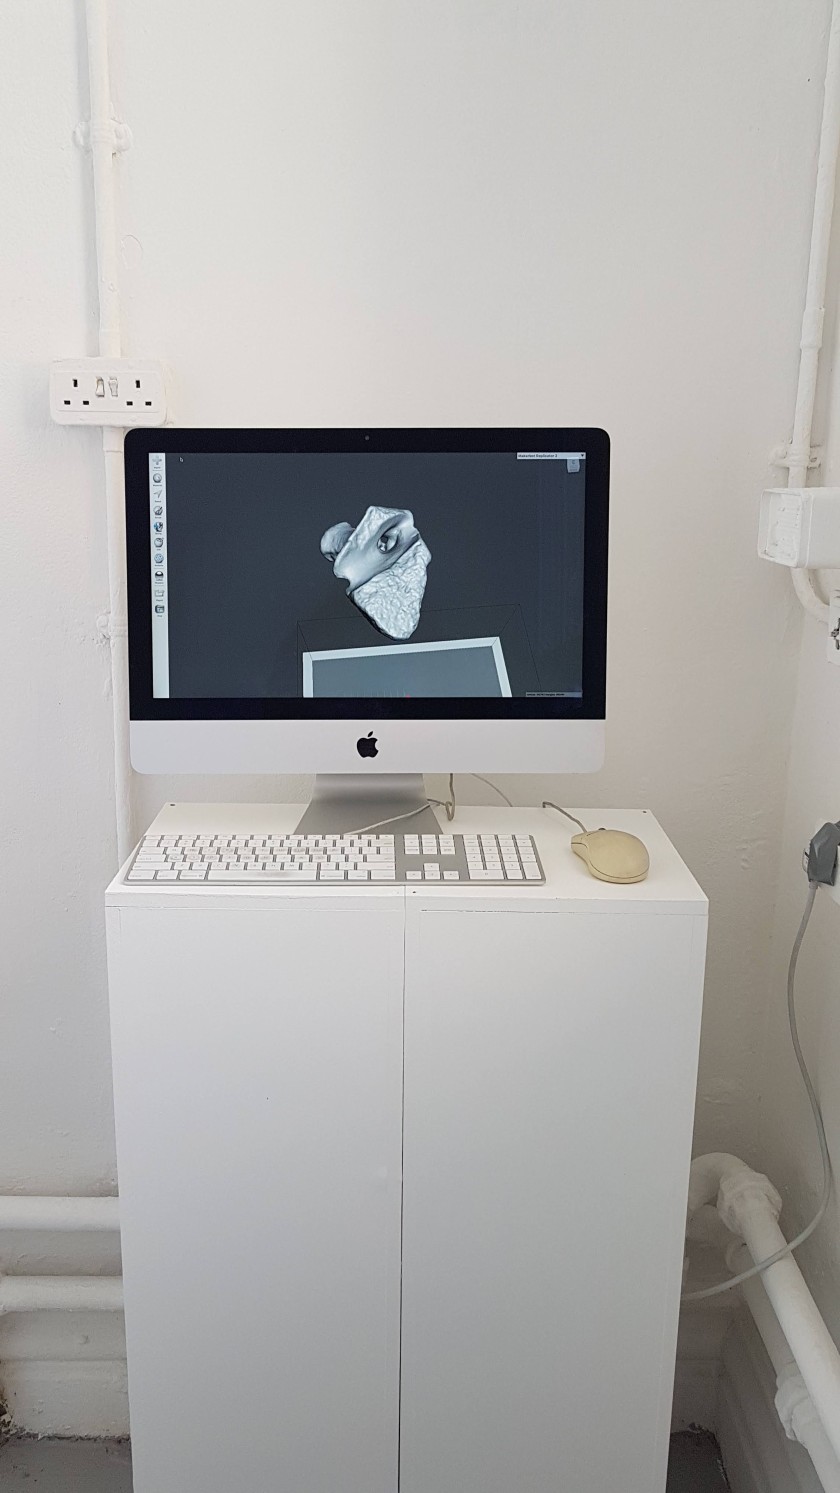
(I took this photo before I swapped out the keyboard and mouse for the cleaner ones)

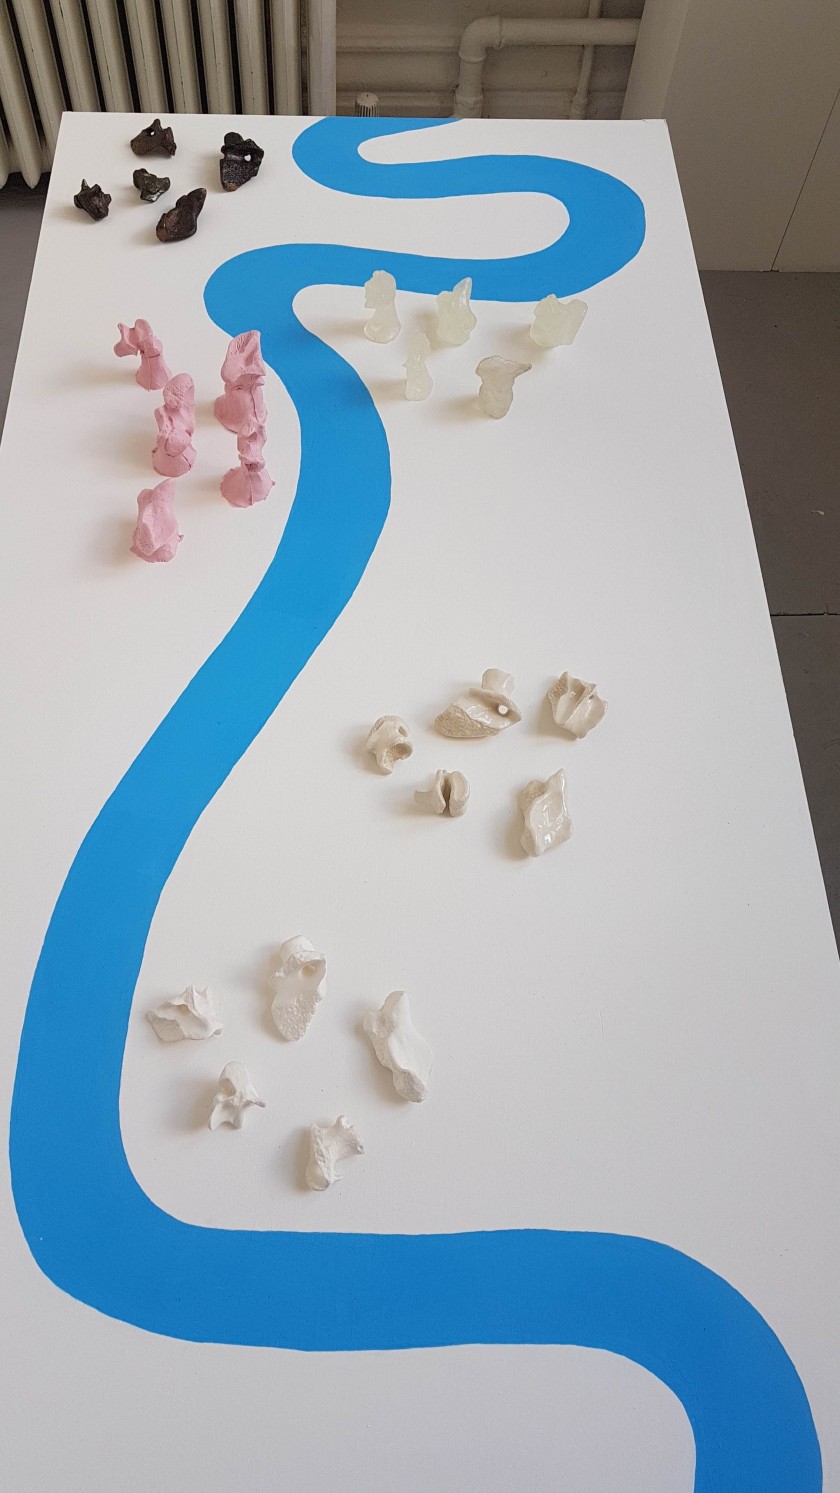
Overall I am surprisingly really happy with how my installation turned out- the room is a really good, well lit space, with large windows, and it looks much better since I painted it, and swept and mopped it. I am also really pleased I was able to make the table top for free from scrap wood, as that saved me a lot of money, and I think it looks much better than the Ikea table tops do anyway. I decided to keep the trestle legs I got from the BA student black, as I liked the contrast (and also I’m lazy and painting over black paint with white would have been a nightmare) and I think it helps to break up all the white in the room. I had to ask my classmates to tell me the river Thames I painted into the table top looked fine, because otherwise I never would have stopped trying to touch it up and make it “perfect”. Considering I didn’t use masking tape or anything except the pencil outline and paint I think it came out well, and is fairly recognizable for what it is, without any need for labels or a more literal representation.

In terms of curating the objects for the exhibition I feel that I have chosen the right amount, and the right selection of materials- I was not able to get the aluminum pieces to a high enough standard, so they have been omitted, the other lot of glass wax pieces I made came out much less transparent and much milkier looking (due to the touch of blue wax I added to offset the yellowing that had happened from the glass wax being overheated) so I left those out and put in the first lot I made, which are much clearer and more transparent. I also left out the herculite casts as they were not up to standard, and are also still fairly fragile compared to the other materials, and I left out the iPad 3D prints, as the Einscan ones were of much higher quality.

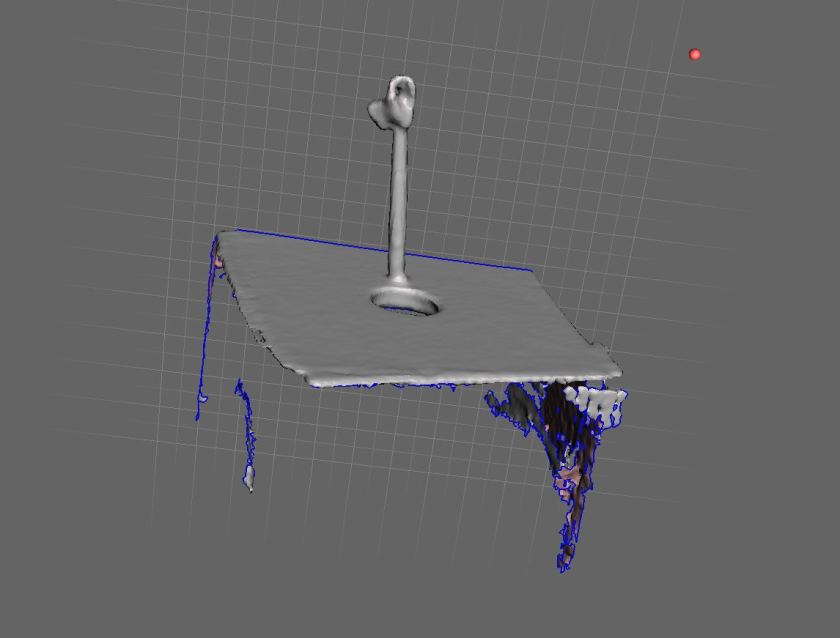
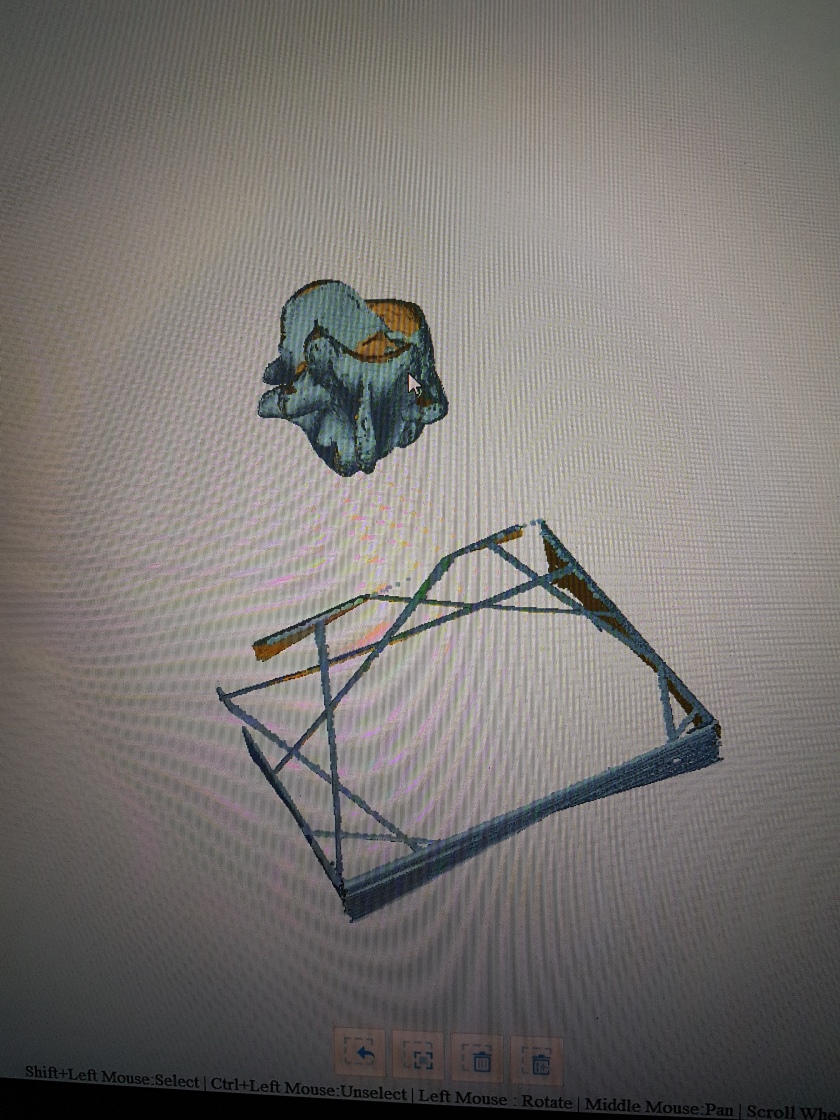
In terms of the digital work on screen I am very happy with how it looks- I have chosen one of the larger bones that has a particularly interesting form for the audience to play with, and I feel that Meshmixer was a good choice of programme for the audience to use, as it is fairly simple programme to mess around on- hopefully people will use it and enjoy playing around! I made a 2 minute video, which is on one of my earlier posts, which shows how to move around the 3D model, how to zoom in and out, and some of the basic tools they can use on Meshmixer, in case anyone gets stuck, and this is on the Mac desktop, titled “How to Use”.

I have discussed this previously, but I chose the five bones that I did as the jaw bone pieces proved difficult to cast in some of the methods, so much so that I could not get a good cast of them in the herculite, or glass wax, so I decided not to include them at all. Also they are a bit less ambiguous than the other bones, so I felt it best to leave them out, as I like the ambiguity of the shapes of the other bones. Also I left out the brick, despite having cast it in herculite, glass wax, bronze, and aluminum, as I felt it looks odd to have 5 bones and then the brick by itself. This is a shame, as the casts of it are quite beautiful, but it would have stood out too much, so it was necessary.

when I think back I thought I would have recreated the rope, brick, plastic bottle, and driftwood in different materials like I did originally with the vacuum forming, for the final show. Unfortunately the rope and bottle became unusable after the vacuum forming, and the driftwood turned out to be quite complex to cast, so I never ended up doing it. The bones became my focal point quite by accident, as I found myself drawn to the shapes and textures of them when I first started experimenting with the macro lens back in the first term. I don’t regret this, because I feel like I have made a strong body of work, that I am very proud of.


Selected Showcase Pitch

Assessment, river project, UNIT 2, Videos

Unknown Landscapes from Kat Outten on Vimeo.

Projecting onto 3D Bones TEST from Kat Outten on Vimeo.

The Pitch:

I want to expand my practice further into the digital and into installation work, and this piece will offer me the chance to try it out. I would like to move the moveable wall in the space to create a smaller, darker area for the installation, so that I can project my video onto a wall. I want to hang 4 of my large scale 3D prints from the ceiling, so that some of the projection falls onto the surfaces of the 3D prints. The video is made of clips of the bones that are the main focus of my primary project, shot with a macro lens close up, and the 3D prints are of the bones, but 363% larger. These are both explorations of the same objects utilising digital technology to render them unfamiliar.
I am aware that the exhibition is up all summer, and that you might have reservations about the projection, but I live less than 10 minutes walk from the uni, and also work nearby and I would happily leave contact details in case the projector goes wrong. The projector could be left on loop, and I have no holidays planned so I hope this won’t prevent you from choosing my work, as I would appreciate the chance to explore this new avenue in my work.


So I really want to take an older piece of digital work of mine, the Unknown Landscapes video, and project it onto the giant 3D printed bones I have made- I originally hoped to make a new video piece using my 3D scans and Blender, but my 3D scans weren’t loading on Blender at all, and I need to figure out why.

I think I need to push my digital skills further in the coming months, as when I finish the MA I am going to struggle to find workshops like we have at uni. I have already been looking at print making studios, ceramic studios, and foundries in London and asking for work experience/internships/trainee opportunities so that I can access certain facilities, but it may be some time before I find something like that or can afford to pay out for access to those facilities. Due to this I want to play around with digital work a little more, as it is more accessible- Meshmixer and Blender are free, and there is other free open source software I can try too- all I need to do is download them on my laptop and get myself a bigger desk so that I have a bit more space to work with. I know it will take time and practice, but at least I can still make work some how whilst I save up and look for affordable studio spaces and workshops. This work is an attempt to step into that, and give it a try.

3D scanning with Einscan

river project, UNIT 2, Videos, Weekly Summaries, Work in Progress

I mentioned this new 3D scanning available in the 3D workshop briefly in my weekly summary post, but I thought I should probably do a separate post for it, as it is a really exciting piece of kit that I have learnt to use.

This slideshow requires JavaScript.

The Einscan is a piece of kit and accompanying software for 3D scanning, which Jonathan (tutor) mentioned was now available for use in the 3D workshop during our one to one tutorial. You start by setting up the software and kit, by calibrating it- you put the calibration stand onto the turntable, and follow the instructions on the software- rotating the removable board as shown on screen so that the dots align. You rotate the board three times, and in-between each one the turntable rotates it 360 degrees to calibrate the camera. Jonathan (technician) explained that the scanner builds the 3D model by sending out beams of light across the object- the way the light bends around the object is then captured and is used to build the model. Once it was calibrated we used a glue gun to attach the bone to a clear plastic rod embedded in a small piece of wood, much like when I 3D scanned with the iPad and with the photogrammetry- the rod acting as a support. Most of the bones had to be scanned twice, with the bone moved into a different position and glued before being scanned the second time. Jonathan then showed me how to match the two scans up on the software to produce the finished model. (he showed me this on Thursday last week, which is why I ended up with the mutant bone scan, as I didn’t know how to match the two scans up).

I still have one more bone to scan, and possibly one to redo, but I have made really quick progress with this and I’m really happy with how the scans are coming out! As you can see from the video, the details and texture are being picked up much better than they were with the iPad, although not quite as well as the photogrammetry- however this has a much higher success rate and is much faster, so I think the prints I get from these scans will probably be the final ones I put in the show, which is very exciting! I really want to play with these scans on blender- maybe animating them in some way, and I would also like to play around with scale if I have time- printing them as small as possible, and as large as possible. If I have time for these experiments, and if they go well, I am considering applying for the Selected Showcase at our end of year show- I envision displaying a short animation of the digital 3D models, or perhaps a few still images, alongside some huge and tiny 3D prints of the bones.

To Do: 
– Scan the last bone
– clean the scans up on Meshmixer
– send the scans to print


Experimenting with Meshmixer 05/06/19

UNIT 2, Videos, Work in Progress

Meshmixer Sped up Test from Kat Outten on Vimeo.

After my first attempt editing an iPad scan of my bone didn’t go so well (you could see where I dragged the mesh, and this was visible on the 3D print) I was a bit hesitant to try again. This video was originally a 5 and half min screen cap of some playing around with another bone scan, to get a feel for the tools and how the programme works, which I sped up to 2 mins. You can see me trying different tools and playing with softening the shape, which I didn’t end up keeping.

screen cap bone 2 ipad.JPG

This screenshot shows the bone before any editing was done- the raw scan.

I feel a little more confident to use Meshmixer now, and I plan on cleaning the rest of the iPad bone scans up, just to see how the shapes have turned out.

This slideshow requires JavaScript.

Weekly blog 03/06/19 – 07/06/19

Photographs, river project, UNIT 2, Videos, Weekly Summaries, Work in Progress

Monday 03/06/19

  • Took moulds from foundry down to Ceramics studio and started testing them out
  • The clay is much softer than anticipated- I am used to more solid materials such as the wax, so de-moulding has proven more difficult- the clay loses shape as soon as you try to pull it out of the moulds
  • I found leaving the clay in the moulds to dry a little helped, but not much
  • I only managed to get one clay bone finished; I had to do a lot more work to it than I was used to doing with the wax to get it to look right, using the real bone for reference

This slideshow requires JavaScript.

  • I also popped into the 3D workshop to chat about the new scanner with the technician, Jonathan, and ended up doing a scan of one of my bones then and there

This slideshow requires JavaScript.

Tuesday 04/06/19

  • I booked out the photography studio last week for this morning, to photograph all my sculptures so far, with the help of Richard, the technician
  • Ended up coming back after lunch and staying there til 3.30ish, as some pieces proved trickier to photograph

This slideshow requires JavaScript.

  • I took 360 pics of all the pieces except for the two brick casts and the bronze casts, and I plan to animate them into little gifs for my website
  • I learnt a lot about how to light different shapes and materials, which I hope I can try to mimic at home with a flexible desk lamp, fabric, and a white table or sheet- Richard definitely taught me that you don’t always need the fancy equipment available at uni
  • Didn’t get time to go to ceramics again, as planned, so I went to the 3D workshop to do more 3D scans instead
  • I ended up with a few fixable scans, and one mutant scan- I scanned it twice at two different angles, but the software stitched it together wrong, giving me a mutant bone

20190604_164439(0).jpg

Wednesday 05/06/19

  • Made progress on remaking my Symposium video (I lost the entire thing because the programme I was using crashed)
  • Had to go to work in the evening

Thursday 06/06/19

  • Morning group tutorial- we discussed show details and I am happy with the space I have been allocated
  • Edited one of the iPad bone scans and sent it to print
  • Made some more progress on remaking the symposium video

Friday 07/06/19

  • Visited Jonathan in 3D and scanned the bones that went wrong on Tuesday- he showed me how to do multiple scans and match them up to get a better 3D model
  • I have one bone left to scan- I just need to do that and clean up the scans on MeshMixer and they will be ready to 3D print

SYMPOSIUM 2

2ND YEAR PRESENTATIONS, Assessment, river project, UNIT 2, Videos

I originally made this video for the Symposium 2 for when we were supposed to present the videos to the rest of our classmates, but as I was just finishing working on it (and despite saving the file every five minutes or so) the Mac I was working on crashed and I lost about 4 hours worth of work. This all happened at 4am, 6 hours before we were due to present to the class, and so I ended up giving a verbal presentation with some of the images I used in the video to demonstrate what I was talking about. This was a very stressful and anxiety inducing situation, but I am very pleased that I did it, and that Jonathan and Ed were understanding and allowed me to present the way I did.

This video is a little bit longer than it was supposed to be, and even that was a struggle, as I found I had so much I wanted to show and say. I am fairly pleased with the outcome though, and I feel that it captures my process and research quite well.

I Can’t Help the Way I Feel- My Fat Body

UNIT 2, Videos, Work in Progress


An artwork exploring my relationship with my body existing in a culture that simultaneously glorifies and vilifies food and sells diet culture to the masses. Interspersed with clips of my own body are clips of the John Isaacs sculpture “I Can’t Help The Way I Feel”, previously on display at the Medicine Now exhibit at the Wellcome Collection in London, which depicts a vaguely human form (without the head, arms, and genitals) engulfed in an explosion of fat. This video piece is both a response to that work, and a work in it’s own right. Ideally I hope to display this in an exhibition with works made by other fat artists, projected onto a wall at a large scale, so that it cannot be ignored by the viewer. I would also like to make casts of various parts of my body to display in the space, so that the audience is confronted by other kinds of body to what we are force fed in the media-  tiny bodies, with only certain parts deemed acceptable to be large (i.e. bums and boobs on women, usually- but only if they are smooth and free of cellulite and stretchmarks).

A large part of my struggle with my body image comes from the outside world, from society as a whole. The footage of the bacon roll (a Greggs advert) represents the constant imagery of fast food that we are bombarded with, from television adverts to posters and even giant billboards. Being in London, particularly, means we are constantly surrounded by this, as the city is saturated (pardon the pun) with images of food. At the same time we are also assaulted with images of the “perfect” body, whether that is on the front of every magazine, or for diet pill and fitness regime ads on the tube. This constant war between the food we are reminded is unhealthy, and images that show bodies like mine as the “before” all contribute to my twisted self image, and have fueled my disordered eating for years.

The “we’ve shed the pounds” footage is not from a health or fitness shop though- it is from the window of an EE phone shop. Clearly they are advertising that they have made their products cheaper, but the wording and the imagery of the scales alludes to weight loss- on a shop that has nothing to do with weight! I thought that was pretty ridiculous, which is why I filmed it and included it in this piece. I may also record some footage of the diet and fitness ads on the tube next time I use the underground and add it to the video at a later date, as I feel that would fit with the work. I would also like to play around with adding sound to the piece- I considered recording myself reciting some of my writing and poetry on my body, but I don’t really like the sound of my voice, and someone else’s voice would not work as it is a personal piece. I feel music would be distracting, so I might ask some people I know who work with sound to help me come up with something, as I feel the work could benefit from it.

This is definitely a work in progress, and I am excited to see what I can do with it in the future! When I finish my MA I think I would like to get a group of fat artists together to put on an exhibition and run some drawing workshops in the space, inspired by my original Fat Bodies Drawing Workshop for the Post Grad Community at my uni, but bigger, better and fat artist only! Perhaps this work will be part of it, but perhaps I may have moved on to a different piece by then.

Peckham project low res

Assessment, Exhibitions, Group Project, UNIT 2, Videos

This slideshow requires JavaScript.

Low Res Project- Projection Mapping from Kat Outten on Vimeo.

Edgelands Definition:
” Edgelands are the transitional, liminal areas of space to be found on the boundaries of country and town—with the spread of urbanisation, an increasingly important facet of the twenty-first century world ” –wikipedia

Projection Mapping:

” Projection mapping, similar to video mapping and spatial augmented reality, is a projection technology used to turn objects, often irregularly shaped, into a display surface for video projection. These objects may be complex industrial landscapes, such as buildings, small indoor objects or theatrical stages. ” –wikipedia

When we came in on the first day and were told it would be a group project I was very vocally against it. However I actually ended up really enjoying the project and the work we made. We were told the project was to be about “edgelands” and that the final outcome needed to use the technique of projection mapping, but that was all we had to go on.

I think my reservations came from the fact that most of the group projects I have done in the past have gone badly, because I have ended up in groups that haven’t clicked well. In this case though we all got on well- I kind of naturally took on a leadership role without meaning too, as I suggested we could experiment with the weird little Lomax camera I have that has no view finder and 4 lens that go off one after the other, leaving you with an image in four strips. I went back to mine to collect it, and we spent the first day running around Peckham sharing the camera. We were limited by the 3 rolls of expired color film that I had and the fact that it was only the one camera, but we all got on well and shared the camera quite easily, pointing things of interest out to each other and consulting each other before taking the photos. We also all took videos and photos on our mobile phones, just in case the photos on the Lomax camera didn’t work. At the end of the first day we took the rolls of film to Snappy Snaps to get them developed and ready to pick up the next day on a disk.It was actually a really fun, collaborative day, and we also all collected objects from some of the weird shops and market stalls in Peckham which we decided we may or may not use in the piece of work we needed to create.

Day two was mostly spent making the different parts of our installation- Dwa made a painting of Peckhamplex (the cinema) so we took all the photos we took inside the cinema and made that into a film to be projected onto the blank white space on the painting, and meanwhile someone else worked on the clips of the market stalls we collected, and someone else put together the photos from the Lomax camera together, and others played with the composition of the installation, and made the video of the fake fruit and veg to project onto the empty crates we picked up on the streets. It all ended up coming together really well- it looked really dynamic and was an interesting reflection of Peckham Rye Lane. I also really enjoyed seeing the other groups installations as well, I was really glad that I got to take part!

Project by:

Kat
Dwa
Taiyoh
Betty
Vanessa
Ash

Low Residency 2019, Day 1, 35mm projector experiments and short film

Group Project, Photographs, Uncategorized, UNIT 2, Videos, Work in Progress

This slideshow requires JavaScript.

Some images of the process, and some interesting test images.

The final video- made using my phones camera, and Gabby’s phone camera, a 35mm projector, various materials, and edited with Premier Pro. The spoken part of the video is me reading out the poem I wrote “An Ode to My Vagina”, which I printed and displayed in the Human Manifesto exhibition at CSM, ran by ArtsFems and the LGBTQ Society.

Another video, this time of various clips recorded and edited- I wanted to show more of my process and may revisit these clips at a later date and reuse them.

Despite feeling really unwell today I made it in and managed to make some work I am happy with, so I’m counting this as a win.

3D Printing iPad Scan

river project, UNIT 2, Videos, Work in Progress

The scans using the iPad didn’t pick up much detail, but captured the shape of the bone quite well- I then used Meshmixer to try and get rid of the pen I used to prop up the bone, which was harder than I expected- cutting it off was the easy part, but I struggled to figure out how to seal up the hole left in the mesh. I haven’t shown this part in the video, as I forgot to record it, but you can see on the 3D print where I dragged the mesh across in an attempt to seal up the hole, so I definitely need more practice with this! Overall though I am very happy with how the print came out, for a first attempt I think I did a good job, and going forwards I know I need to practice messing around on MeshMixer to make my other 3D scans and prints look better!

I am planning on scanning the rest with the iPad as well, to see what they come out like, and to act as a back up in case I can’t get them to work with photogrammetry in time.