Residency at The Playground week 1

Accessibility Project, Internship at 3rd Rail, Residency at The Playground, Weekly Summaries

“The Playground is offering a 2-month summer residency for ten 2019 graduates from Camberwell, Chelsea and Wimbledon. This is a socially engaged residency and we invite creatives to be resident one to two days a week. The residency involves an exchange of four hours towards working with local communities in a public programme. This could include working towards a showcase of local peoples’ art, assisting at a public event, or contributing curation skills. The residency and the public programme will be coordinated by The Playground staff. As part of the summer residency graduates will get: • The opportunity to curate and exchange skills and creative practices with the local community through activities and events.
• Access to studio space at The Playground Monday-Friday 10am-6pm.
• Practice development through Careers and Employability and training on working with community groups.
• Kitchen access (free tea and coffee).
• The opportunity to be part of a pool of workshop leaders and assistants for further paid work.

About the Playground: The Playground is a space for us all to meet, hosted by Camberwell College of Arts, to share our interests and find ways to achieve new things together. In the coming months we aim to make things happen in this space for all ages through multi-arts events, showcasing opportunities, workshops and open access to lo-tech making and digital technologies.”

– info taken from The Playground Summer Residency application form

I applied for this residency and got it! As part of this I have given myself a project further exploring accessibility in the arts and the gallery space, leading on from my river project that I worked on during the MA. As I also have the internship at 3rd Rail Print Space I have decided to focus on accessibility in print. Print based work can be quite inaccessible for those with visual impairments, and reading and comprehension difficulties, such as dyslexia- so I want to challenge this and explore how we can make print based works more inclusive.

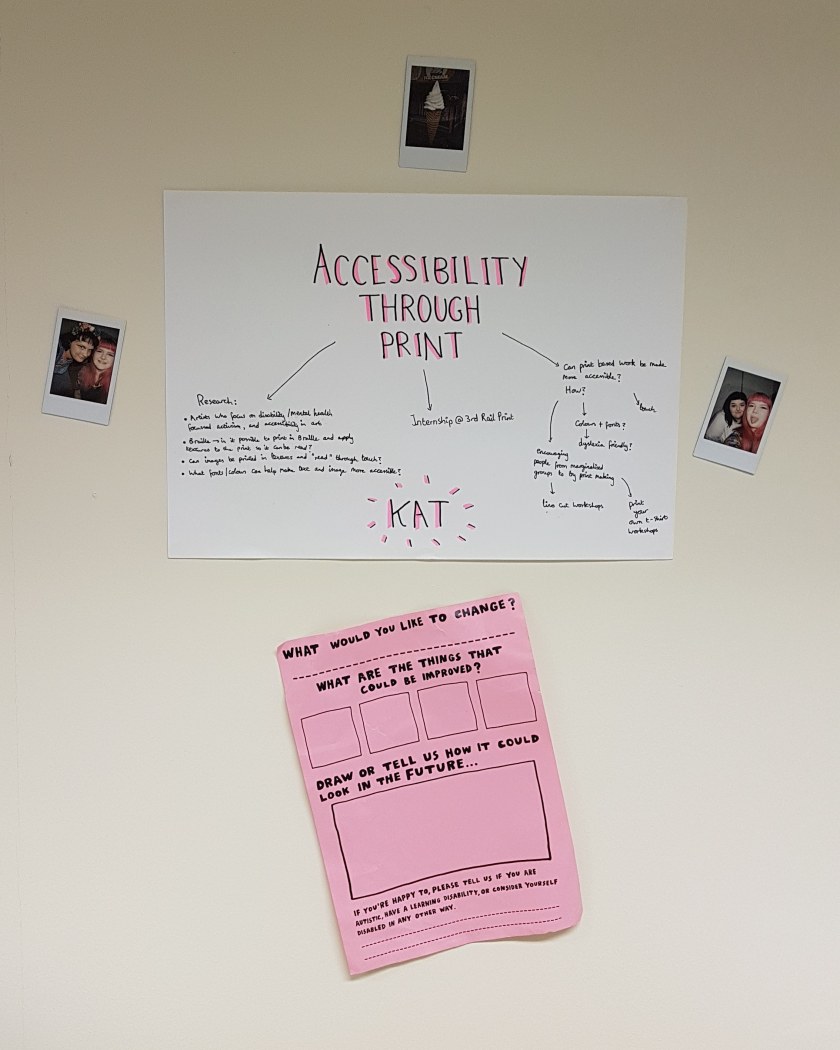
Here is a photo of my wall space behind my desk at The Playground, and a photo of what I’ve written up so far about this project:
IMG_20190812_183714_723.jpg20190812_175352.jpg

The pink sheet was taken from a current exhibition at the Wellcome Collection that I visited two weeks ago, and I think it helps to set the focus for this project.

3D Scanning using iPad 14/01/19

river project, UNIT 2, Videos, Weekly Summaries, Work in Progress

This video is of the Digital Media Technician Adamina demonstrating how to use the 3D scanning software and piece of kit for an iPad. This is one of the more basic 3D scanning techniques available, and as you can see the scan hasn’t picked up the details of the bone, only the rough shapes.

The next step for me is to install a free programme called MeshMixer and cut off the pen, as it came up in the scan, and seal up the piece. Then it will be ready to be 3D printed on Monday next week.

This slideshow requires JavaScript.

These photos show the set up in the studio, including white backdrop, plinth, and lighting set up. We suspended the bone from nylon wire so that we could scan the whole object, and used a pen and blueback underneath it for stability- we needed it to be still for the scanning to work.

Next Steps:

  • download MeshMixer and clean up the scan for printing
  • meet with Adamina next Monday (I have booked an appointment with her) and send the scan to print
  • hopefully next week we will also experiment with photogrammetry, which she mentions in the video. This process is a bit more lengthy and complicated- I will have to borrow a camera and lens from uni, and photograph the object multiple times from multiple angles, and then upload these photos to a specialist programme that stitches everything together to create a 3D model. This will take a fair bit of time, and I might still need to work into the objects on the software to clean them up before we can send them to the 3D printer

Glass Wax Tests 11/01/19

Photographs, river project, UNIT 2, Videos, Weekly Summaries, Work in Progress

This slideshow requires JavaScript.


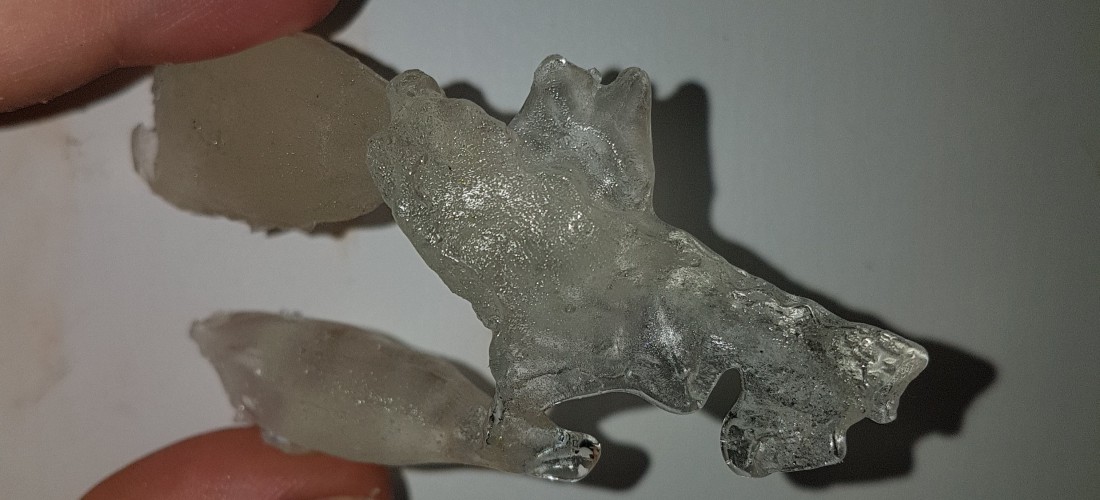
Some photos taken of the process of casting with glass wax- the melting glass wax, the casts full of glass wax, and photos of the failed jaw bone casts and brick cast. Casting the brick hollow with glass wax is proving troublesome- the wax is very brittle and the sides of the cast keep breaking as I try to de-mould it. I will try one more time to cast it hollow but a bit thicker and if that doesn’t work I might have to cast it solid instead. The jaw bone pieces kept failing as the glass wax is too thick and not hot enough to flow all the way through the moulds- I will try to get it hotter next time, but I have to be careful in case the wax gets too hot and the colour changes.

Video demonstrating the properties of glass wax and the casting process.
I wanted to explore the properties and materiality of glass wax, and these are the results so far.
Clip 1: the chunk of unmelted glass wax, demonstrating what it looks like before it is melted and cast- you can see how the light refracts and passes through it.
Clip 2 and 3: the glass wax as it melts, showing the viscosity and how it stretches and flows much like real glass when in molten form. It is very different to other waxes I have used in the past.
Clips 4 and 5: the first attempts at casting the jaw bones in glass wax- as you can see the wax didn’t flow completely through the moulds as it was not hot enough and cooled too fast. I will try again but with the wax much hotter so hopefully it will flow through the moulds properly.
The rest of the clips: the other bone casts in glass wax.

This slideshow requires JavaScript.

These photos show the second attempt at casting the jaw bones in glass wax (still not hot enough), the glass wax casts all together, the broken hollow brick cast (the details were captured beautifully, it’s just a shame that the sides broke), and one of the glass wax casts lit by Jonathan’s phone torch- as an experiment to see how light travels through them. I think going forwards I would like to photograph the glass wax pieces with a light source beneath them like this, but using a more professional set up.

Notes on glass wax:

  • Properties- melts differently to waxes I have used in the past (i.e. the green and orange waxes used in uni, soy wax, paraffin wax, beeswax)
  • As it melts it goes quite stringy and is still very thick and viscous, can be stretched into glass-like threads that look like nylon thread
  • It sets VERY quickly and needs to be quite hot to pour well, but you have to be super careful not to overheat it as it can make the wax change colour
  • You can add oil paint as a pigment to glass wax, but I’m more interested in how it looks originally- like a translucent glass
  • I might do one or two in colour just to see what it looks like, but we’ll see
  • It is quite brittle- I tried to make a hollow brick cast and the sides shattered (like glass) as I tried to remove the cast- if I retry this I will need to make it thicker
  • It picks up detail really beautifully and I’m definitely impressed
  • I need to redo the jaw bones in glass wax as the wax wasn’t hot enough and as a result didn’t flow through the moulds properly